Remove power from the device first, to avoid working with the
system while it is live. Observe all electrical shock hazard
warning and precautions for handling electrostatic sensitive
devices
3) Ensure that the PROM device to be programmed / upgraded is empty.
4) Program the PROM device with the appropriate file, in accordance with the
instructions for the PROM device.
5) Confirm that the checksum of the programmed device matches that given in the
Eclipse HX Release Notes (for this documentation, see the Eclipse HX v9.1
software USB).
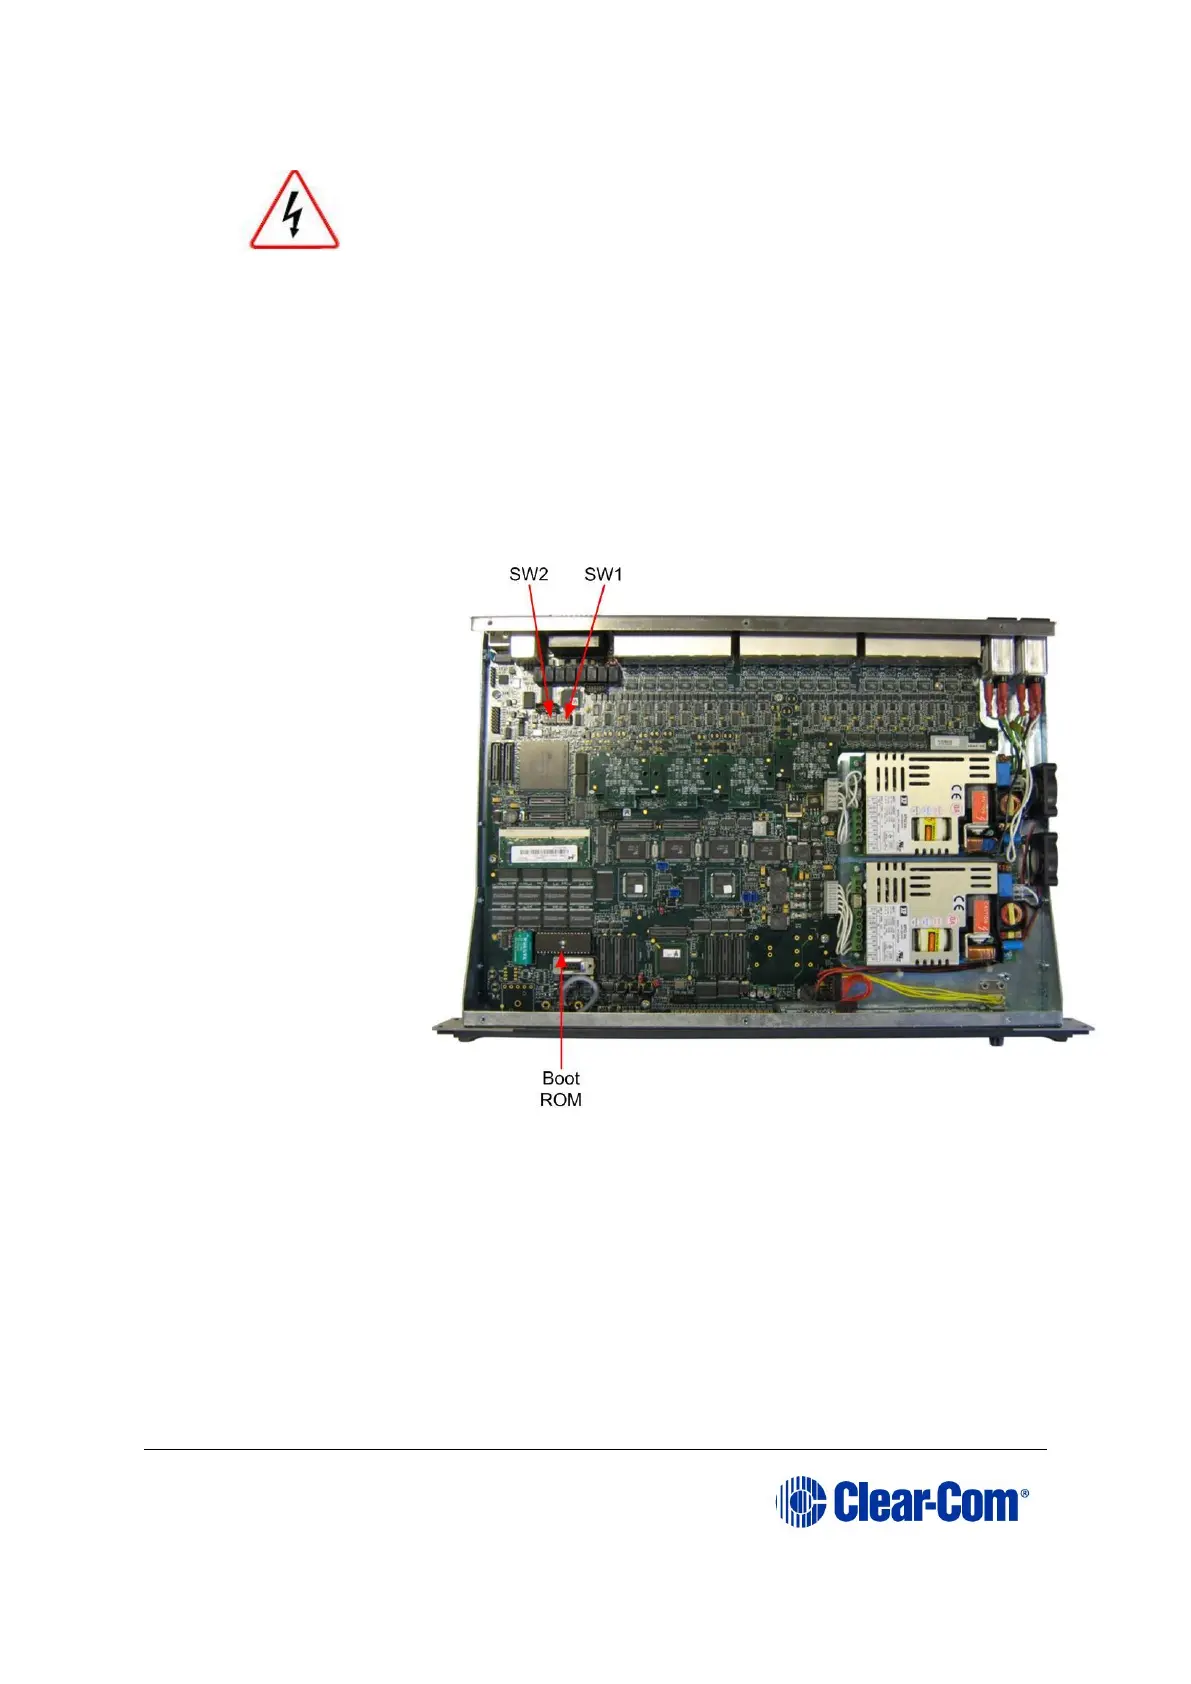
6) Remove the existing PROM device from the main board.
Figure 6-1: Eclipse HX-PiCo main board
7) Insert the newly programmed PROM device, taking care to ensure the correct
polarity of the device.
8) Replace the lid of the Eclipse HX-PiCo device.
6.2 Changing the Eclipse HX-PiCo RAM
Note: When you change the Eclipse HX-PiCo RAM (from 128Mb RAM to 256Mb RAM), you must
also change the Eclipse HX-PiCo PROM. See 6.1 Changing the Eclipse HX-PiCo PROM
above.