INSTALLATION MANUAL
CMA-5024 GLSSU
This document includes Proprietary Information and shall not be reproduced or communicated to third party
without prior written permission by CMC Electronics Inc.
Page 120
November 21, 2008
C. GLSSU installation
It is assumed that the installer has drilled the mounting holes pattern at the desired mounting location in
accordance with the outline drawing in Figure 111.
(1) Pull-down the circuit breaker intended for powering the GLSSU.
(2) Secure the GLSSU in its mounting holes using four (4) screws, lock and flat washers.
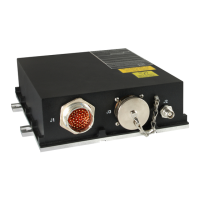
(3) Connect the aircraft cable harness and the antenna cable respectively to the connectors J1 J3 J2 of
the GLSSU.
Notes: If no cable is connected to the approach aircraft connector J3, the protective metal cap
chained to the GLSSU frame must be screwed in place. If such a cable is connected at J3,
the protective cap must be attached to the cable.
The document reference is online, please check the correspondence between the online documentation and the printed version.
 Loading...