3. Getting Started
UniSite-xpi User Manual 3-57
Can I Use Another
Device?
If you do not have an AMD 27256 (the device we are going to use for this
Session), go to the Select Device screen and select the device you are
going to program. Keep in mind that the device you select might not have
the same capabilities as the AMD 27256. For example, the AMD 27256
supports Electronic ID while the Hitachi 27256 does not.
Load the Data File Before you can program the device, you must perform the following steps
to load your data into RAM.
1. Create a binary file on a disk.
2. Place the disk in drive A.
3. From the More Commands/File Operations menu, use the Load File
command to load the data file into RAM. This operation is described
in detail in Session 5.
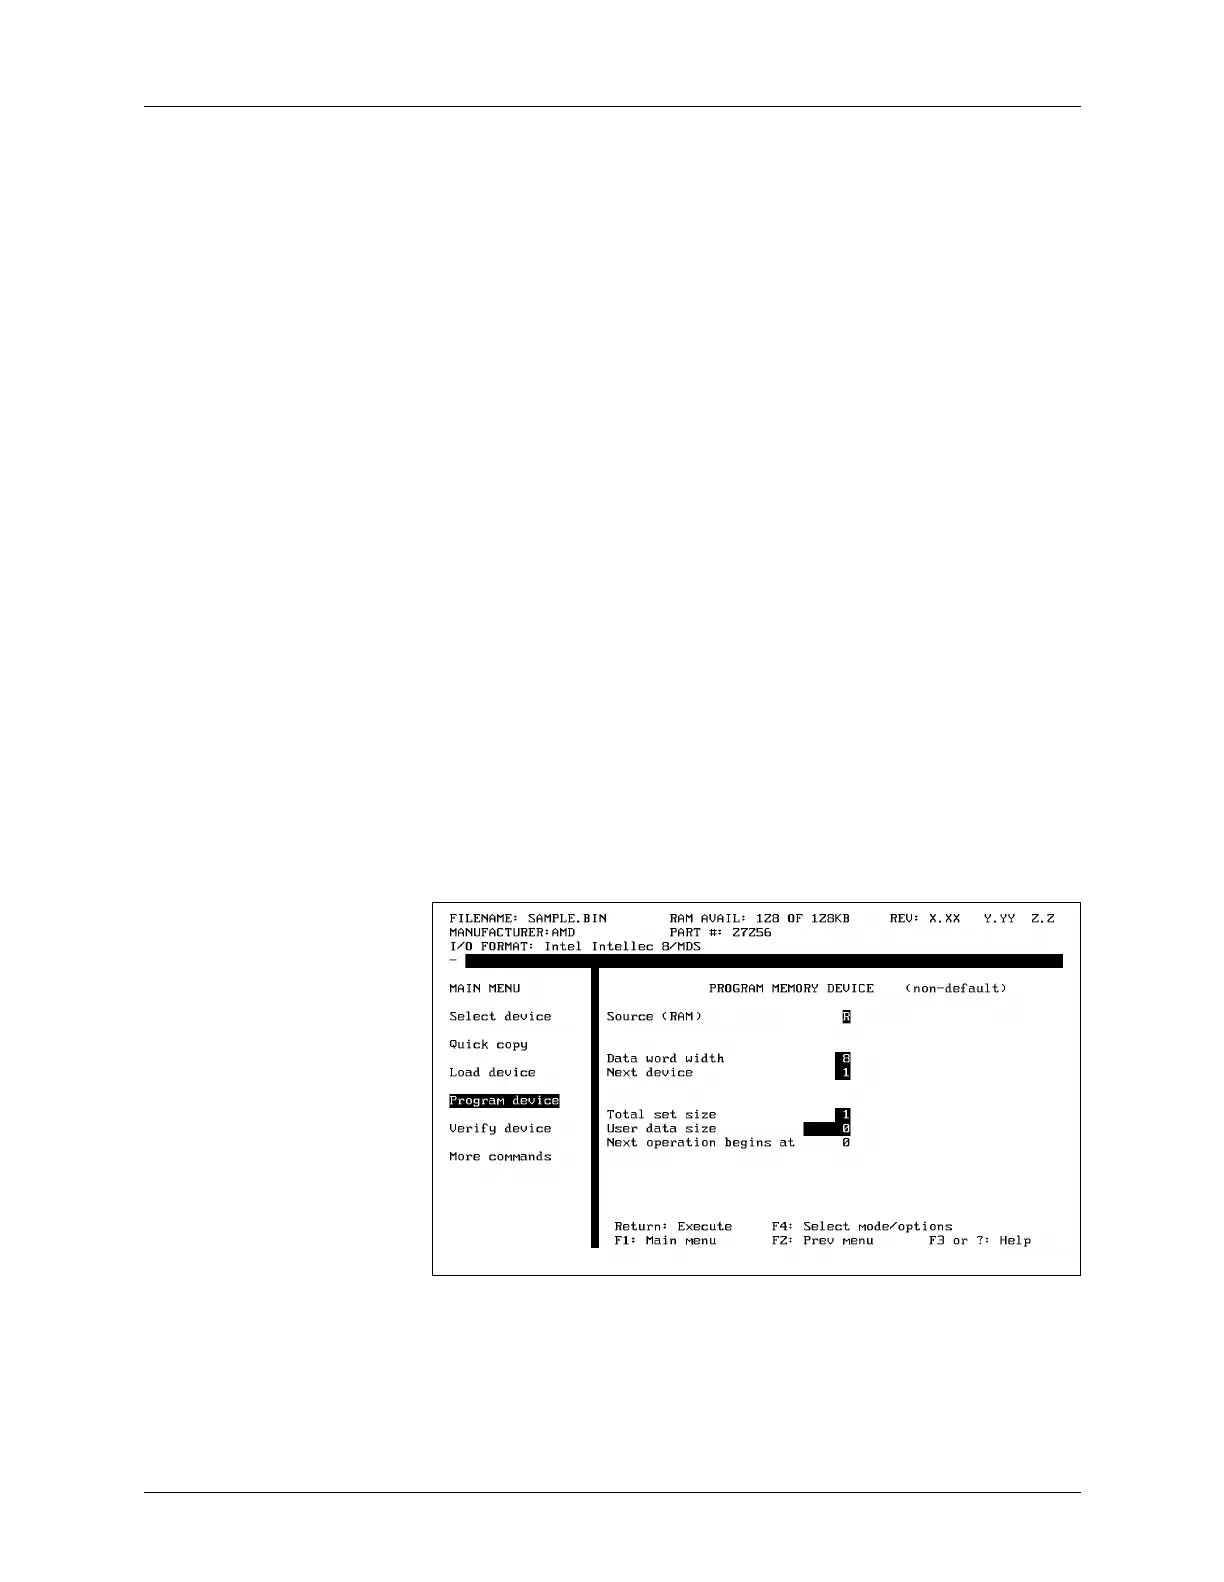
Parameter Screens After the data is loaded into RAM, select Program Device from the Main
Menu. The dialog window displays the Program Memory Device screen,
shown in Figure 3-57.
Look at the Program Memory Device screen. At the top of the dialog
window, you see one of the following:
PROGRAM MEMORY DEVICE (all parameters)
PROGRAM MEMORY DEVICE (non-default)
There are two types of programming parameter screens: simple and
complex. UniSite-xpi defaults to displaying the simple, Non-default
parameters screen.
What Is the
Difference?
Both screens let you change programming parameters. The All
Parameters screen contains all the programming parameters supported
by the selected device. The Non-default parameters screen contains a
simplified subset of the programming parameters supported by the
selected device.
Figure 3-57
The Program Memory Device
Screen
 Loading...