A. Using Modules
A-12 UniSite-xpi User Manual
1. Go to the Select Device screen and choose the device you want to use.
2. Pay particular attention to the suffix to avoid putting a device into the
wrong size MatchBook.
The correct MatchBook size for the device appears on the right-hand
side of the message bar, near the top of the screen. For example:
Matchbook: .300 SOIC
Inserting the SOIC Device
into a MatchBook Use the following procedure to insert an SOIC device into the SOIC
MatchBook. Before you go any further, make sure you have the SOIC
Base properly installed in PinSite.
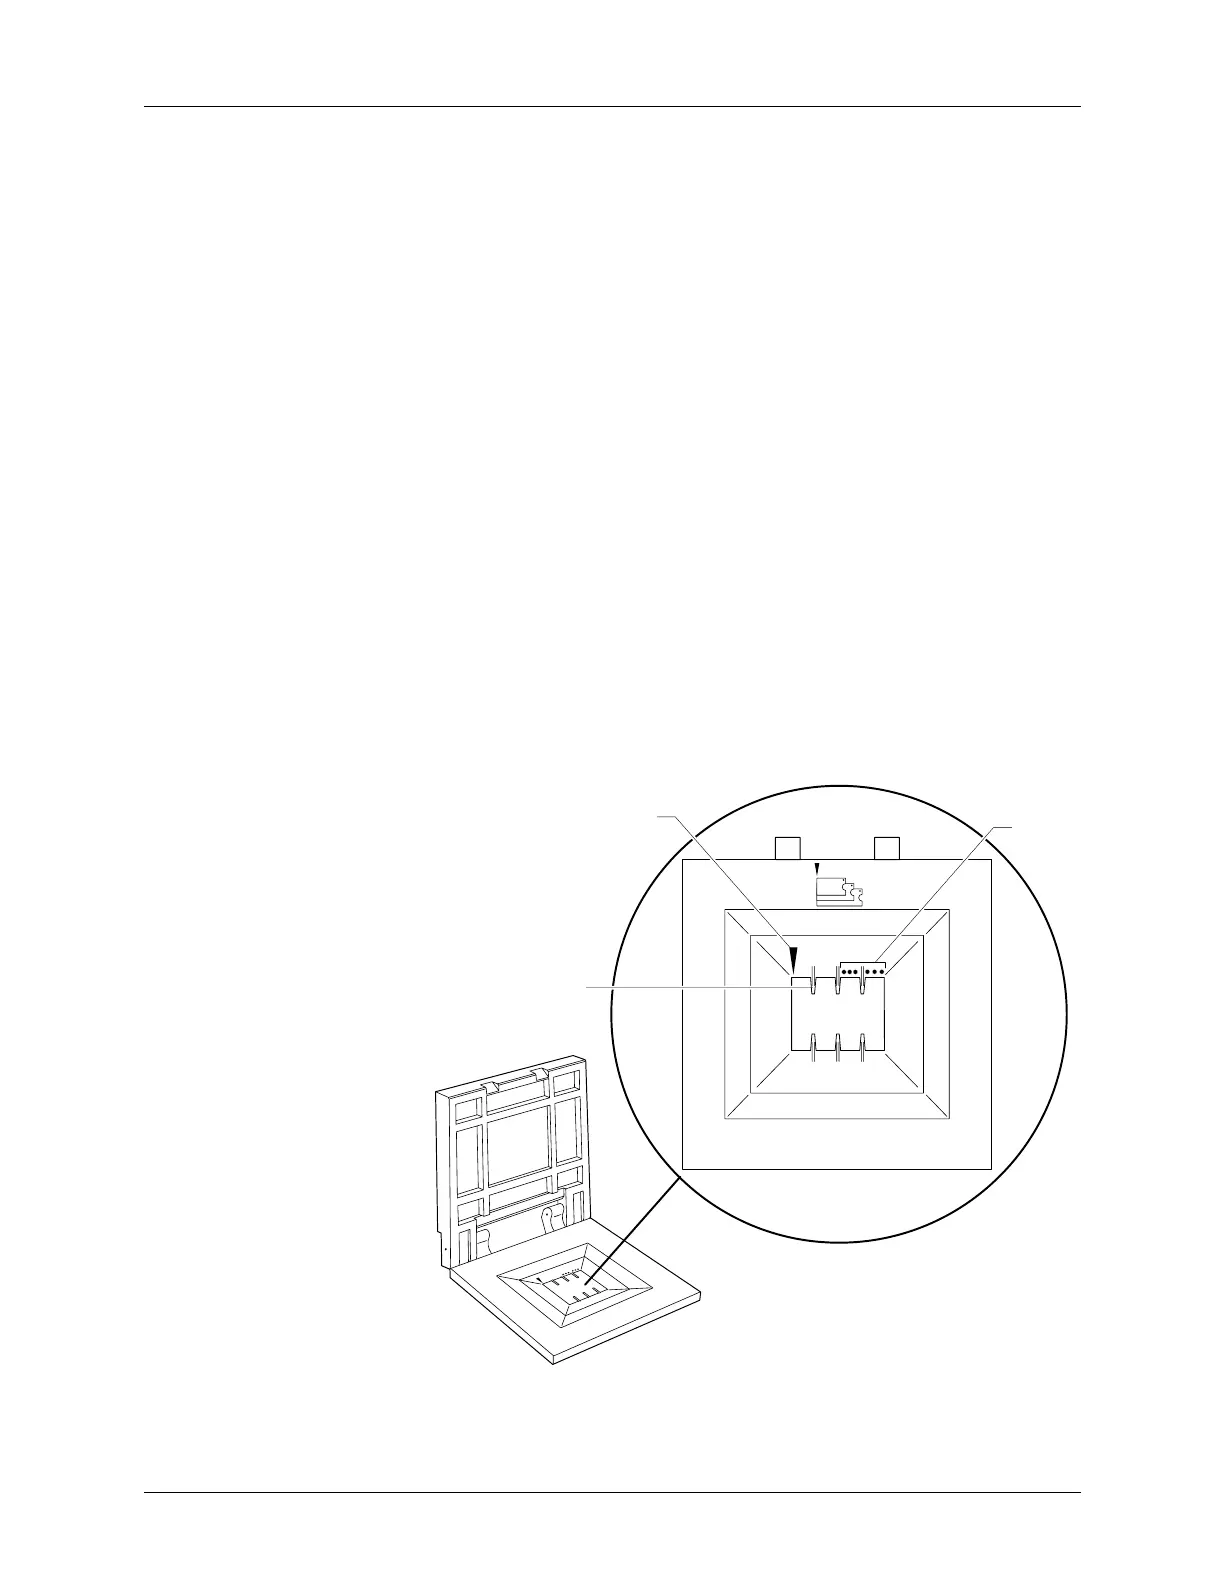
1. Position the SOIC device so that pin 1 is up and to the right as you
view it from the top.
2. Insert the SOIC device into the open MatchBook. Make sure the SOIC
device is flush against the left-hand side of the MatchBook. Also
make sure that the device is positioned between the six alignment
fingers and not on top of them.
The device should be left justified. The unused portion of the socket
will be on the right as you view it from the top.
The small, round dots along the top of the opening, as shown in
Figure A-10, indicate the location of pin 1 for the various sizes of
SOIC devices the SOIC MatchBook will accept.
Figure A-10
SOIC Device Insertion
0568-3
LEFT JUSTIFY PART
IN SOCKET
PIN 1
ALIGNMENT
FINGER (1 OF 6)
 Loading...