2. Setup and Installation
UniSite-xpi User Manual 2-41
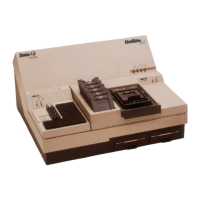
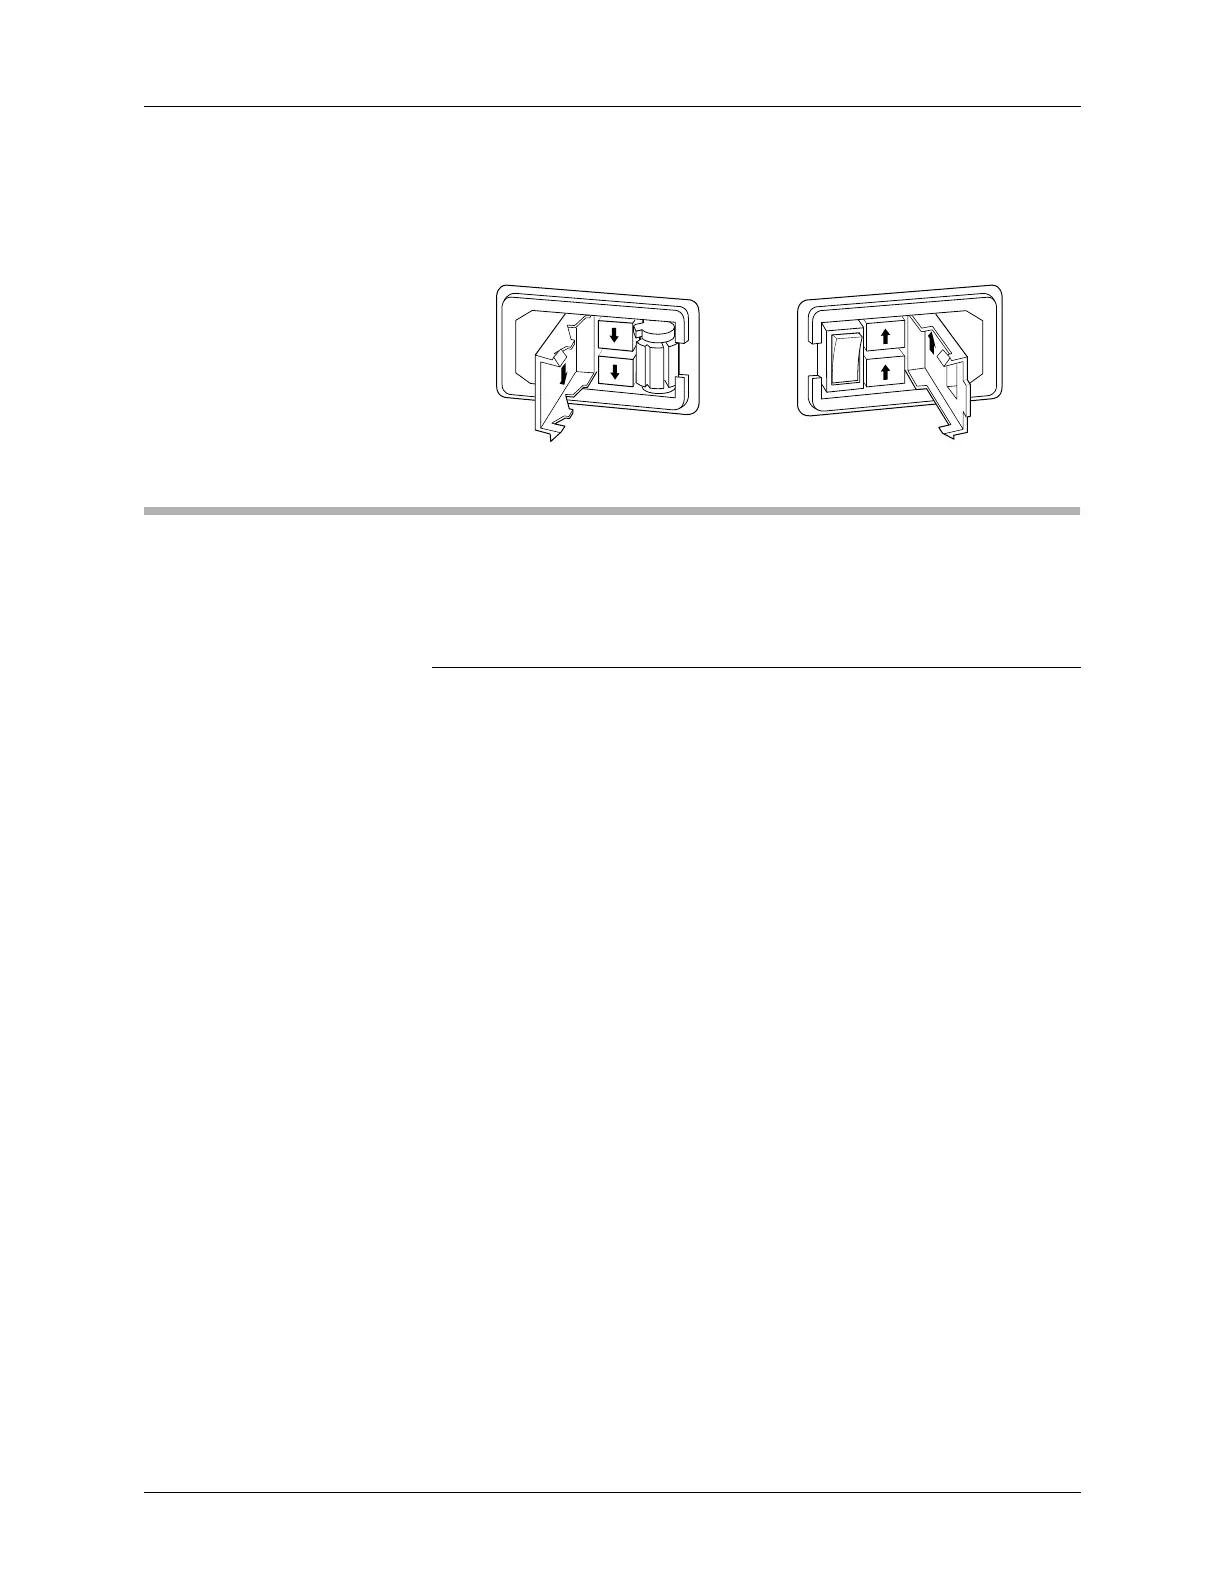
4. Insert the fuse holder into its slot so that the arrow points in the same
direction as the arrows on the door of the fuse holder.
5. Snap the door closed.
What To Do Next Time
Next time you power up the programmer, you probably do not need to
follow all the steps outlined in this chapter. Listed below are the normal
steps for preparing for another session on the programmer.
Note: If you have not used the programmer for awhile, or if you suspect the
programmer might have been moved from one area to another, follow the
procedure below before you use the programmer.
To prepare the programmer for another session, follow the procedure
below:
1. Check the power cords and cables between the programmer and the
connected equipment.
2. If you are controlling the programmer from a PC or workstation,
make sure it is on and that the terminal emulation software (such as
HiTerm) is running.
If you are controlling the programmer from a terminal, make sure it
is on.
If you are using terminal emulation software, select VT100 on
Programmer Port from the Utilities menu.
3. (Legacy) If you do not have an MSM installed, insert the Boot Files
disk into UniSite’s disk drive A, and insert an Algorithm disk into
disk drive B.
4. Select and insert a Module (and Base if necessary) into the
programmer. Make sure the Module and Base are locked in place.
5. Power up the programmer.
6. Verify the terminal type when the Power-on screen appears.
You are now ready to begin a new session on the programmer.
Refer to step 12, “Install Devices,” on page 2-30 for instructions on how to
install devices. Refer to Chapter 3 “Getting Started” for tutorials on how
to use your programmer.
Figure 2-23
Removing the Fuse Holder
230Vac
230Vac
115Vac
OLDER UNITS NEWER UNITS
0060-3