EasyManuals Logo

Datamax M-Class Mark II Maintenance Manual

Datamax M-Class Mark II
94 pages
To Next Page IconTo Next Page
To Previous Page IconTo Previous Page
Page #86 background imageLoading...
Page #86 background image
Removal and Replacement
4-22
5. Remove the Platen and / or Assist Roller from the Platen Block.
Installation:
1. Position the Platen and / or Assist Roller into the Platen Block.
2. While holding the roller(s) in place, meshed with the drive gear, install the Inner Bearing
Plate and Screw.
3. Install the Bushing(s) over the roller shaft(s) and into the Platen Block.
4. Replace the Outer Bearing Plate and start, but do NOT tighten, the Screw.
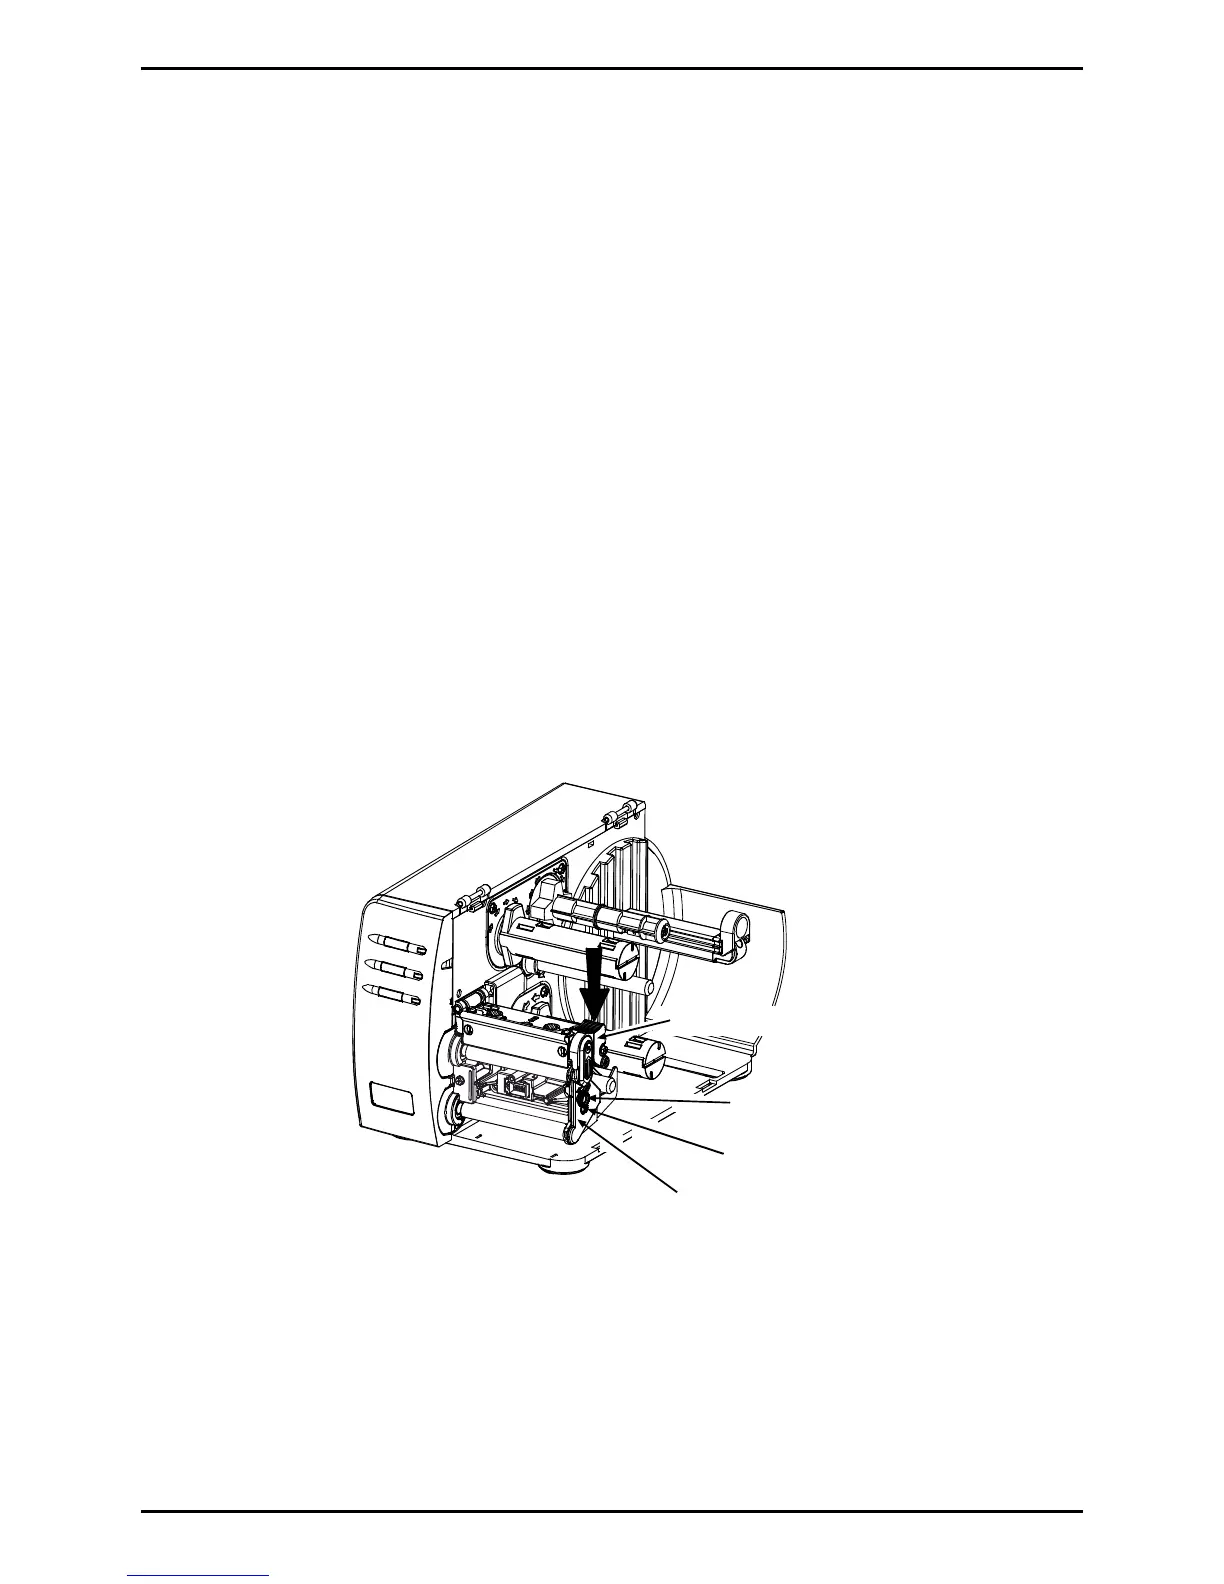
5. Ensure that the Leveling Cam is loose and then latch the Printhead Assembly.
6. While pushing downward on the Printhead Assembly (see arrow, below), pull down on
the Outer Bearing Plate and tighten the Screw.
Printhead Assembly
Leveling Cam
Screw
Outer Bearing Plate
7. Install the Tearplate and Fascia or other output device.

Table of Contents

Other manuals for Datamax M-Class Mark II

Questions and Answers:

Question and Answer IconNeed help?

Do you have a question about the Datamax M-Class Mark II and is the answer not in the manual?

Datamax M-Class Mark II Specifications

General IconGeneral
Media SensorAdjustable reflective and transmissive sensors
Print MethodThermal Transfer
Print Resolution203 dpi
Memory8 MB Flash, 16 MB SDRAM
Interface OptionsUSB, Serial, Ethernet, Parallel
Media TypeRoll-fed, die-cut, continuous, fan-fold, tags, ticket stock
Media Width1.0 in (25.4 mm) to 4.65 in (118 mm)
Media Thickness0.0025 in (0.0635 mm) to 0.010 in (0.254 mm)
Media Roll Diameter8 inches (203 mm) max
Ribbon Width1 to 4.33 inches (25.4 to 110 mm)
Ribbon Length1968 ft (600 m)
Ribbon Core1 inch (25.4 mm)
Label Width Range1.0 in (25.4 mm) to 4.65 in (118 mm)
Label Length Range0.25 to 39 inches (6.35 to 991 mm)

Related product manuals