Expansion cards
NOTE: A System Event Log (SEL) event is logged if an expansion card riser is not supported or missing. It does not prevent
your system from turning on. However, if a F1/F2 pause occurs with an error message, see Troubleshooting expansion
cards section in the Dell EMC PowerEdge Servers Troubleshooting Guide at www.dell.com/poweredgemanuals.
Expansion card guidelines
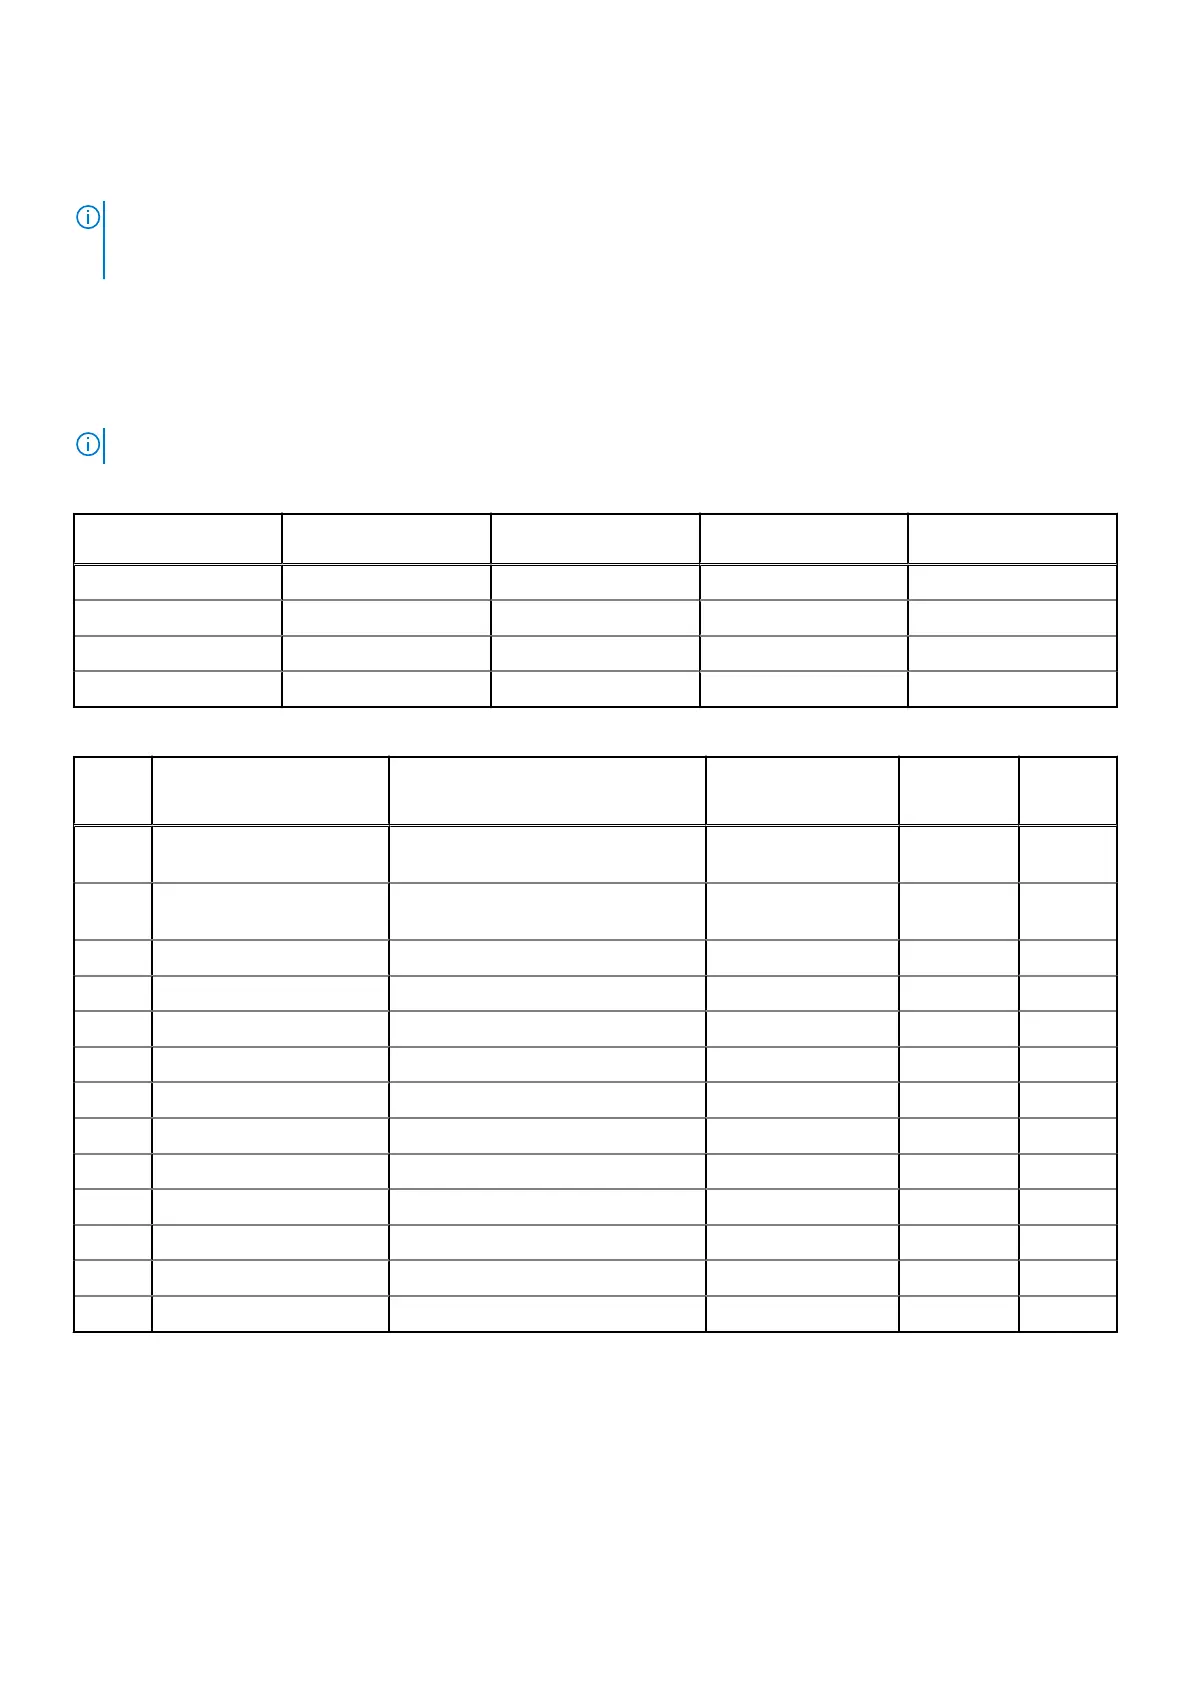
The following table describes the installation order for installing expansion cards to ensure proper cooling and mechanical fit.
The expansion cards with the highest priority must be installed first by using the slot priority indicated.
NOTE: The expansion card slots are not hot-swappable.
Table 6. Expansion card slots supported on the system board
PCIe slot Processor
Connection
PCIe slot height PCIe slot length Slot width
Slot 1 (Gen3) Processor Full Height Half Length x8 link in x8 slot
Slot 2 (Gen3) Processor Full Height Half Length x8 link in x16 slot
Slot 3 (Gen3) Platform Controller Hub Full Height Half Length x1
Slot 4 (Gen3) Platform Controller Hub Full Height Half Length x4 link in x8 slot
Table 7. Expansion card installation order
Card
Priorit
y
Category Card Type Form Factor Slot
Priority
Maximu
m
Allowed
1 Internal Adapter PowerEdge RAID Controller (PERC)
H730P+
Full Height 1,2 1
2 Internal Adapter PowerEdge RAID Controller (PERC)
H330+
Full Height 1,2 1
4 Internal Adapter HBA330 Full Height 1,2 1
6 External Adapter 12 GB SAS HBA Full Height 1,2 2
7 NIC 10 G NICs Dual Port (Intel) Full Height 1,2 2
8 NIC 10 GBT NICs (Intel) Full Height 1,2 2
9 HBA FC8 HBAs Full Height 1,2 2
10 Internal storage BOSS Full Height 1,2,4 1
11 Internal storage BOSS2 Full height 1,2,4 1
12 NIC 1 Gb NICs Quad Port (Broadcom) Full Height 1,2,4 3
13 NIC 1 Gb NICs Quad Port (Intel) Full Height 1,2,4 3
14 NIC 1 Gb NICs Dual Port (Broadcom) Full Height 1,2,3,4 4
15 NIC 1 Gb NICs Quad Port (Intel) Full Height 1,2,4 3
Removing an expansion card
Prerequisites
1. Follow the safety guidelines listed in Safety instructions.
2. Follow the procedure listed in Before working inside your system.
3. Remove the air shroud.
Installing and removing system components
59