24
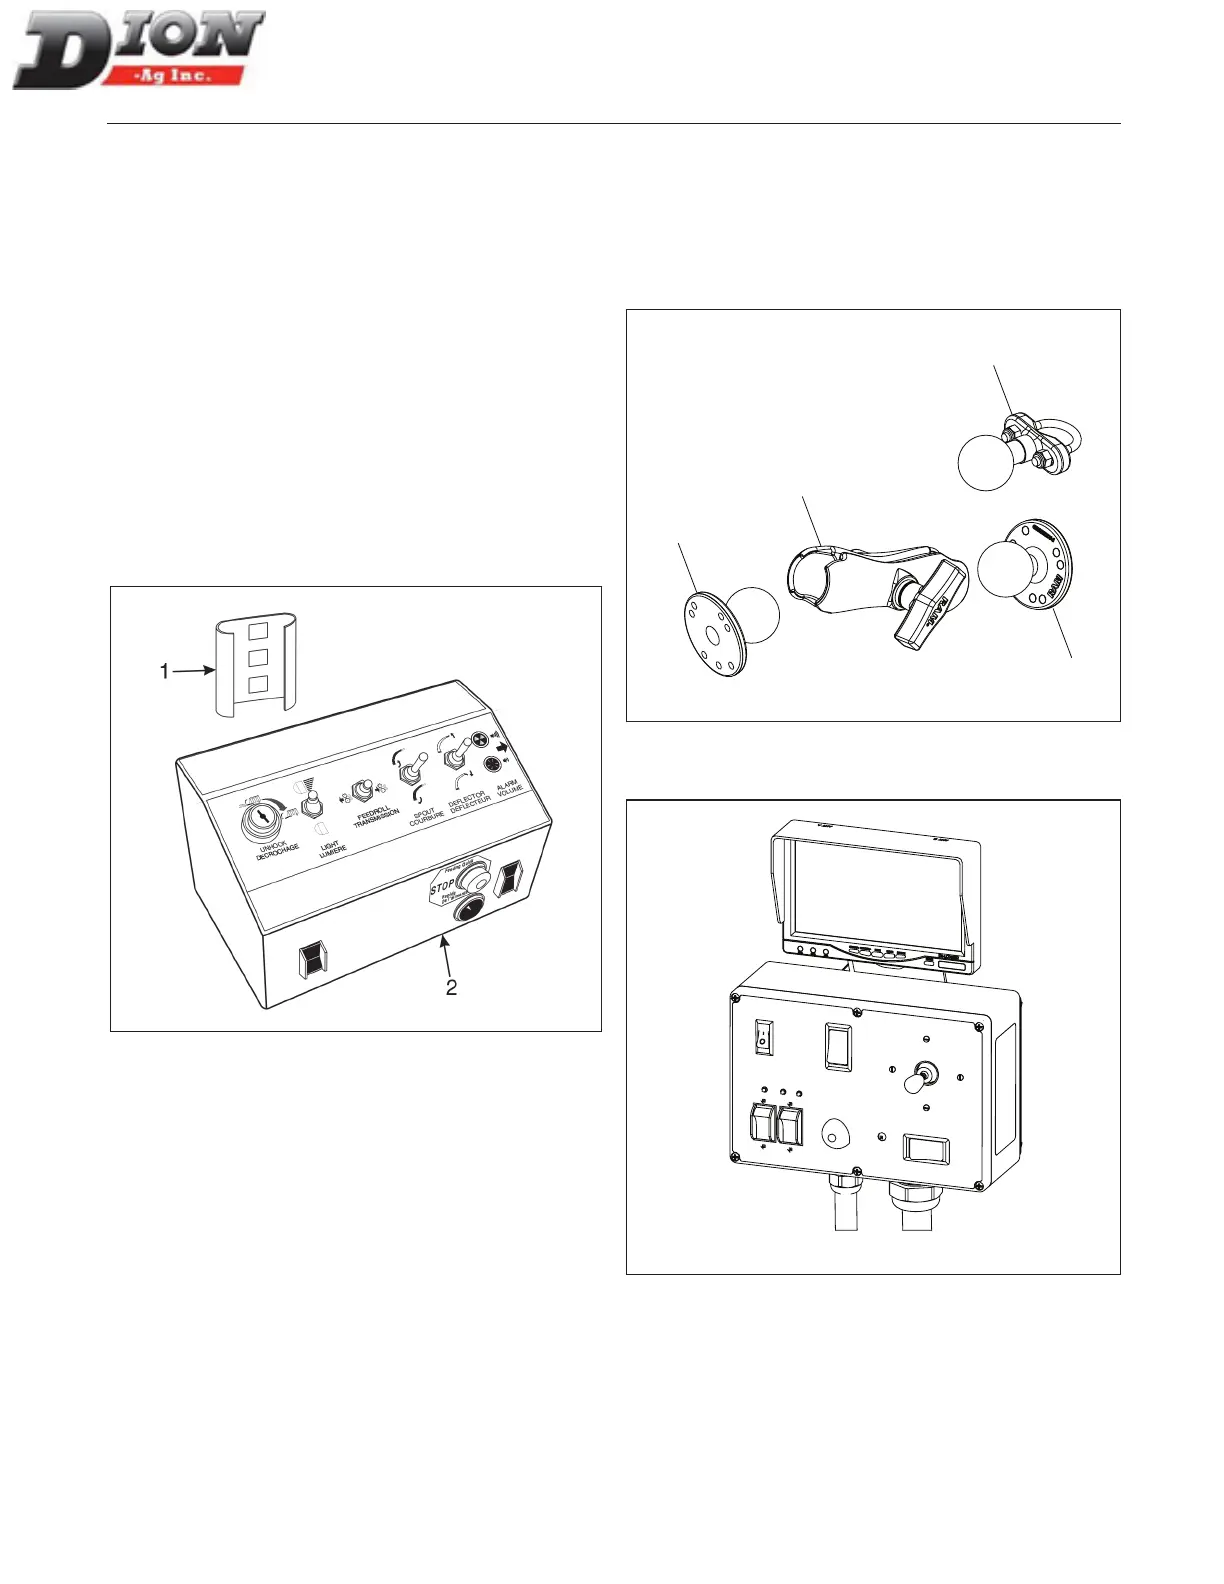
INSTALLING THE CONTROL BOX
FIGURE 3 AND FIGURE 6
1. Install the control box support bracket (item 1) in the
tractor cab so that it is easily accessible. This brack-
et is supplied with the box.
2. Install the control box (item 2) on the support brack-
et. Just slide the bracket on the box inside the sup-
port bracket.
3. Install the cable bracket (item 3) on the tractor’s
rear. Make sure it is easily accessible in order to be
readily disconnected (page 24).
4. Hook up the control box to the Forage Harvester
using the quick connects (item 4).
5. Connect the power wire (item 5) to the tractor bat-
tery. To do so, rst disconnect the tractor’s battery
negative terminal (-) to prevent any short circuit.
Must be bolted
inside tractor
cab
Figure 3 Control box
INSTALLING THE CONTROL BOX (F41 STINGER
MODEL ONLY) - FIGURE 4 AND FIGURE 5
On the F41 Stinger model, a ball joint support (item 7) is
used for positioning the spout control box at the correct lo-
cation. Use the «U» bolt (item 8) for round bars and the at
support (item 9) for at mounting surfaces.
7
8
9
9
Figure 4 Ball joint support
Figure 5 Stinger spout control box
ASSEMBLING INSTRUCTIONS
Manual No. F4117E987E V1.1