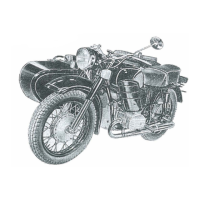
XIV. REPAIRING
THE
SIDECAR
The side
car
has to be repaired
in
case
its
fa
ste
ning
s a re found
l1
be
worn or some
of
its
co
mponent
parts
and uni ts h
ave
been da
m<Jged
in
sen•ice.
I.
DISMANTLING
AND
ASSEMBLING THE SIDECAR.
ln
order
to detach the sidecar body, proceed as follo
ws:
unscrew the nuts (3 pes) , sec
uring
the b
em11s
of
the
body rea
sus
pension to the
rear
tube
of
the
fr
ame after fir
st
removi
ng
the sea
back and cus
hi
on
fr
om the body;
take out the mal and unscrew the
nuts
of
the bolts
of
the fran
fastening
of
s
id
ecar body to the fram
e,
remove lhe cla
mp
s and sus
pe
nsion cushions;
remove the sidecar body from the
fr
ame.
After performing the required repairs, re-assemble the si
de
car
i1
rc\
·e
rse order.
To rem
on
the sideca r wheel shock absorber, do the fol l
ow
ing:
place a support under the sidecar frame so
thai
the wheel
is
rais
cd above lhe ground, remove the s
id
ecar
wh
ee
l;
unscrew lhe lower and upper holts
securing
the shock absorber
after
wh
ich remo\·e
Lh
e s
ho
ck absorber.
In
order to detach the wheel suspension lever
fr
om
the
frame
proceed as follows:
ttnscrew a
nd
remove two
co
upling bolls
of
the lever
axle;
loosen
<t
nd
extract the bolts located
at
the ends
of
the
ax
le
an1
lightening
the rubber
bushing
s
of
the lever;
knock
out
L
he
pin
(journal)
from the lever axl
e.
Following that.
di
se
ngage
, by
turning
out the lever,
the
left-ha
n1
j
ou
rnal
of
th e
nx
le
from the frame
hing
e.
On
dismantling,
wash a
nd
clea n the component parts.
Re-assemble the lever together with the frame
in
r
everse
order
Di
s
mantling
of
the
remaining
assemb
li
es and their re-a ssemblin!
are so simple !hat
do
not require any special
explanations.
2.
R.EPAIR.ING THE SIDECAR.
Repairing
the
Sidecar
Body
Th
e sidecar body shou
ld
be
repaired in case cracks
or
other me
chani
c<J
I dam
<Jges
<J
re found on it
or
when re-pa inti
ng
is intended
A
ll
the crumpled places
mu
st be dressed, the cracks
to
be weld
cd up.
At the points
of cracks,
st
rengthening
s
traps
ma y be welded
01
lhe inside for reinfo
rc
emen
t.
After weld
in
g,
trimming
and dressing, it is necessary
to
pain
lh
e repaired places or re-paint the entire bod
y.
·
It must
be
bome
in mind
that
the component
parts
are
pa
inte(
by
lite N
'ak
er with baking enamels type MJ1-12.
:02