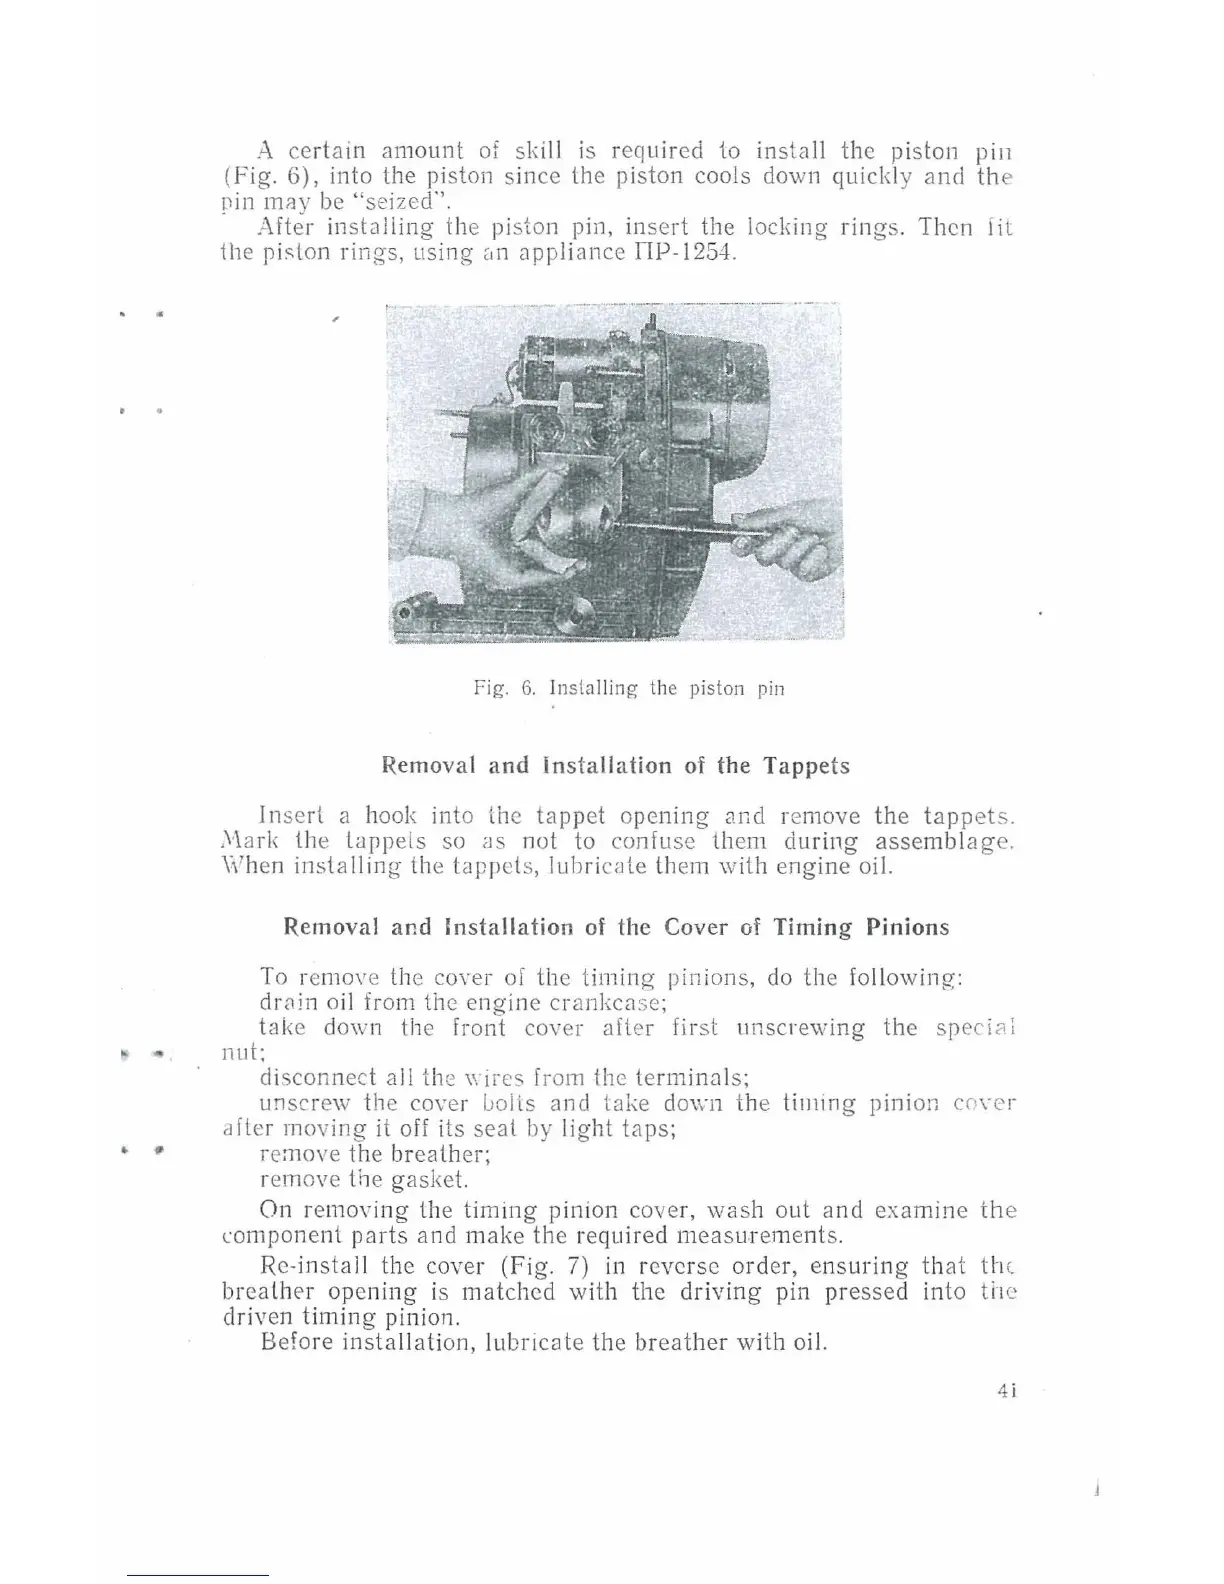
A ce
rtain
amount
of
skill is r
eq
uired to insta
ll
th
e piston pin
(Fig. 6), into the piston since the piston cools down quickly
and
the
!Jin
m!'ly
be "seized''.
After
in
staliing the
pi
ston pin,
in
sert the locl<ing
ring
s.
Then
lit
ihe pic,lon
ring
s, using an appliance DP-1254.
Fig.
6.
Insta
llin
g the piston pin
R.emoval
and
Installation
of
the
Tappets
ln
serl a
ho
ok
into the
tappet
opening and remove
the
tapp
ets.
,\·la
rl
< lhe lappels so i.IS not to confuse them during
assemblag
e.
When
installing
the ti.!ppets,
lu
b
ri
cate
th
em with engine oil.
R.emoval and
Installation
of the Cover of
Timing
Pinions
To
remove the
coYer
of the timing pinions,
do
the following:
dr<1in
o
il
from the engine crankcase;
take down the front cover afler
fi
rst unscrewing the speci
<l
i
~
"'
nut:
disconnect a
ll
the
\\
·ires from the terminals;
unscrew the cover
IJoits and take down the
ti111ing
pinion co
n'r
afler moving
it
off
it
s
seal
by
li
ght
taps;
~
• re
mo
ve
the breathe
r;
remove lhe gasket.
On removing lhe
timing
pinion
co
ver, wash out
and
examine
the
component
parts
and make the required
measurement
s.
Re-install the cover (Fig.
7)
in
reverse order,
ensuring
th
at
the
breather opening
is
matched with the driving pin pressed into
ti·1e
driven
timing
pinion.
Before installation,
lu
bricate the breather with oil.
4 i