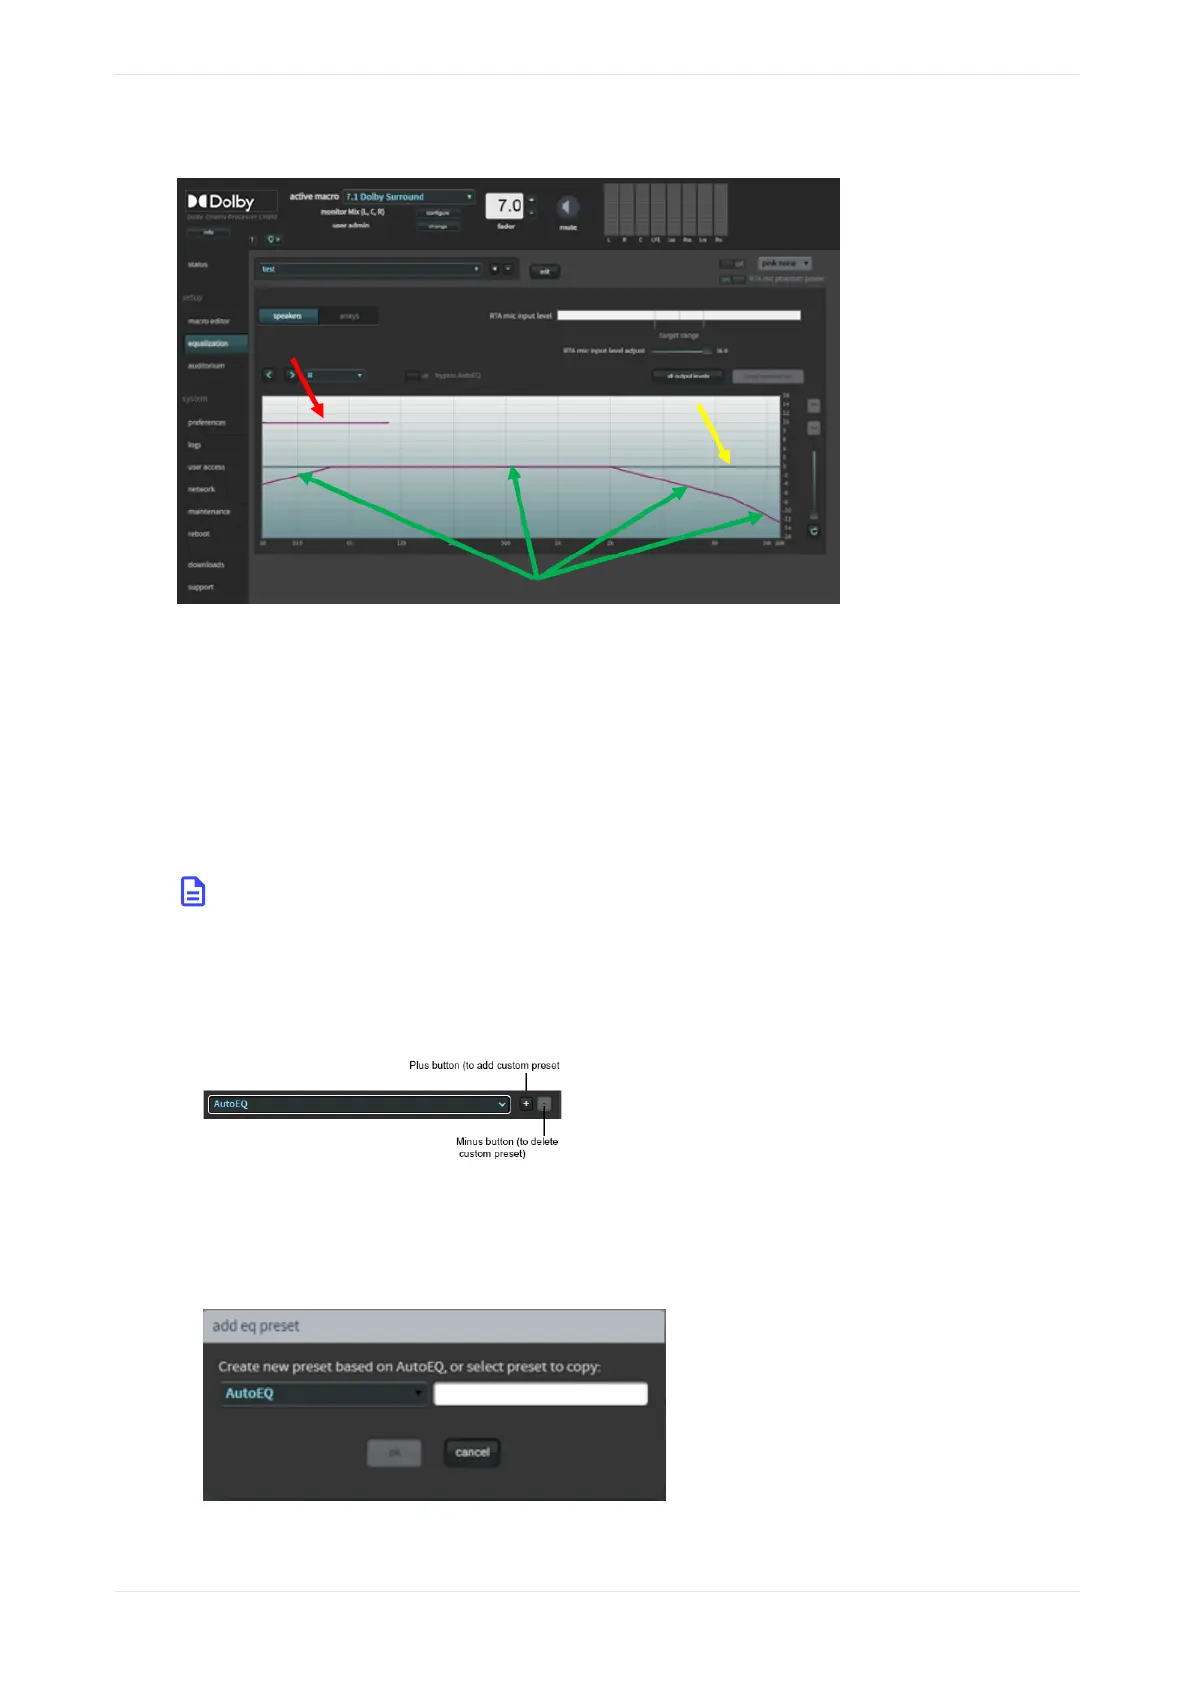
Figure 115: Real-time analyzer equalization screen
The CP950 RTA displays several lines that can help you equalize each loudspeaker.
• The yellow arrow points to a line that indicates the applied EQ filter. This line will change as you apply
gain or cut to the frequencies in the equalizer.
• The green arrows point to a magenta line that represents the x-curve, the target frequency response
specified in SMPTE 202. Note that when you EQ larger rooms it may be necessary to adjust your target
frequency response established in the SMPTE standard.
• The red arrow points to the target frequency response for the Low-Frequency Eects (LFE) channel that is
located behind the screen. This represents 10 dB of in-band gain over the center channel. Note that the
red arrow is displayed only when you select the LFE channel.
Note: The default EQ preset is AutoEQ. You cannot edit the AutoEQ preset parameters. However, you
can save a copy of these parameters under a dierent name and make changes to the copy.
To add a new EQ preset:
1. Click the plus (+) button.
Figure 116: EQ preset buttons
You are prompted to base your new preset on either the AutoEQ preset or a copy of a previously created
custom preset, as shown in the following figure. In either case, you must also enter a name for your new
preset. Alternatively, you can create a new custom preset by following the instructions aer step 4.
Figure 117: Add an EQ preset
Configuring the equalization parameters
Dolby Cinema Processor CP950 and Dolby Atmos Cinema Processor CP950A Manual 90
Issue 9 Part Number 8800298 19 January 2022



 To Next Page