- Rotating Atomizer with External Charging
Version:: 07 • As of:: 01/2020
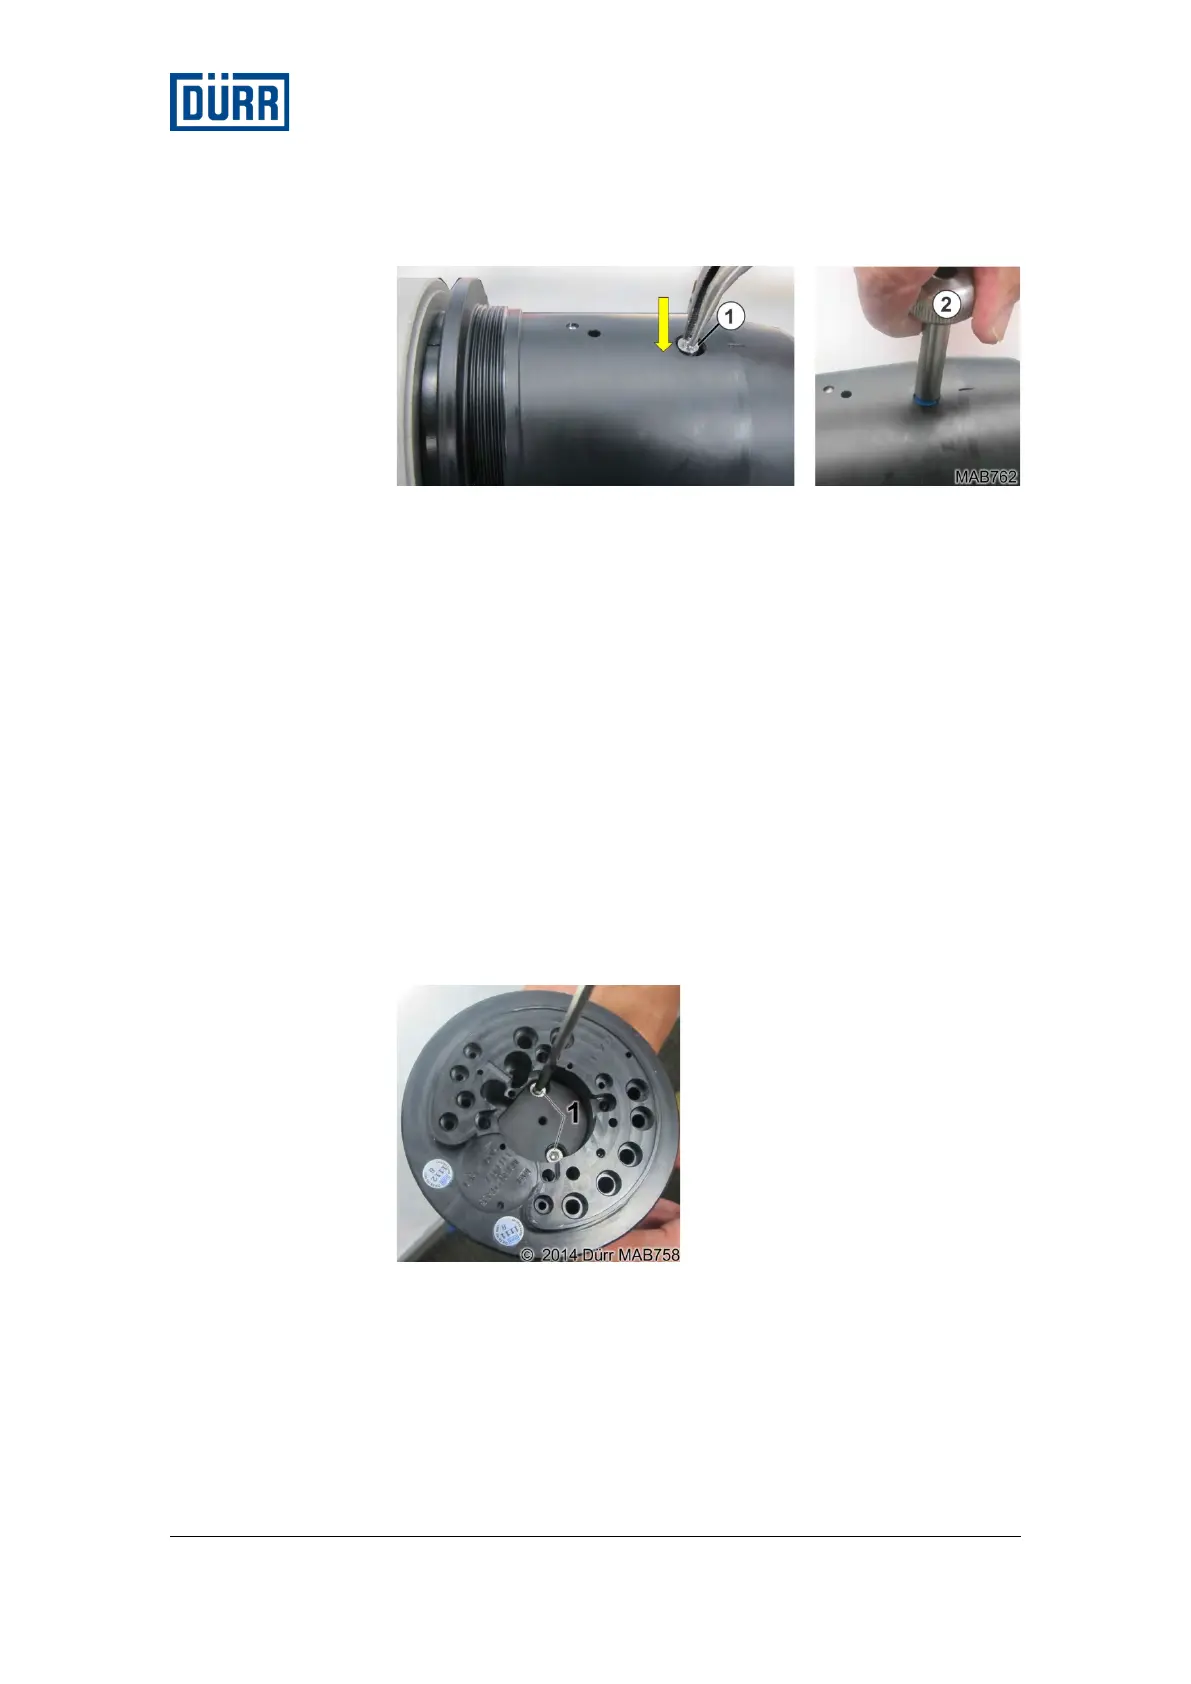
Fig. 378: Installing the shaft detent
1 Insert the shaft detent.
2 Screw the lid tight.
Pos: 65 /INP/ Bell2/08_09 H auptnade lventil aus_ein @ 4 0\mod_1411 047314541_ 20.docx @ 50 2798 @ 233 @ 1
9.5 Installing the main needle valve
The main needle valve is located in the valve block.
The clamping device must be removed before the main needle valve
can be removed. For information about dismantling the clamping
device see chapter “Removing fiber-optic cables”.
All channels controlled by the valve should be rinsed and dry.
9.5.1 Removing the main needle valve
The main needle valve is covered by a lid. To remove the main needle
valve, the lid must be removed first.
• Remove two screws of the lid.
Fig. 79: Back of the valve block
1 Screws on lid
• Remove the lid.
• Use a socket wrench to remove the main needle valve from the
valve block.
 Loading...