2
Working with these Instructions for Use
Header line – the title...
of the main chapter
The title of the specific sub-section is printed underneath
the main header – to help you find your way quickly from
subject to subject.
Page body...
the Instructions for Use
in combined text/illustrations. The information is
expressed in the form of practical actions, giving the user
direct hands-on experience in learning how to use the
machine.
Left-hand column – the text...
provides explanations and instructs the user step-by-step
in the practical use of the product, with short, clear
instructions in easy-to-follow sequence.
Bullet points indicate separate actions. Where several
actions are described, numbers are used both to refer to
the relevant details in the illustrations and to specify the
sequence of actions.
Right-hand column – the illustrations...
provide the visual reference for the text and make it easier
to locate the various parts of the equipment. Elements
mentioned in the text are highlighted. Unnecessary details
are avoided.
Screen displays prompt the user to proceed and confirm
correct actions.
Working with these Instructions for Use
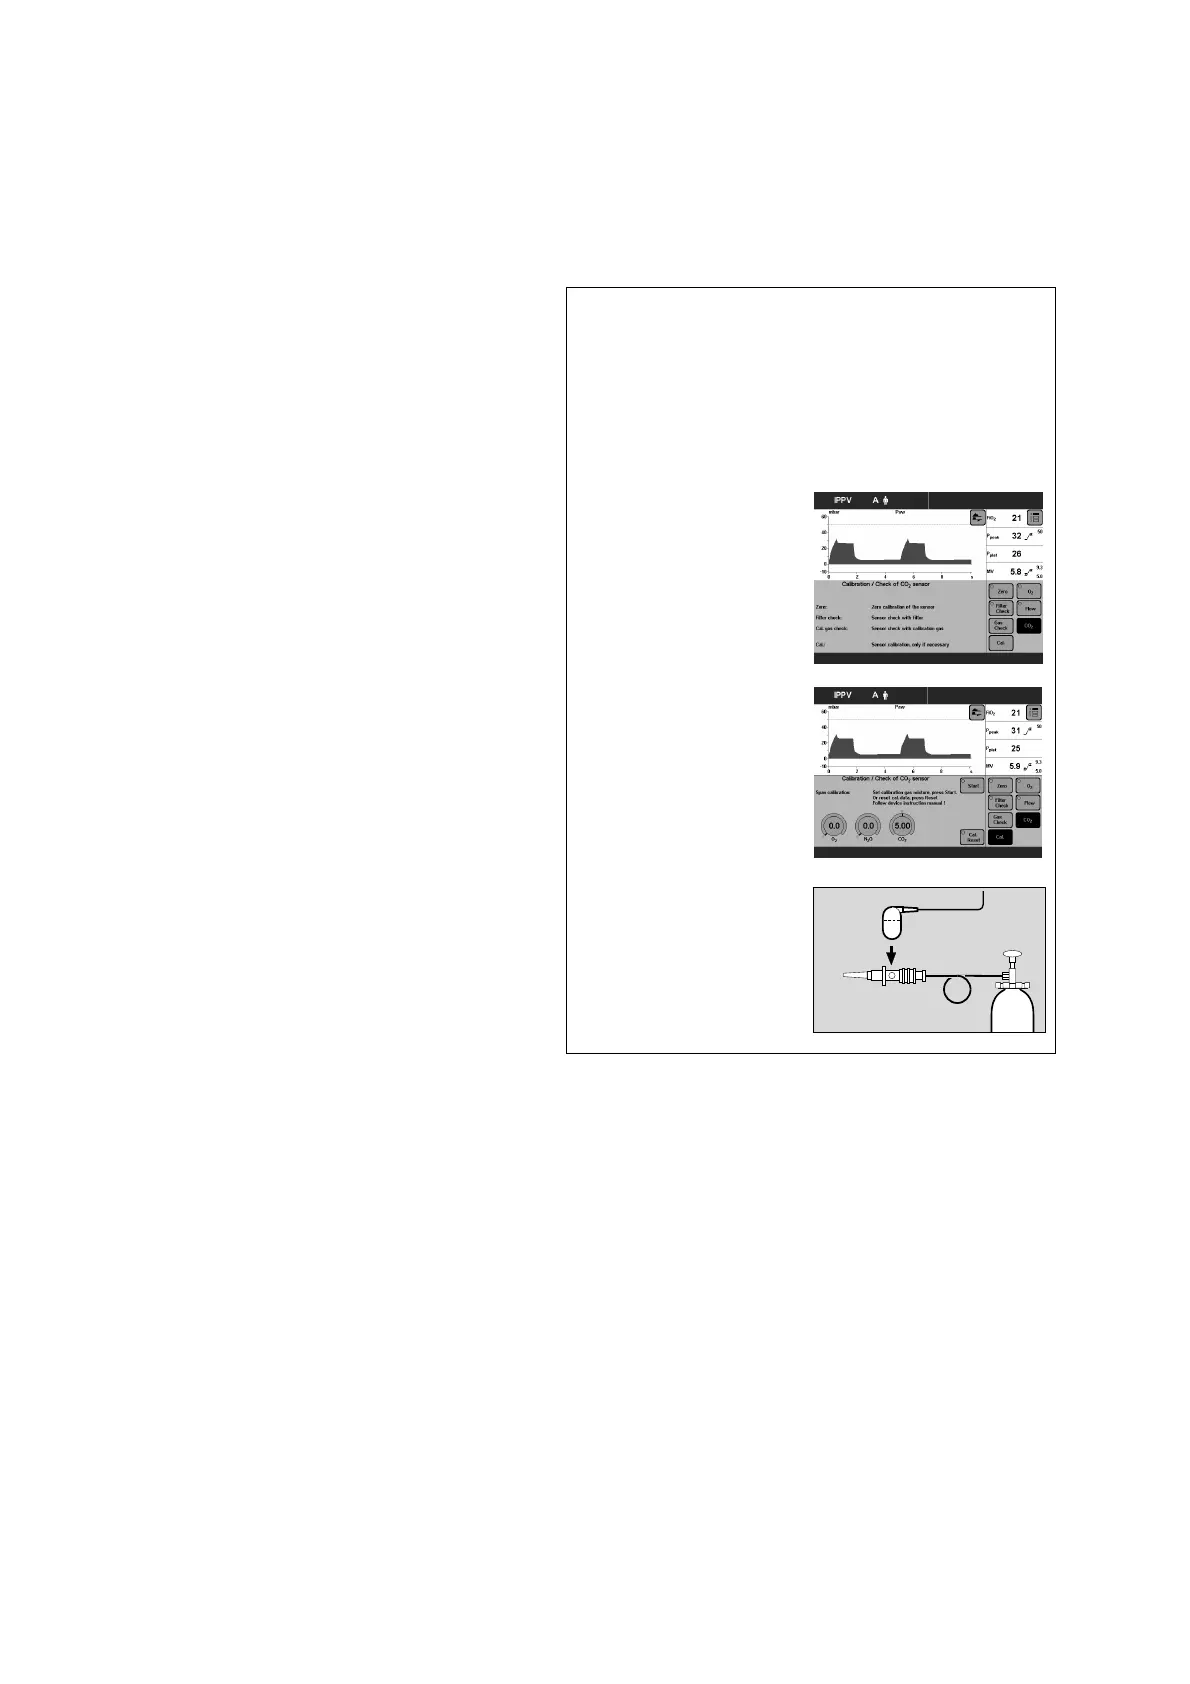
Calibrating the CO2 sensor
The CO2 sensor must be calibrated:
– if the check values are not met on checking
calibration with filter or calibration gas.
– as part of the half-yearly inspection of Evita 4.
● Switch on Evita 4. Wait about for 3 minutes for
the machine to complete its warm-up phase.
● Press the »Calibration« key.
Display (example):
● Touch »CO2« screen key.
Display (example):
● Carry out CO2 zero calibration, page 74.
After the CO2 zero calibration:
Touch the »Cal.« screen key.
● Connect the calibration gas supply.
Use the cuvette from the calibration set!
1 Connect the calibration gas cylinder and the
cuvette of the calibration set to the hose.
2 Remove the CO2 sensor from its park bracket
and fit it to the cuvette of the calibration set.
● Read the CO2, O2 and N2O concentrations
(vol.%) of the calibration gas from the test
cylinder.
Operation
Calibrating
2
1
3