18 | 10.2 Label-Making Lessons
DuraLabel.com | 800.788.5572
MAKING LABELS
10.2 Label-Making Lessons
The following three lessons will walk you through creating three labels. Each one is more
complex than the one before, so you should do the lessons in order. After completing
the lessons, you will understand the basic functions of the Lobo.
Before starting the lessons, load a cartridge into your Lobo and power it on.
TIPS: You can press the Esc key to cancel any changes and return to the previous
screen. If you make mistakes and want to start over, press the File key at the top left of
your keyboard, select New from the menu, and press Enter. You will be asked whether
you want to save the work you’ve done; select No. A new, blank label will be created.
10.2.1 LESSON 1: SIMPLE LABEL WITH TEXT AND SYMBOL
This lesson will teach you how to make a simple label that contains text and a symbol.
Step 1: Enter text.
The Lobo starts in text entry mode. Use the keyboard to type the word POWER.
Step 2: Insert the symbol.
Press the Symbol key on the keyboard.
Use the up and down arrow keys to scroll through the symbol categories. Go to the
second category, called Arrows, and press Enter.
Use the directional arrows to browse the symbols in that category. Select the
symbol in the top row, and press Enter to insert that symbol into the label.
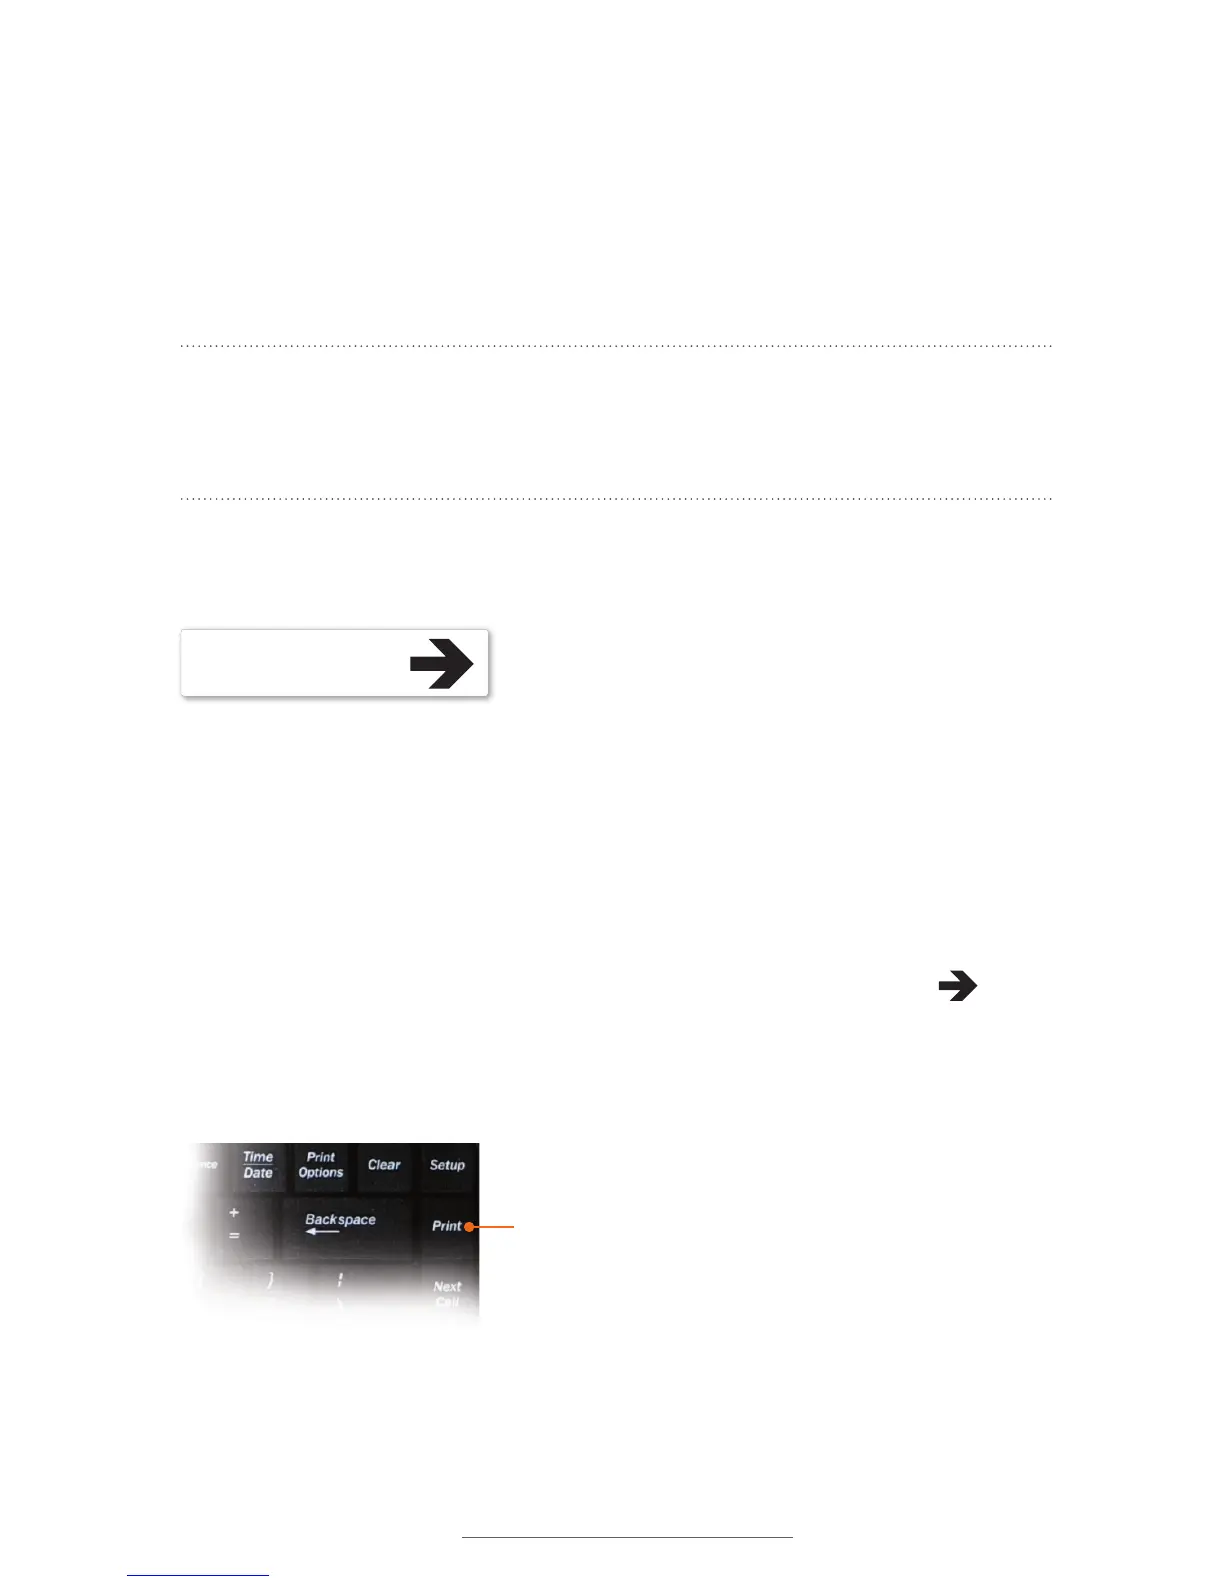
Step 3: Print the label.
Press the Print key, which is at the top right of the keyboard, under the Setup key.
POWER
Print Key