20 | 10.2 Label-Making Lessons
DuraLabel.com | 800.788.5572
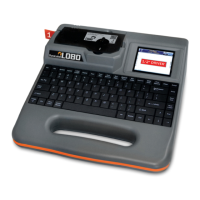
MAKING LABELS
Step 6: Apply text formatting to first cell.
Press Next Cell once to move back to the first cell.
Press the Font Options key to bring up the font formatting menu.
In control screen menus, like this one, the left and right arrows are used to change
settings. To turn Bold to On, press the right arrow key. You will see the setting change
from Off to On. Press Enter to accept the change.
Next, you will choose how the text formatting will be applied. Choose Entire Cell and
press Enter.
Step 7: Apply text formatting to second cell.
Press the Next Cell key to move to the second cell. Press the up arrow to select the field
that has the text Contents.
Press Font Options and turn Underline to On. Press Enter.
Choose the Selected Field option and press Enter. The Selected Field option lets you
apply formatting to a single field instead of to an entire cell or an entire label.
Step 8: Add a frame.
Next, you will be adding a frame, or border. Press the Frame key to enter the frame
menu.
With Frame selected, press the right arrow twice to change the setting from Off to Grid.
Press Enter to accept the changes.
Now you will have a choice of applying the frame to the entire label or all the labels in a
project. Select Entire Label and press Enter.
Step 9: Preview label.
Press the View Label key.
Select Print Preview by pressing Enter.
Scroll across the label using the left and right arrow keys. If the label looks correct, it is
ready to print.
Step 10: Print the label.
Press the Print key.