GBK51948 RHINO2
Installation Manual Issue 5
5.1 Mounting
5.1.1 General Mounting Conditions
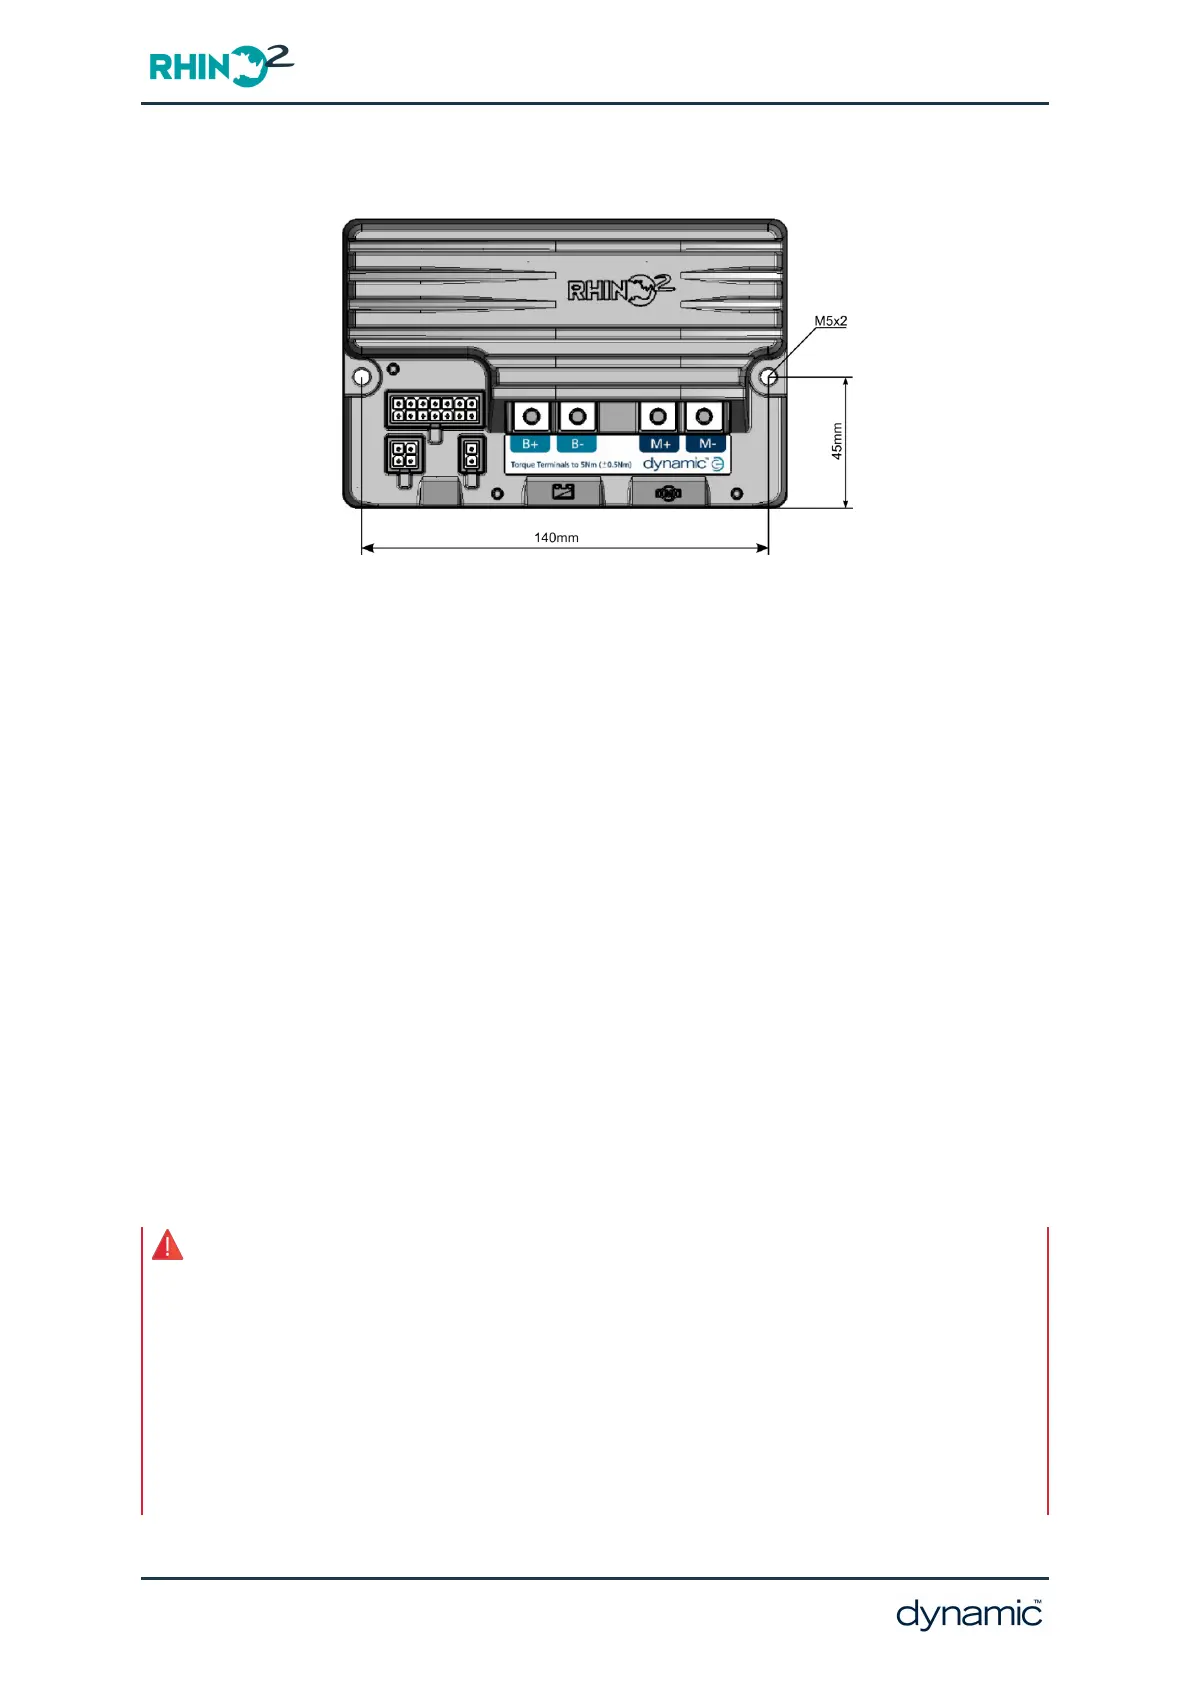
Figure 5: RHINO2 Mounting Configuration
l
The position and orientation should give maximum mechanical protection to the
controller.
l
Mount out of the path of water splashes from wheels or cowling and protect the
connector panel from direct splashing.
l
The controller should be mounted under the scooter cover.
l
Failure to adhere to the mounting conditions specified may lead to water ingress,
which could result in system malfunctions and long-term damage to the unit.
l
For peak performance, locate the controller so that air can flow over and around the
case, particularly if mounting in the tiller.
l
A position close to the batteries and motor is recommended to reduce the length of
high-current wires.
l
Use both screw positions to attach the controller. M5 cap screws are recommended.
Other M5 fasteners can also be used. Do not over tighten the mounting screws (max
8Nm).
l
Use a magnetic tip screwdriver for removing and fitting fasteners.
l
Refer to section 5.1.2 Mounting Orientation for recommended mounting orientations.
l
If an extension loom is fitted, mount it with the female connector facing horizontal or
downwards, and protect it from direct splashing. If the extension loom is to be used
for frequent disconnection, mount the female connector so that it faces downwards.
Warning
Regardless of mounting orientation, protect scooter wiring, connectors and components (including those of the
tiller head) from the risk of damage, water splashes and/or water ingress, and route the cabling so that water
will not run down into the connector system. Female connectors on extension cables should be mounted so that
they are horizontal or face downwards.
Do not mount the RHINO2 in a position where the user can come into contact with the unit. The case
temperature can exceed 41°C.
If cover accessory is used and product is mounted in an orientation that will allow water to pool, a drain or
drain holes (of 2.5 mm diameter) should be drilled in the cover.
Page 16 - Installation and testing