EasyManua.ls Logo

Edgetech 4200 - Figure 5-2: Removing the Tail Cone Screws; Figure 5-3: Removing the Tail Cone

Edgetech 4200
142 pages
Print Icon
To Next Page IconTo Next Page
To Previous Page IconTo Previous Page
Loading...
5-3
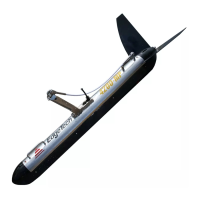
3. Remove the thumbscrew from the tail cone and set it aside.
Figure 5-2: Removing the Tail Cone Screws
4. Using the 5-mm Allen wrench, loosen the five tail cone mounting screws enough such that they
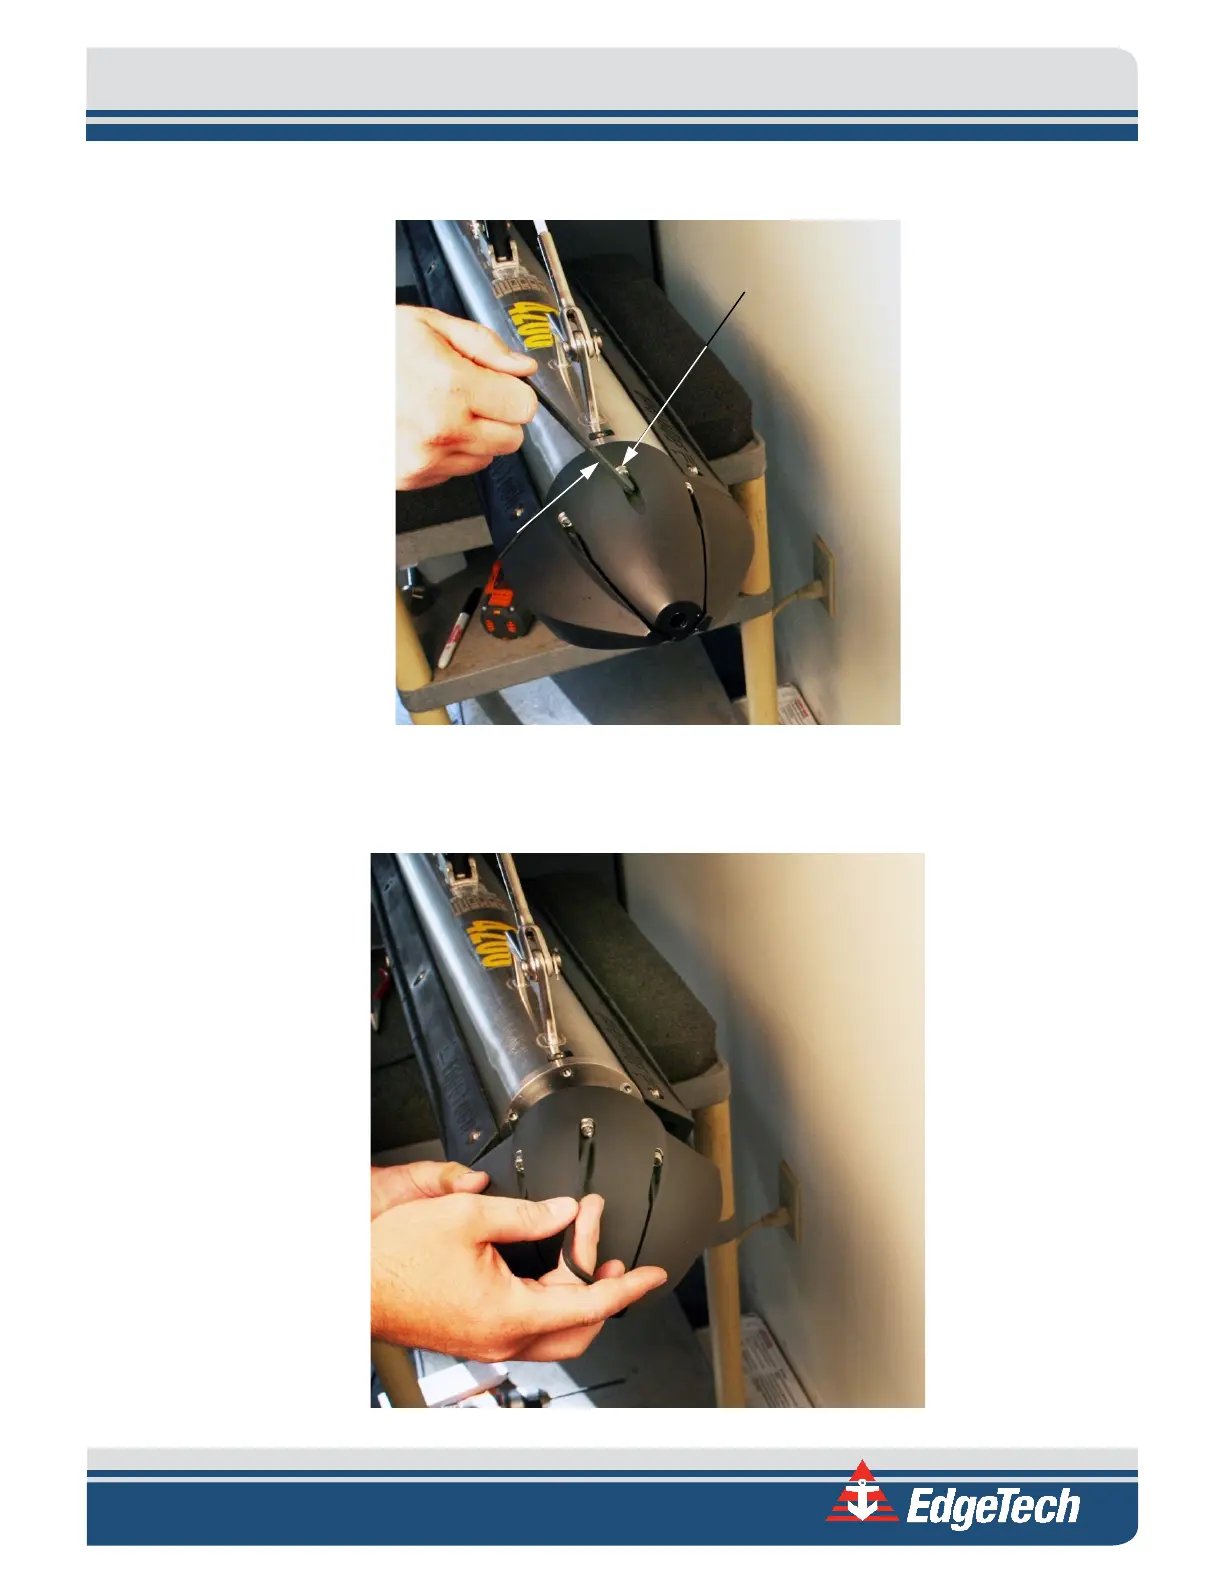
separate from the housing, and then remove the tail cone.
Figure 5-3: Removing the Tail Cone
Tail fin mounting
screws (5)
5-mm allen
wrench

Table of Contents

Related product manuals