72 TP-00347-01
Chapter 5: Servicing
Tape Drives
Removing a Tape Drive
Tape drives are hot pluggable. It is not mandatory to power down the library to replace a
drive.
To remove a tape drive:
1. Unload the tape cartridge from the tape drive (if present) using:
• "Operator Control Panel (OCP)" on page 33
• "Remote Management Unit (RMU)" on page 44
2. Remove all affected tape drive ca
bles on the rear panel.
3. Loosen the blue thumbscrews located on the rear of the t
ape drive with your fingers.
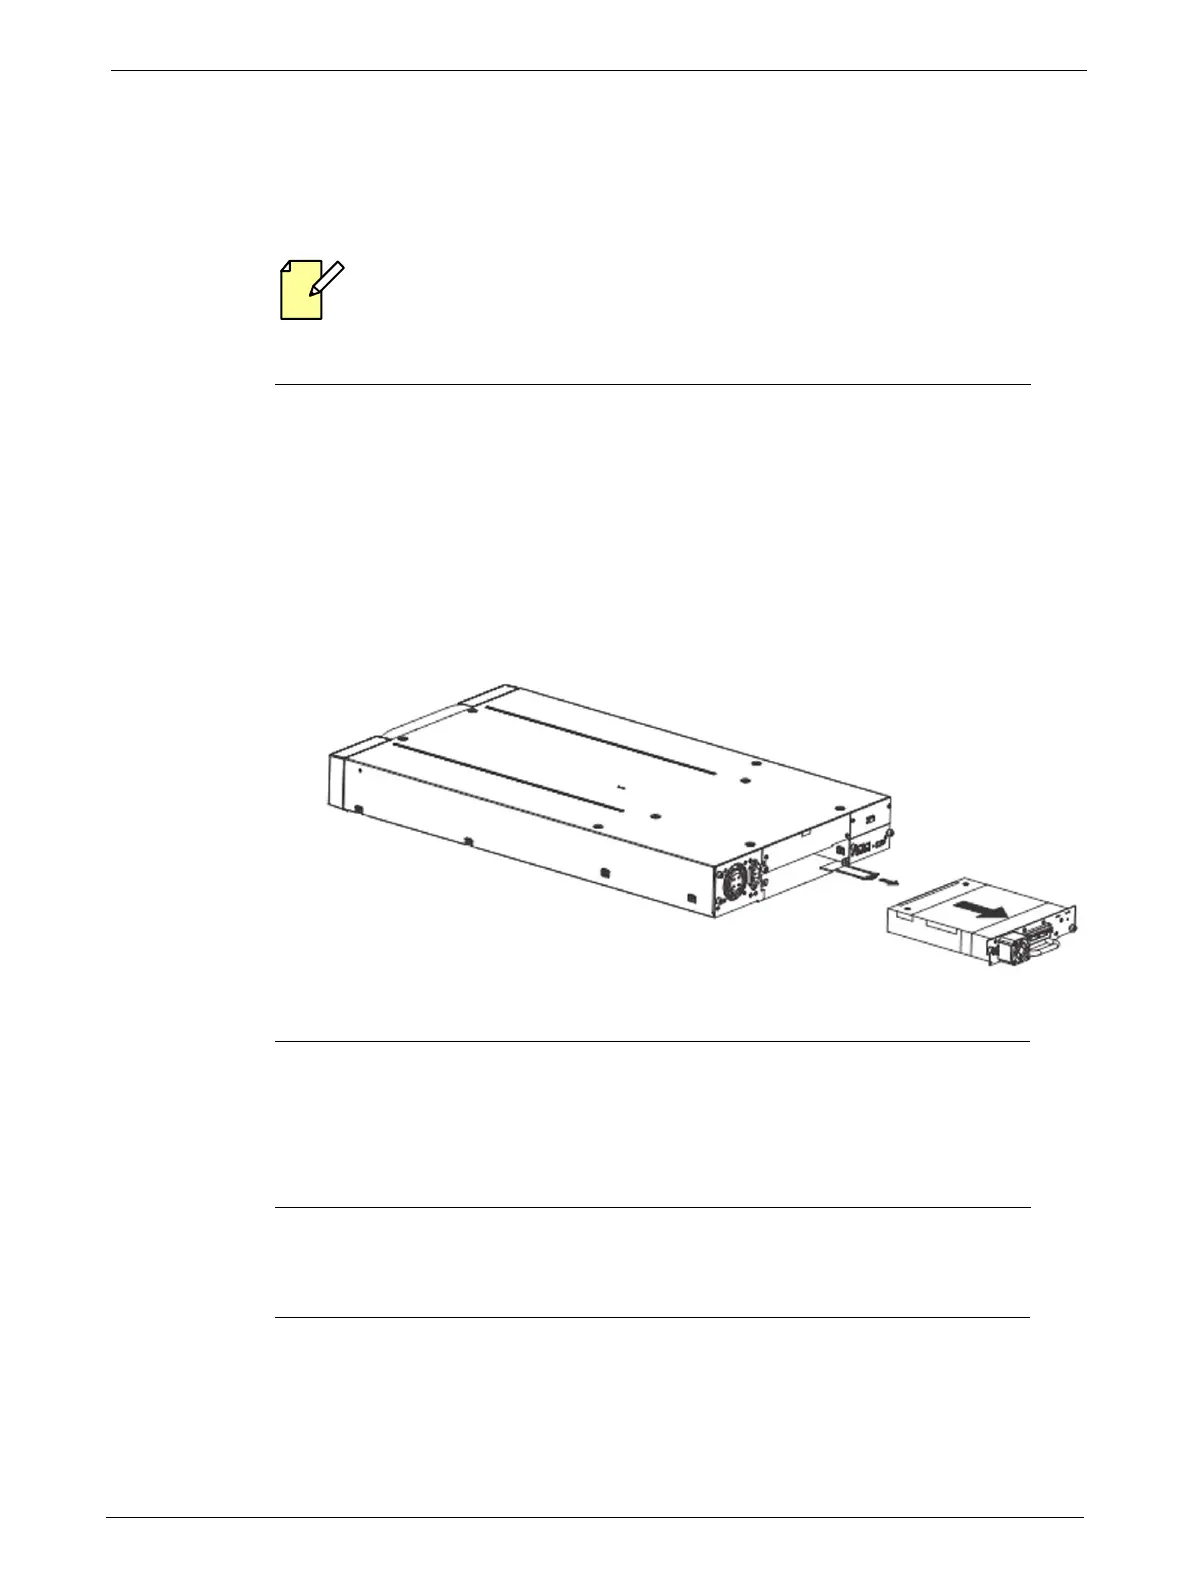
4. Slightly pull out and push down the tab containing the product ID label so it does not
interf
ere with the tape drive as shown
below.
5. Pull the tape drive by the handle straight out of the library.
Replacing a Tape Drive
To replace the tape drive with another tape drive:
1. Remove the tape drive from the library, as described in "Removing a Tape Drive" on page 72.
2. To install the new tape drive, see "Installing Tape Drives" on page 23.