Setting up a VPLEX Local implementation
33
Setting up VPLEX
Setting up a VPLEX Local implementation
CAUTION
If you are setting up a VPLEX Metro implementation, follow the tasks in “Setting
up a VPLEX Metro implementation” on page 46. You cannot set up each cluster
individually and then join them later.
Task 1: Set the
management
server’s public IP
address
Before you can log in to the VPLEX management server over the customer network,
you must set the address on the management server’s public Ethernet port:
Note: The tasks in this document use PuTTY for logging in to the management server.
However, you can use any similar Telnet/SSH client.
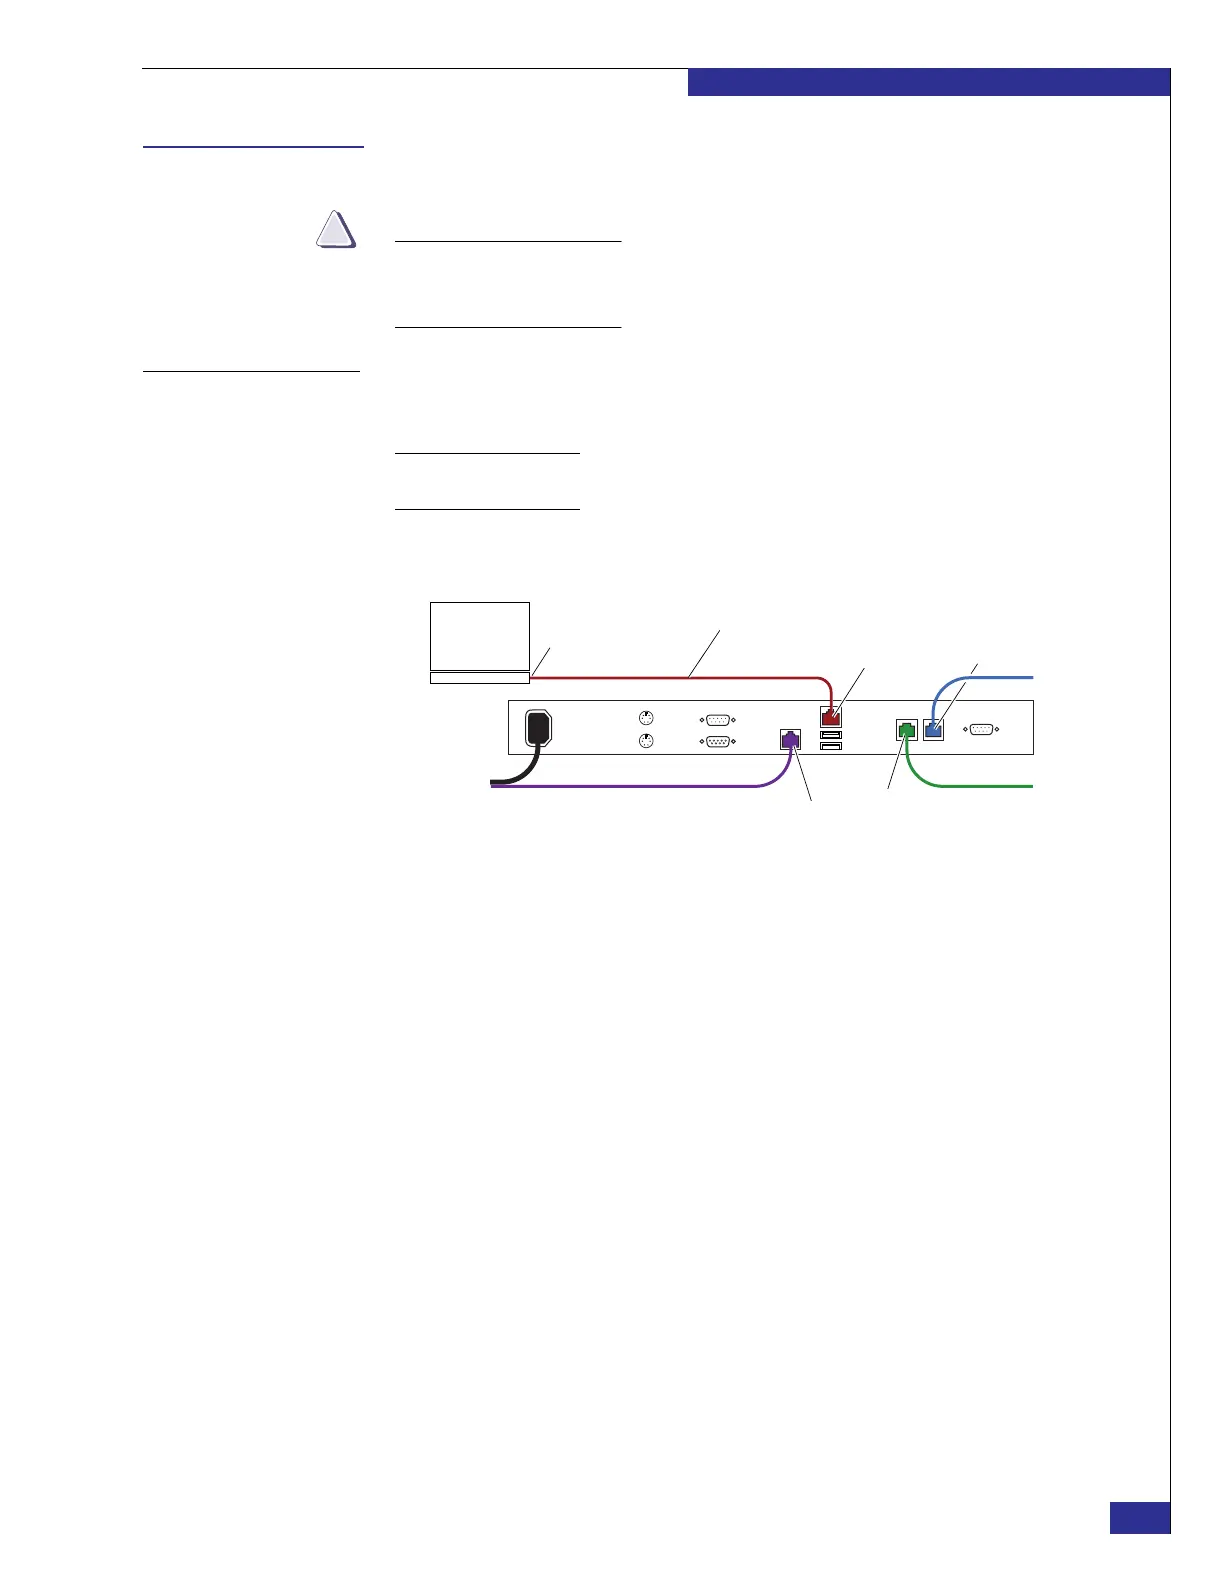
1. Connect your laptop to the management server as shown in Figure 20, using the
red service cable that hangs inside the EMC cabinet.
Figure 20 Laptop connection to management server
2. On your laptop’s toolbar, select Start > Settings > Control Panel > Network
Connections (double-click).
3. If any public network connection is enabled on your laptop, right-click the
network card and select Disable.
4. On the Network Connections window, right-click Local Area Connection and
select Properties.
5. On the Local Area Connection Properties window, double-click Internet
Protocol (TCP/IP) under This connection uses the following items.
6. On the Internet Protocol (TCP/IP) Properties window:
a. If your laptop is configured with specific addresses, make a note of them, to
ensure that you reset the configuration correctly later.
b. Select Use the following IP addresses, and type the following values:
– IP address: 128.221.252.3
– Subnet mask: 255.255.255.224
– Default gateway: 128.221.252.2
7. Click OK on the Internet Protocol (TCP/IP) Properties window, and again on the
Local Area Connection Properties window.
8. Close the Network Connections window.
zep-009b
Red service cable in cabinet
Service port
Mgmt-B port
Mgmt-A port
Laptop
Ethernet port
Public Ethernet port