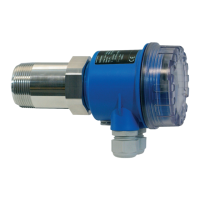
Installation
Hardware Installation and Maintenance Manual 3
–3
move the analyzer. If the analyzer is to be lifted by hand, designate multiple
individuals to lift by the mounting brackets, and distribute the weight among
personnel to avoid injury.
Tomounttheanalyzer
1. Select a suitable location to mount the analyzer. Choose a shaded
area or use an optional analyzer hood (or equivalent) to minimize
sun exposure.
2. Locate the mounting feet on your unit.
3. For wall installations, mark the centers of the top mounting holes.
4. Drill the appropriate size holes for the screws or concrete studs you
are using.
5. Hold the analyzer in place and fasten with the top screws.
6. Repeat for the bottom mounting holes.
7. Secure all designated attachment points.
Once all designated attachment points are securely fastened, the analyzer
should be ready for the electrical connections.
Opening and Closing the Analyzer Enclosure
Cover
Toopentheanalyzerenclosurecover
1. Using an 8 mm Allen wrench or driver, remove each cover screw
completely.
2. Place cover screws in a safe place to protect against damage or loss.
3. Gently open cover by pulling on the edge opposite the hinges.
Toclosetheanalyzerenclosurecover
1. Gently close the enclosure cover, replace the cover screws and
tighten each to 40 N-m.
Care must be taken to avoid damaging the enclosure cover and
body mating surfaces that form a machined flame path (gap
0.05mm, roughness
6
m). Contact Service if the surfaces are
damaged to the extent they no longer meet the above
specifications. Refer to “Service Contact” on page B-27.

 Loading...