MAINTENANCE MANUAL
Effectivity: All
Page 61-9
Edition 2 | Rev. 1
B. Woodcomp KW-31-033 propeller
Maintenance type: Line
Personnel qualification: Independent verification personnel qualified in accordance with
Part 66 or higher
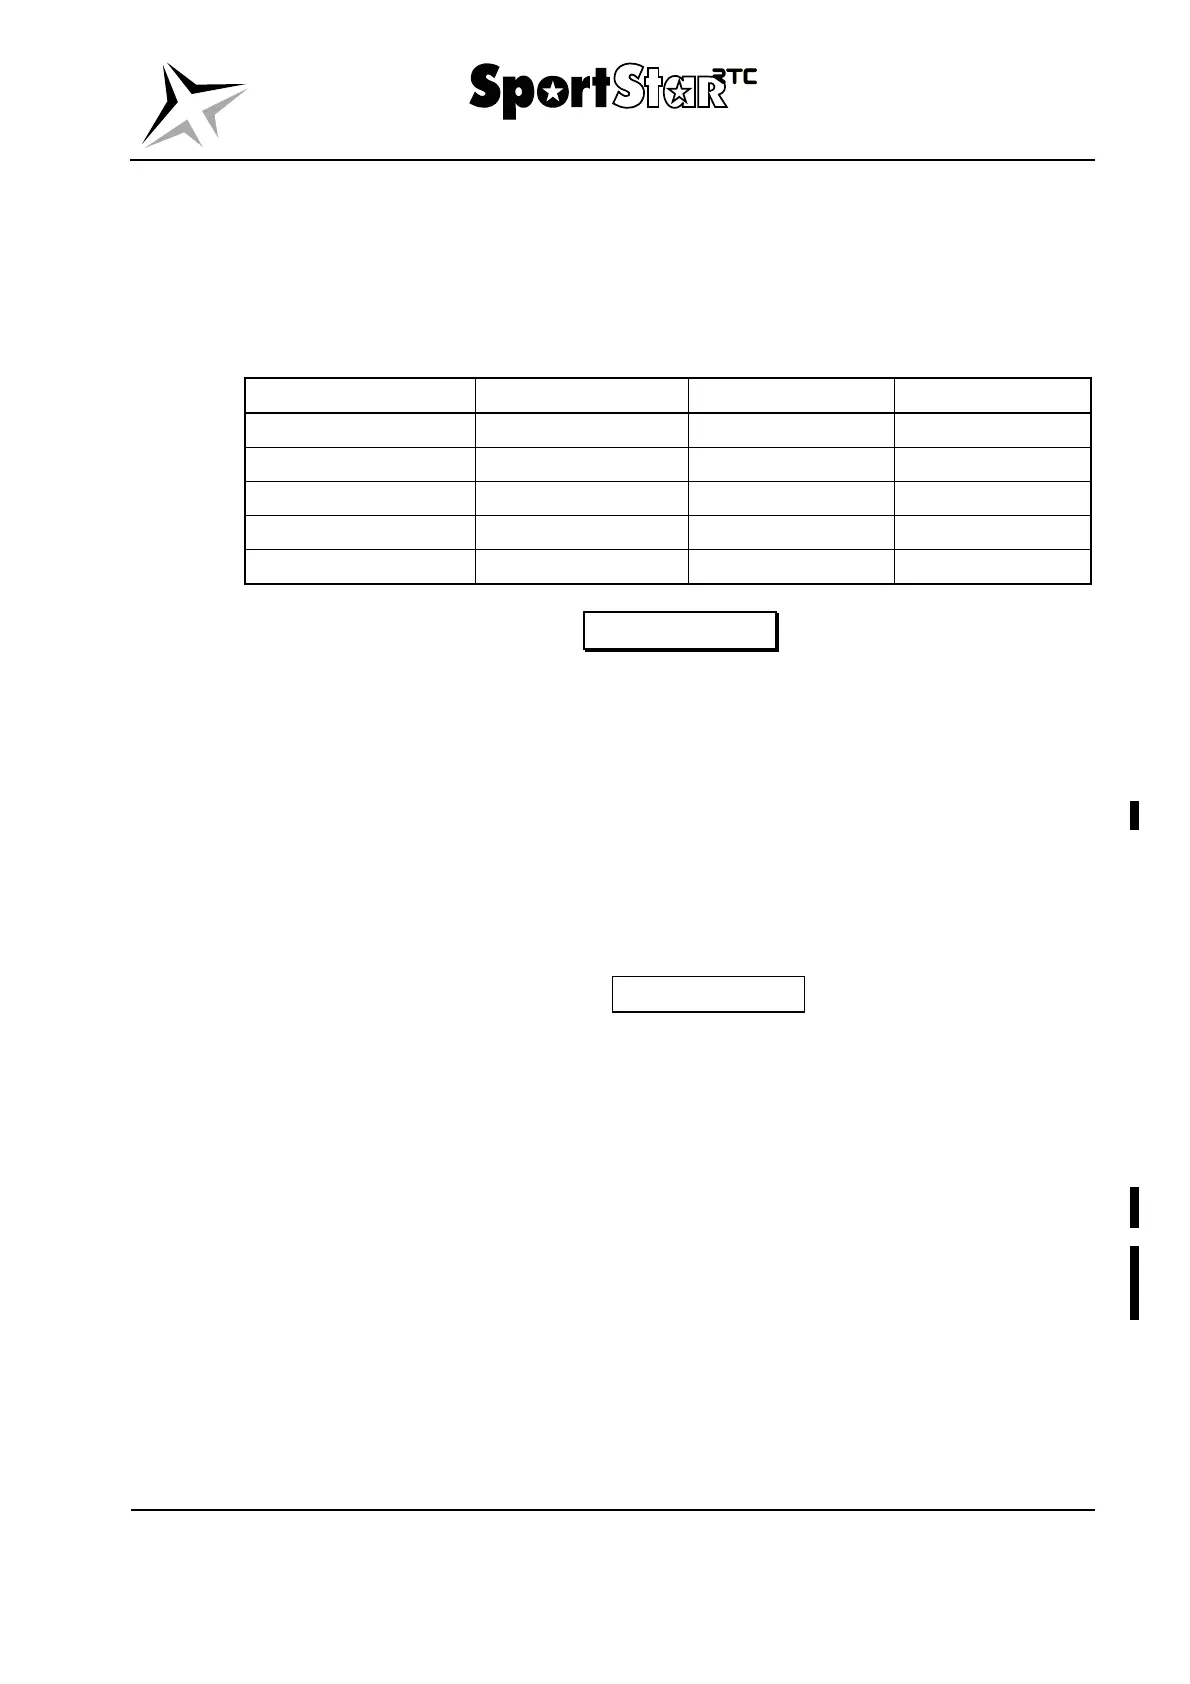
Recommended tools and material:
Item Designation / Size Quantity Note
Hex wrench No. 6 1 pc.
Wrench No. 13 1 pc.
Torque wrench 5 – 30 Nm 1 pc.
Cleaning agent Technical benzine -
Lint-free cloth - -
WARNING
SWITCH OFF THE IGNITION AND TAKE OUT THE KEY!
(1) Removal – KW-31-033 propeller
(a) Switch the electrical network off and disconnect the battery.
(b) Remove the engine cowlings (Section 71-10).
(c) Unscrew and remove the nuts (2, Fig. 61-3).
(d) Remove the propeller (1) from the engine flange.
(e) Put protective covers on the propeller blades and put it in a horizontal position on a
pad which supports the spacer.
(2) Installation – KW-31-033 propeller
CAUTION
WHEN INSTALL THE PROPELLER, MAKE SURE THAT THE
CARBON BRUSHES ARE NOT DAMAGED.
(a) Remove protective covers from the propeller blades.
(b) Thoroughly clean the flange of engine and propeller.
(c) Release the carbon brush block (5, Fig. 61-3).
(d) Check that the bushings (3) are inserted in the mounting holes in the engine flange
(4); the bushings are inserted into the holes from the engine side.
(e) Insert the propeller (1) bolts into the bushings (3) in the engine flange (4) and
install the nuts (2); during screwing nuts, check touchdown of bushings shoulder on
the engine flange – the bushings shoulder must touch down on the engine flange.
(f) Press the propeller spinner by hand and tighten the nuts (2) in the sequence in
accordance with Fig. 61-2 with torque 22 Nm.
(g) Adjust and tighten the carbon brush block (5, Fig. 61-3).