MAINTENANCE MANUAL
Effectivity: All
Page 33-19
Edition 2 | Rev. 0
C. Orion 600 series positon / anti-collision lights
Maintenance type: Line
Personnel qualification: Independent verification personnel qualified in accordance with
Part 66 or higher
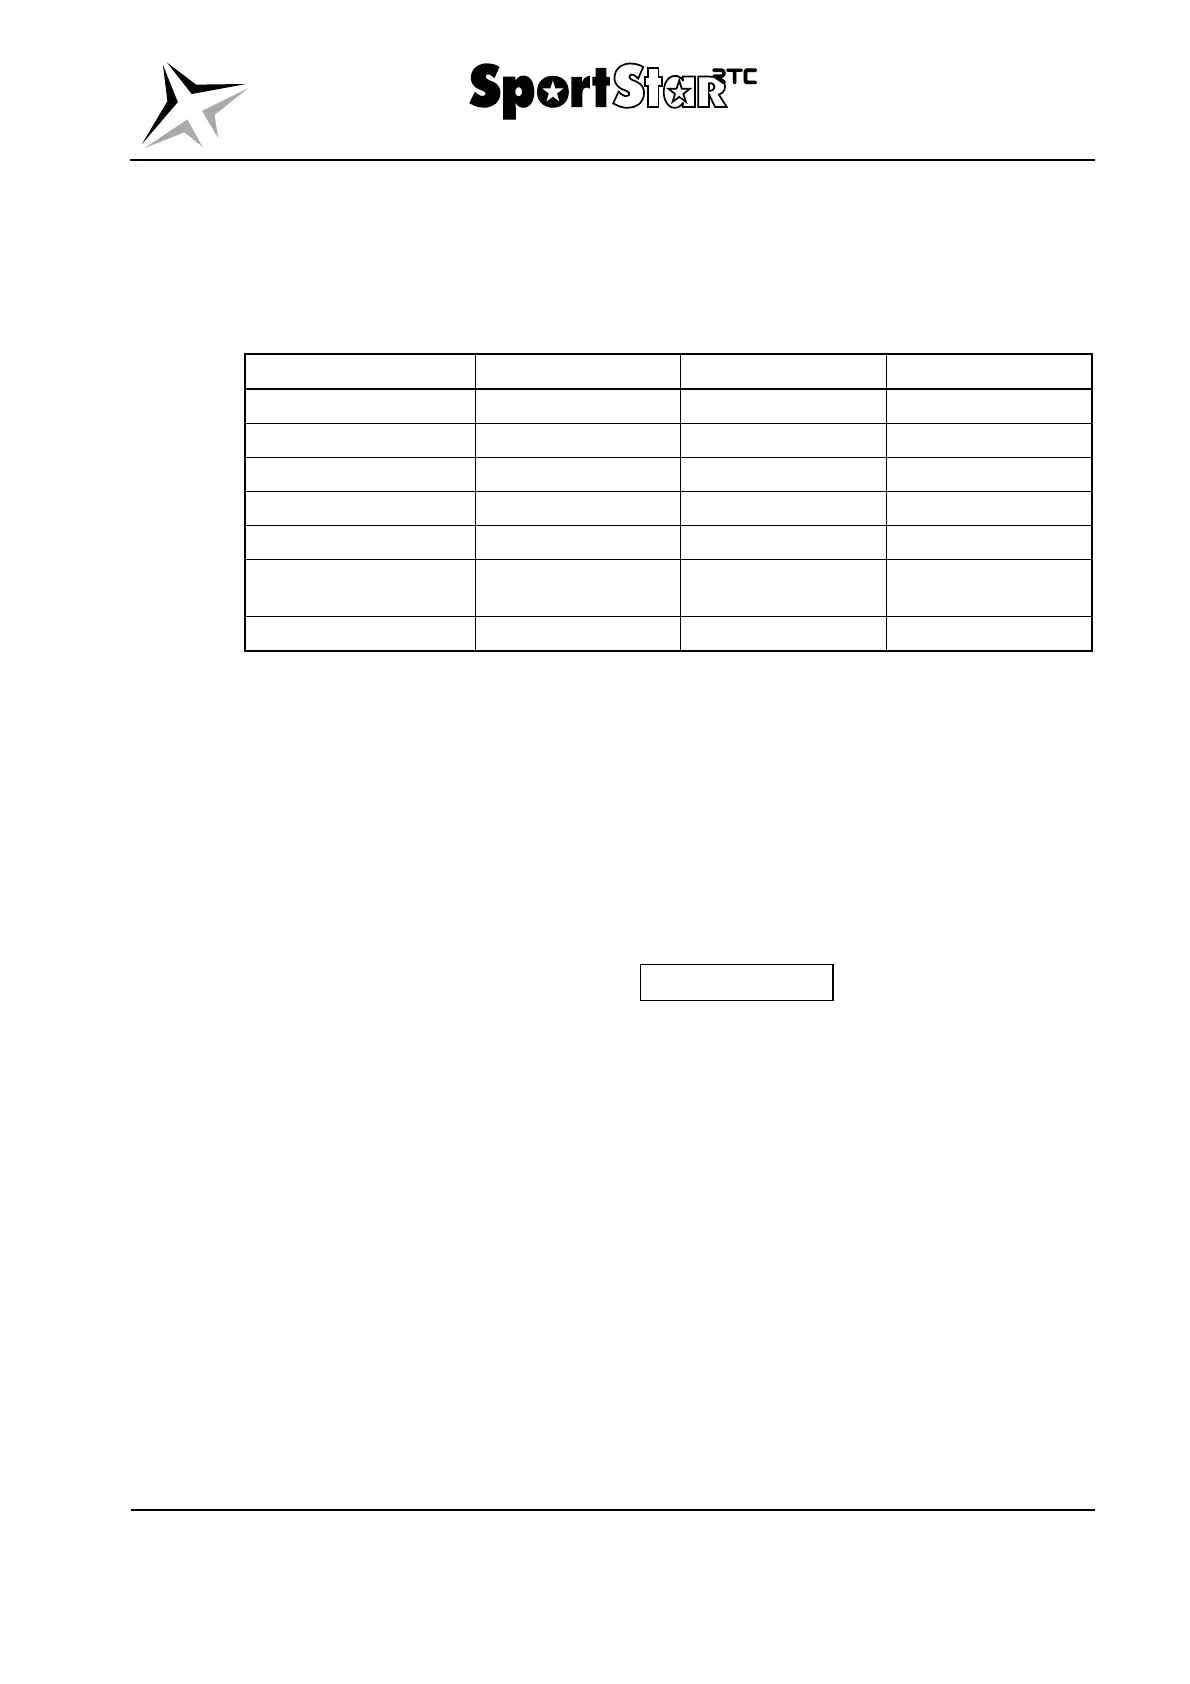
Recommended tools and material:
Item Designation / Size Quantity Note
Philips screwdriver No. 2 1 pc.
Crimping pliers - 1 pc.
Connector P/N 1-480426-0 1 pc.
Contact P/N 163305-2 4 pcs.
Cleaning agent Technical benzine -
Sealant Transparent sanitary
silicone
-
Lint free cloth - -
NOTE
The removal / installation procedures for left and right lights are
identical.
(1) Removal – position / anti-collision light
(a) Switch the electrical network off and disconnect the battery.
(b) Remove the cover W4L or W4R (Fig. 06-2).
(c) Disconnect the connector with wires (8, Fig. 33-7) from the harness.
(d) Carefully unscrew the screws (7) and remove the retainer (2).
CAUTION
DO NOT TOUCH THE LED LENS SURFACE WITH EITHER
FINGERS OR SHARP OBJECTS. THIS COULD SOIL AND/OR
DAMAGE THE LENS AND AFFECT THE OPTICAL
PERFORMANCE OF THE LEDS.
(e) Remove the lens (4) from the light body by lifting the rear of the lens approximately
12 mm, now slide the lens rearward approximately 12 mm and lift upwards to
remove.
(f) Remove the sealant from the gap between the baseplate (3) and the wingtip (9).
(g) Unscrew the screws (5) and remove the light body (1).
(h) Unscrew the screws (6) and remove the baseplate (3).
(2) Installation – position / anti-collision light
(a) Use a scraper to remove the old sealant from the wingtip (9, Fig. 33-7),
respectively the light body (1) and thoroughly clean the contact surfaces with a
cleaning agent.