When you are flying to a destination, the 6030 defaults to automatic head/tailwind. If a manual head/tailwind is
desired, press and hold the H/T wind key for 3 seconds; the Information Field will read “HT wind auto”. Press
the F2 key until the Information Field reads “HT man.
!"
”, then use the !" keys to set the desired
head/tailwind in the Information Field (e.g., “HT man.
!"
-12” for a 12 mph headwind). When entering a manual
headwind component, you must rely on experience to enter a reasonable value based on the circumstances. To
revert to automatic head/tailwind, press the F2 (Auto Wind) key.
5.3 Route Function
A route is a sequence of waypoints that must be flown in order. The 6030 can store up to twenty routes; the
waypoints used on a route must first have been entered into the 6030’s waypoint list. Each route can also be
assigned a route name, for example, Quest Air Triangle. The same waypoint can be used more than once along
a route, and the same waypoint may occur on other routes as well. If a waypoint is used in a route, it cannot be
deleted from the waypoint list until the route is deleted. You can view the stored routes by highlighting Routes in
the Main Setup Menu and pressing the OK key. Up to eight are displayed on the screen at one time; use the$
arrow to display the next set of eight routes. While flying a route you have the option of looking up other,
possibly closer, waypoints without leaving the current active route; use a long press of the Goto key in normal
run-mode to do this.
To activate a route, press the Route key for a few seconds and a list of your existing routes will be displayed in
the lower half of the display. Highlight the desired route with the !" keys, then press OK, and the name of the
active route will appear in the Information Field. When you are flying with an active route, the next waypoint will
be shown in the top line of the Information Field and “next
!
pr
"
wp” will appear in the bottom line. You can
move forward to the next waypoint or move back to the previous waypoint using the !" keys.
It is possible to designate any previously entered route as a Competition Route which, in contrast to the routes
described above, can have waypoints or cylinders around waypoints that are mandatory (such as turnpoints in a
competition task or in FAI record/badge flights). For more information on Competition Routes see Section 5.4,
Competition Route.
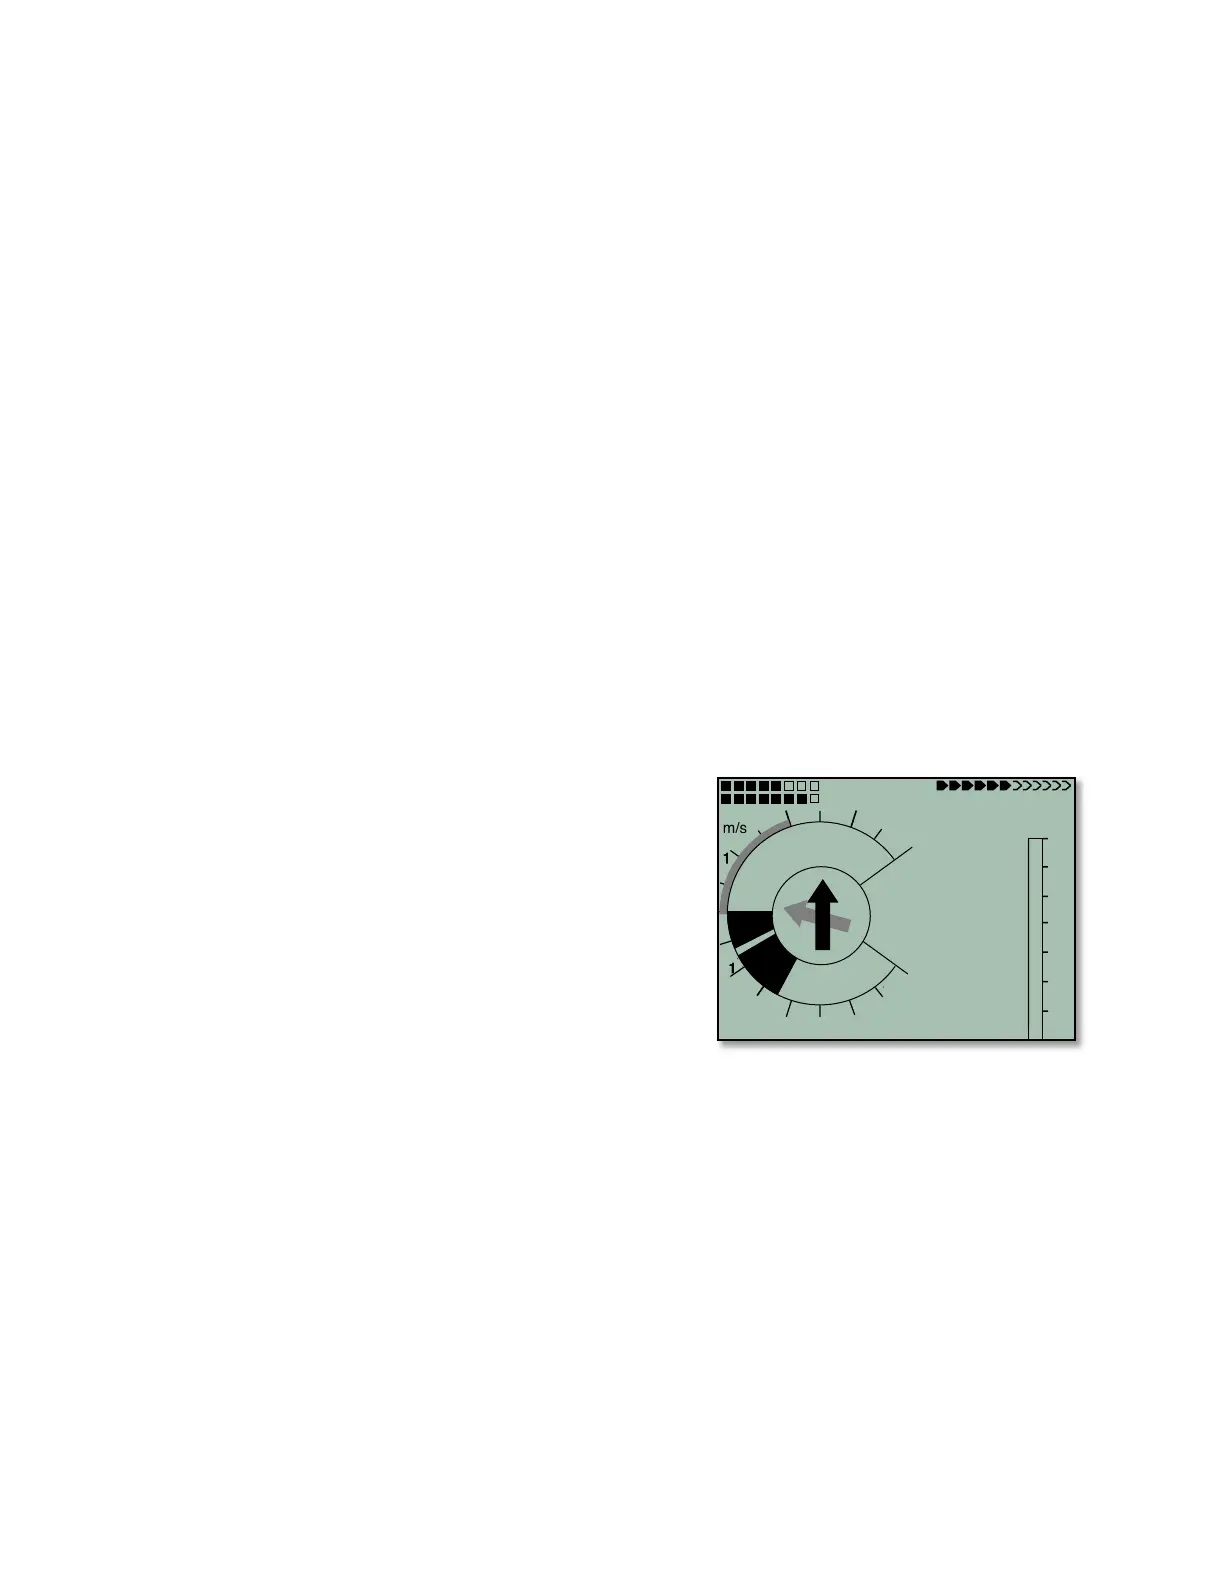
5.3.1 Direction arrow to second turnpoint
In the middle of the compass rose, a solid black arrow points to
the next waypoint. If there is more than one waypoint remaining
in an active route there will be a second arrow (shaded) under
the black arrow that points in the direction to the second
waypoint. This second arrow makes it easier for pilots flying a
competition task to know in advance which direction to turn
after reaching the waypoint cylinder. In the example, the
direction to the second waypoint is northwest of the current
position.
5.3.2 Enter/Edit Route
The easiest way to create a route is to use software like FlyChart or SeeYou on your computer and then upload
the routes to the 6030. Routes also can be created from the waypoints stored in the 6030 using the keypad as
described below.
To create a new route, select Routes from the Main Setup Menu, and press the F1 (lns. Route) key. A new
route with the default name “Xxxxx” will appear in the lower half of the display. The blinking cursor will be on the
first character of the default name, which can be changed using the !" keys. Use the $ key to advance the
cursor to the next letter, and accept the previous one. Repeat this process for each character of the name.
Press the OK key to conclude the entry of the route name.
Next, the desired waypoints must be added to the route. Press the F1 (lns. Wayp) key and the list of the
available waypoints, in alphabetical order, will be displayed in the bottom half of the screen. The prompt “Select
Waypoint No1” is displayed. Use the "!$keys to scroll until the desired waypoint is highlighted. Add it to the
route by pressing the OK key. The waypoint is then added to the list of waypoints in the route displayed in the
upper half of the screen.
To add the next waypoint, press the F1 (Ins.Wayp) key again. Once more, the waypoint list appears, and you
can select the second waypoint. After selecting the waypoint, press the OK key to add this waypoint to the