38
4 SETTING UP
ELECTRIC AND ACOUSTIC
Global Settings: Set Input 2 Mode to “Left Only” under SETUP: I/O: Audio
Presets: Custom
This setup is provided for those who wish to use the FM9 to process an electric guitar and an acoustic guitar at
the same time. It also works for guitars equipped with dual output magnetic and piezo pickups. Special presets
containing the Input 2 block are required as illustrated below. For this setup, the electric and acoustic signals are
combined into one stereo output, but if you learn to use Input and Output blocks, this will open other options such
as different guitars appearing at different outputs.
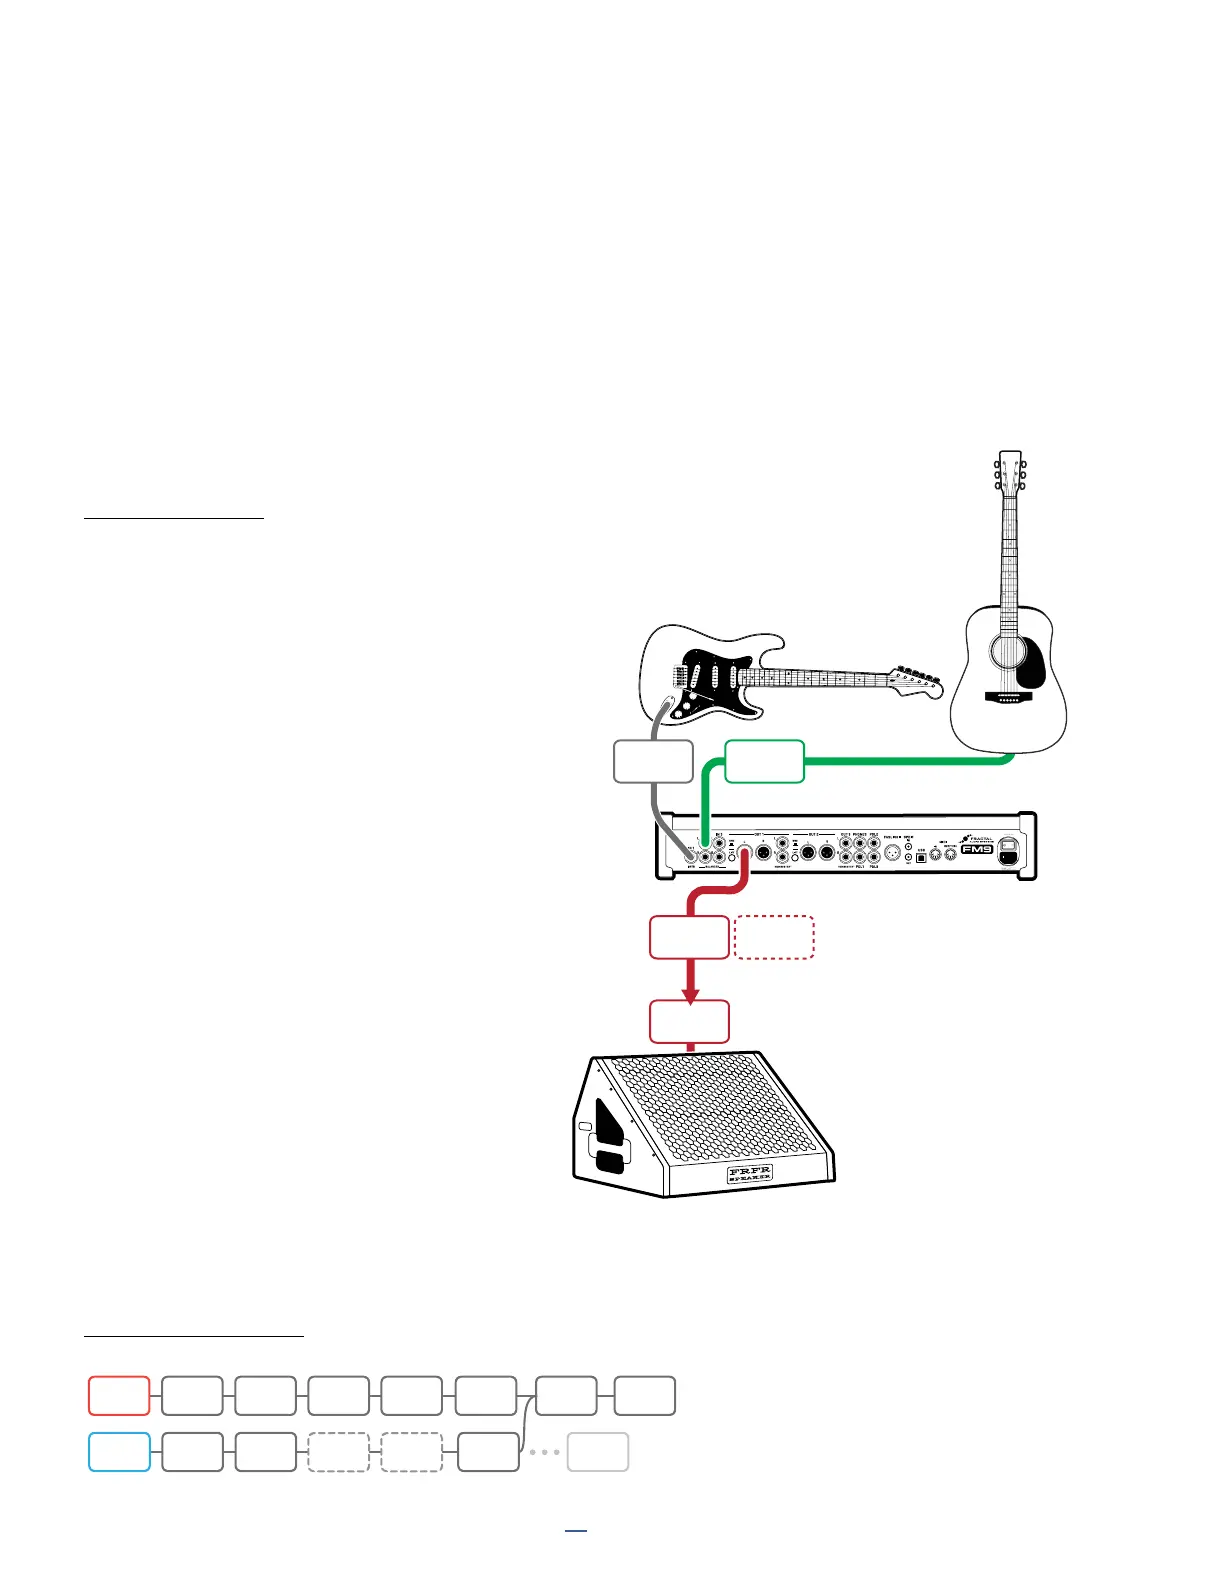
CONNECTIONS
Connect your electric guitar to
FM9 Input 1 (Instrument).
Connect your acoustic guitar (or the piezo side
of your electric) to FM9 Input 2 L. Set Input 2
Mode to “LEFT ONLY” under SETUP: I/O: Audio.
Connect FM9 Output 1 to your PA, mixer, or
monitors as you would in any other “direct” setup.
Create a preset as shown below where IN 1 is the
electric guitar and IN 2 is the acoustic/piezo.
A variety of blocks can be used to process
an acoustic guitar. In many cases, a bit of
compression and EQ is all you need, but another
good option is the TUBE PRE model in the amp
block, with or without a Cab block loaded with
a custom IR designed to enhance the piezo
tone with the sound of a mic’d acoustic.
Note that in the example, the two chains
are sharing a reverb block, which sounds
great and is also economical. It is also
possible to share many other blocks.
If you wanted the acoustic to go to its
own output, you could insert the OUT 2
block and connect to that instead.
EXAMPLE PRESET
FM9
IN 1
(INSTR)
INPUT 2 L
OUTPUT
1L
OUTPUT
1R
LINE
INPUT
Optional
for Stereo
IN1 WAH DRV AMP1 CAB1
AMP2? CAB2?
DLY REV
IN 2 CMP EQ CHO
OUT1
T