78
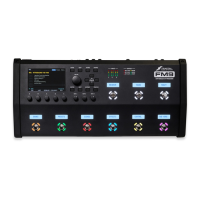
10 LAYOUTS & SWITCHES
PER-PRESET SWITCHES
Like the Axe-Fx III and FM3, the FM9 supports two ways of having the footswitches in any layout change on a per-
preset basis. The rst is “Placeholders” and the second is “Overrides.” Both of these methods rely on the special
set of “Per Preset Switch Denitions” that are part of every preset. Find these denitions in the “Per-Preset FC”
area of the Home menu (Push-knob D).
Numbered Placeholder switches (like those in the FM9 factory “Per Preset” layout) are inserted just like any
other function in any Layout. They do nothing, however, unless the correspondingly numbered Per-Preset Switch
Denition is populated. For example, the rst switch in Layout 6 is set to always perform the rst Per-Preset
switch denition (“PP#1”) in the current preset. This might be “Drive 2: Bypass” in one preset and “Flanger 2:
Bypass” in another.
Overrides are less polite. Each preset also has the ability to commandeer any switch in any layout. Whatever
global denition that switch normally has is instead replaced by a PP# of your choice. For example, a given preset
might force “Layout 1, Switch 1” to show PP#2. Imagine you have your whole board set up around ve scenes
but then suddenly realize you need a 6th scene in just one song. You dial in “PP#2” to “Select Scene 6” and then
override the Tempo switch in your main layout with PP#2 in the preset for that one song. Very cool.
Critically, both Placeholders and Overrides draw from the same list of 24 numbered per-preset denitions (“PP#)
found in any preset. In the case of Placeholders, the footswitch asks for one by its number. In the case of
Overrides, the preset forces a designated switch into a designated position.
Learn more about Per-Preset Switches in the Footswitch Functions Guide available on our web site:
https://www.fractalaudio.com/fas-ffg
CREATING PER-PRESET SWITCH DEFINITIONS
Here’s how to create the denitions used by both types of Per-Preset switches:
1. Load the desired preset and navigate to its list of per-preset switch footswitch denitions:
Press HOME, then use Push-knob D to open the FC Per-Preset menu.
Page to the Per-Preset FC tab if it isn’t already selected.
2. Nav to the top of the list and then turn the VALUE knob to select your choice of per-preset switch denitions
(numbered “PP# 1–24.). The rst twelve of these appear as placeholders in layout 6.
3. Dene the PP# switch. The interface is basically identical to that used by the “EZ” footswitch page.
You can set Tap Function, Hold Function, LED ring color, Mini-Display settings, and Layout Links.
4. Repeat this process from step 2 for any other PP# switches you wish to dene.
5. OPTION: If you want to create any overrides, turn the page to “Overrides”. NAV to the Layout and Switch you
want to override and turn the VALUE wheel to the desired PP#.
6. You must save the preset to commit any changes: STORE, ENTER, ENTER.
7. Press HOME when nished.