57
EN
The "3x" and "1x" buttons can be used to magnify the ignition section on the workpiece.
The slider can be used to see a detailed view of any sequence.
The next stage of the course is an exercise unit using the VR glasses. The colour of the
position display on the tip of the rod electrode (GHOST) shows how accurately the rod
electrode is being guided.
- Green: very good
- Yellow: within the tolerance
- Red: outside the tolerance - requires correction!
The ignition sequence is as follows:
Guide the rod electrode slowly to the target point shown in green
Touch the workpiece with a stroking movement over a distance of approx. 10 mm in
the welding direction
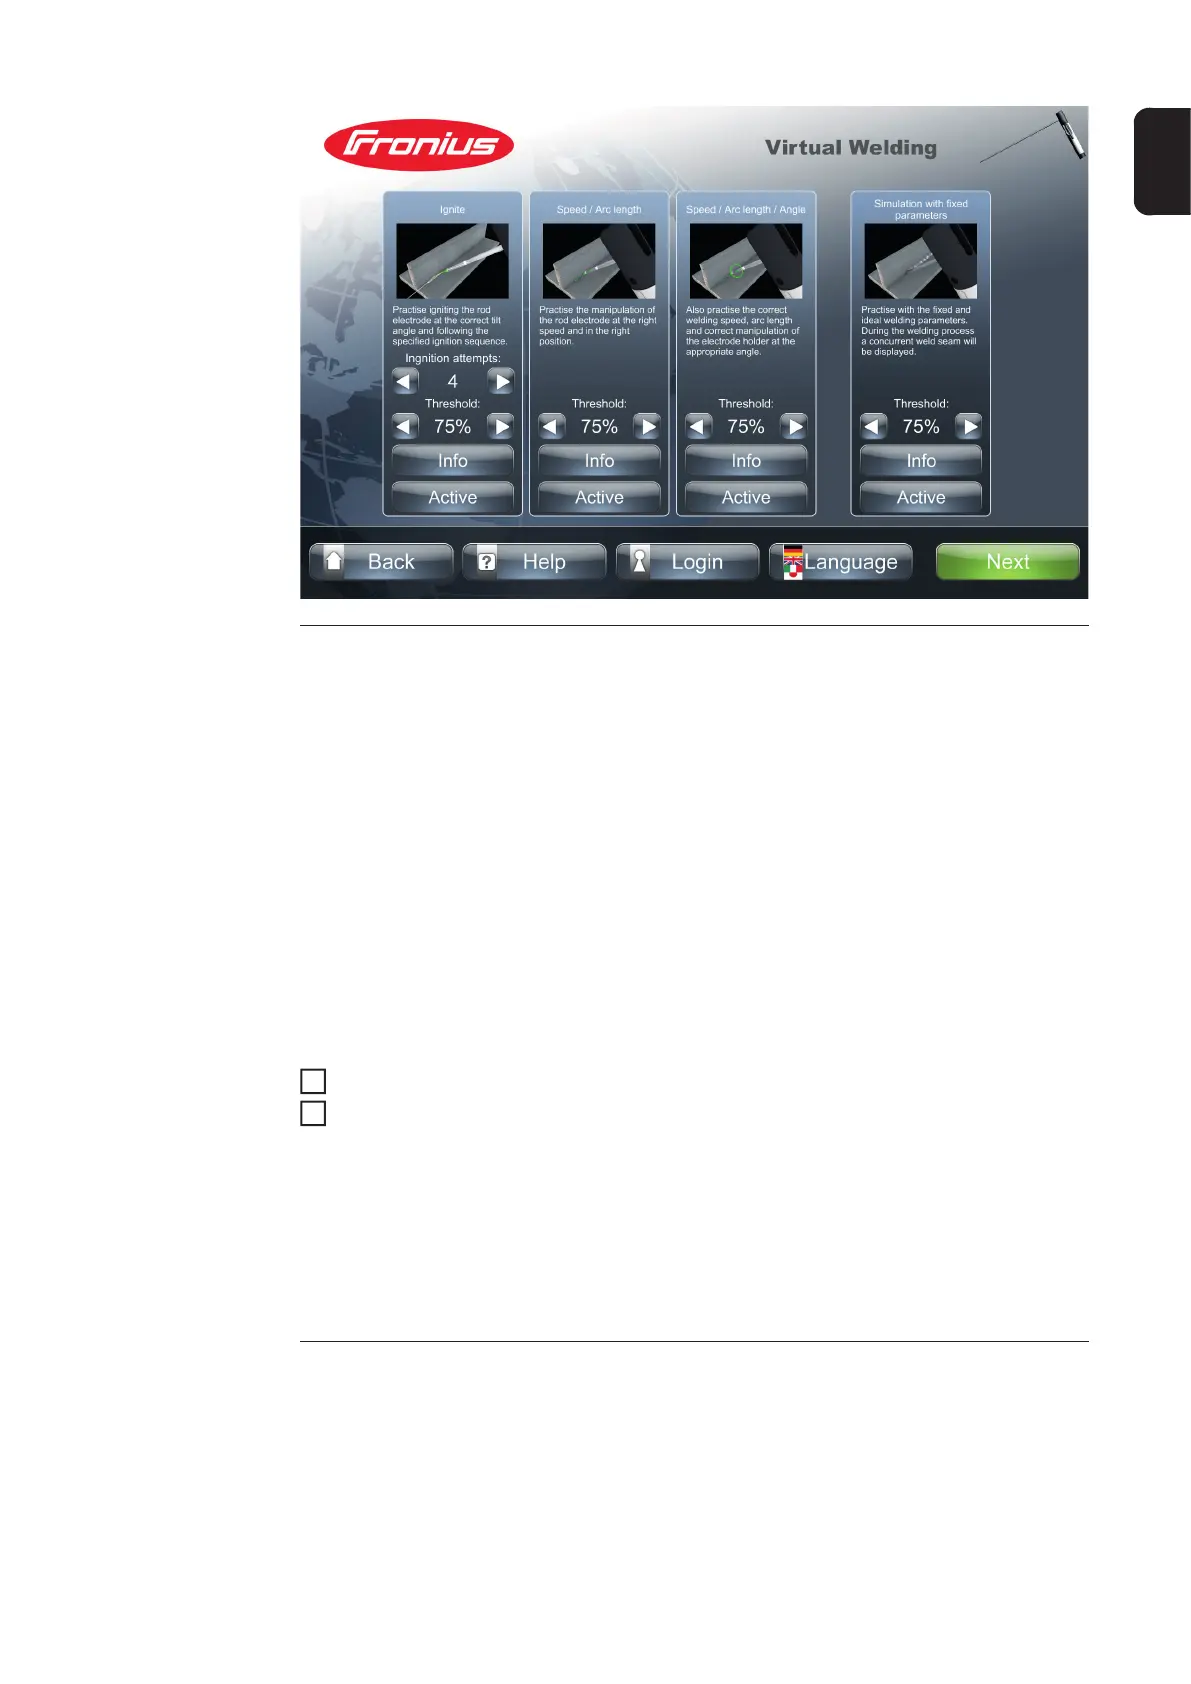
The number of ignition attempts (maximum 10) and the threshold for the number of ignition
attempts that must be completed successfully can be specified.
The ignition sequences carried out are displayed as coloured circles:
- Green circle: ignition sequence successful
- Red circle: ignition sequence failed
Ignition
The trainee practises igniting the rod electrode at the correct tilt angle and following the
specified ignition sequence. The longer of the two rod electrodes is required for this.
The first step is a course unit on the basic sequence of movements that does not involve
the VR glasses.
1
2
Speed / Arc length
The trainee practises guiding the rod electrode to the workpiece with the correct arc
length. From this point the shorter of the two rod electrodes is required.
The colour of the distance arrow (GHOST) shows how accurately the rod electrode is be-
ing guided.
- Green: very good
- Yellow: within the tolerance
- Red: outside the tolerance - requires correction!