ATTENTION
Confirm that the pick rollers are installed properly. Otherwise, paper jams or other feeding errors
may occur.
9 Close the ADF.
For details, refer to How to Close the ADF (page 63).
Be careful not to get your fingers caught when closing the ADF.
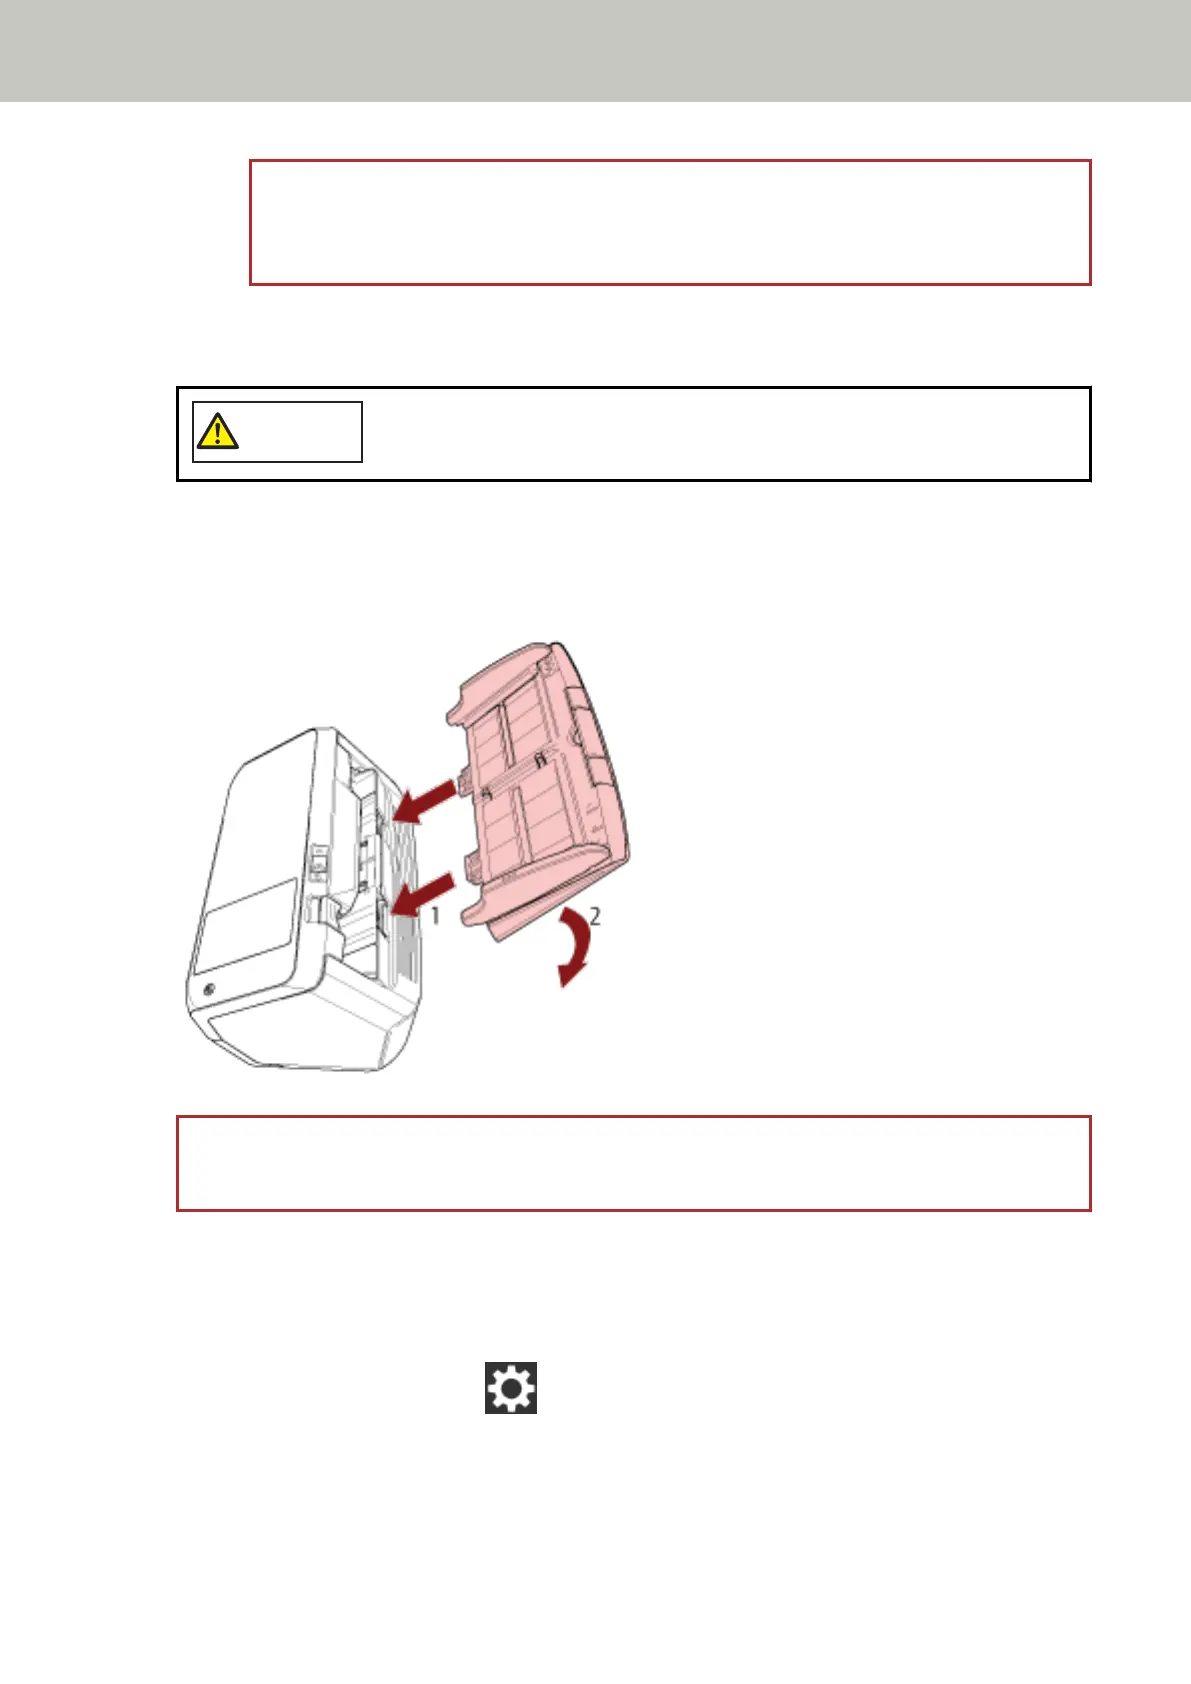
10 Attach the ADF paper chute (feeder).
Insert the tabs into the slots on the back of the scanner in the direction of arrow 1 and tilt the ADF paper
chute (feeder) downwards in the direction of arrow 2 until it locks in place.
Attach the ADF paper chute (feeder) with the side guides facing upwards.
ATTENTION
Do not leave any space between the ADF paper chute (feeder) and the scanner.
11 Plug in the power cable and turn on the scanner.
For details, refer to How to Turn the Power ON (page 55).
12 Clear the pick roller counter.
a On the touch screen, press → [Cleaning & Maintenance] → [Consumable counters].
b On the [Consumable counters] screen, press the [Clear] button for
[After Replacing the Pick Roller].
Replacing the Consumables
138
 Loading...