142
Chapter 6 Installing Internal Options
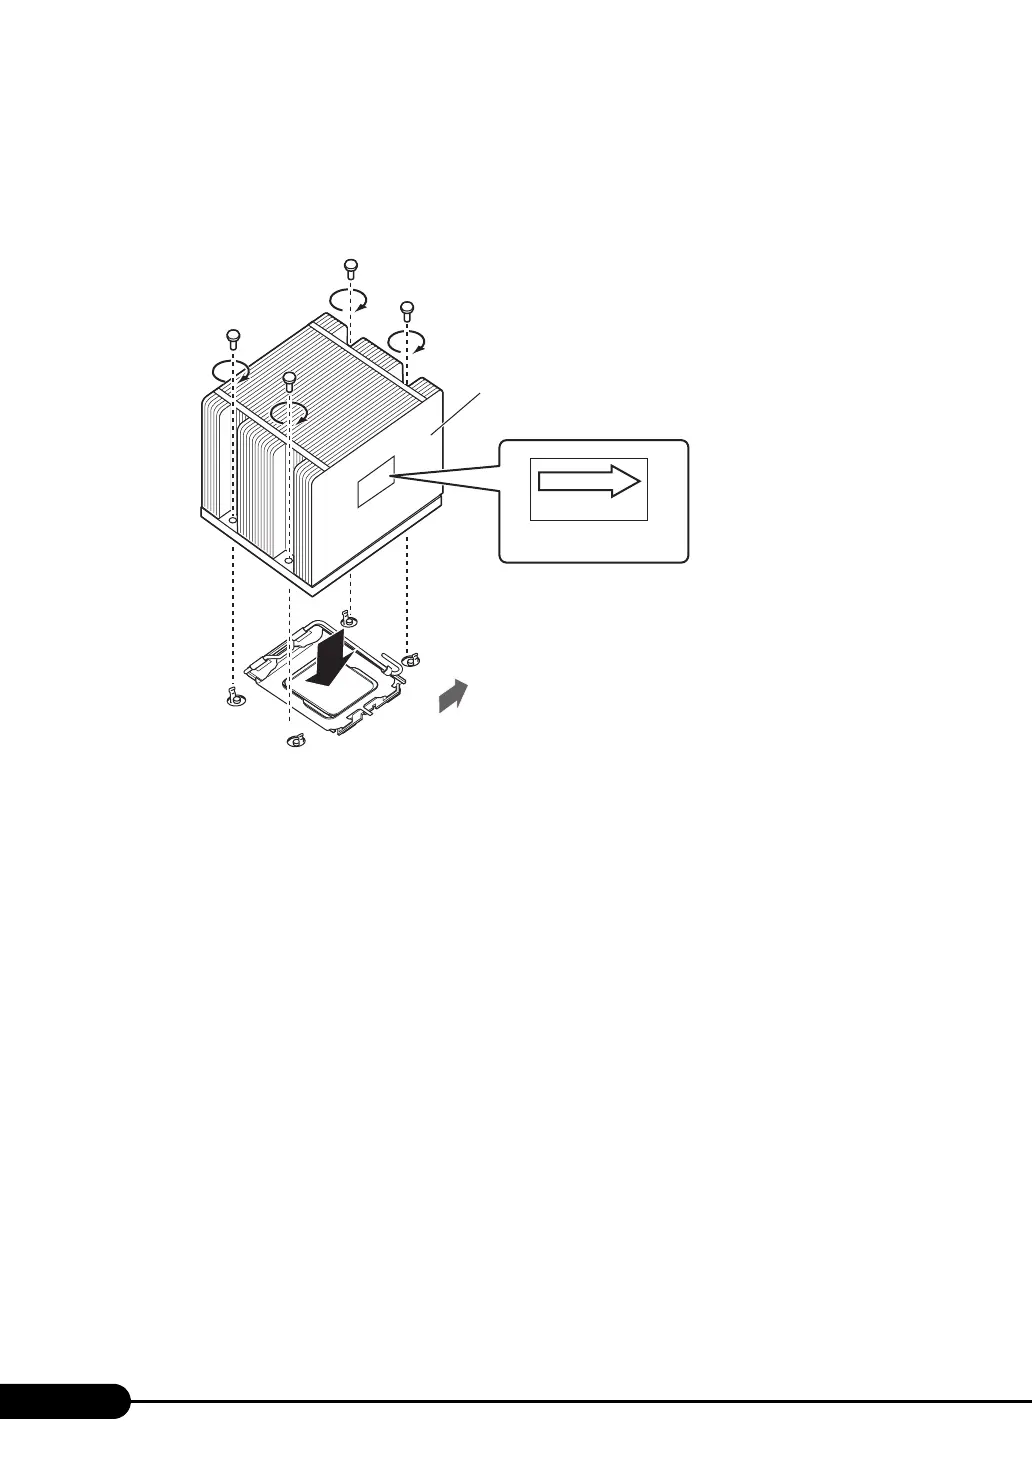
8 Install the heat sink.
Check the direction by referring to the label attached to the heat sink, and install it on the CPU
with screws to secure it.
Tighten the screws little by little diagonally.
9 Reattach the fan duct.
" How to attach the fan duct" (p.138)
10 Attach the top over and push the server back into the rack.
" How to attach the top cover" (p.137)
11 Initialize the Extended System Configuration Data (ESCD).
Set [Reset Configuration Data] to [Yes] in the [Advanced] menu of the BIOS Setup Utility.
"7.2.5 Advanced Menu" (p.190).
12 Save the BIOS configuration data.
"4.3 Storing the System Configuration Information" (p.84)
How to remove the CPU
To remove the CPU, reverse the installation procedure.
Heat sink
AIRFLOW
The arrow points
towards the rear.
* The label may say "Direction of airflow"
inside the arrow as a variation.
Rear of the server

 Loading...