Preliminary steps
▶
"Unlocking the server" on page 39
▶
"Removing the bay cover" on page
40
▶
"Shutting down the server" on page 41
▶
"Disconnecting the power cord" on page 42.
▶
"Getting access to the component" on page 43.
Removing the defective system cable
▶
"Removing the standard PSU" on page 74.
▶
"Removing the ODD" on page 163.
▶
If applicable, remove HDD3 and HDD4, see "Removing a 3.5-inch HDD" on
page 94.
▶
Push the RDX backup drive somewhat to the front to get more space, see
"Removing the RDX backup drive" on page 170.
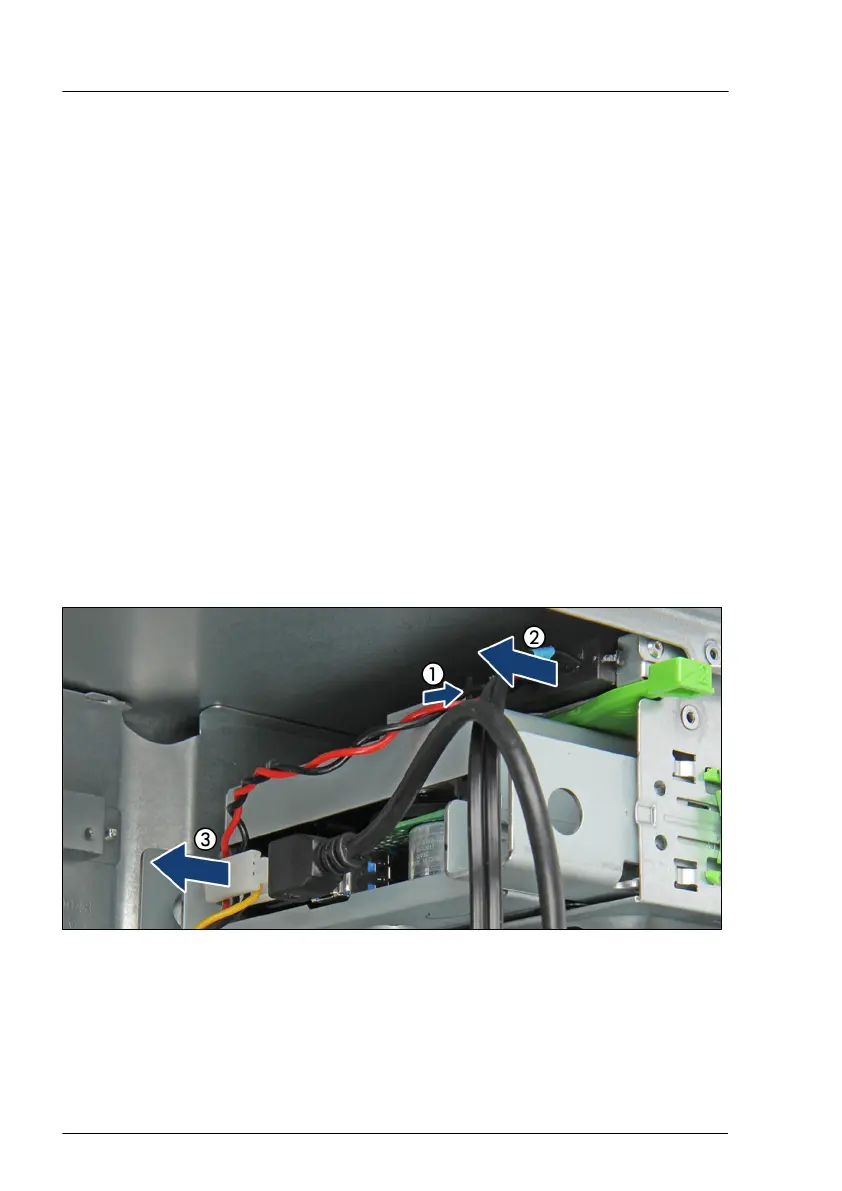
Figure 145: Removing the connectors from accessible drives
▶
Pinch the left side of the connector (1) and remove it from the ODD back
plate (2).
▶
Remove the connector from the RDX backup drive (3).
Cables
218 Upgrade and Maintenance Manual TX1310 M5

 Loading...


