DIRECTION 5750007-1EN, REV. 1 LOGIQ E10 BASIC SERVICE MANUAL
8 - 36 Section 8-6 - Replacing Covers and Bumpers
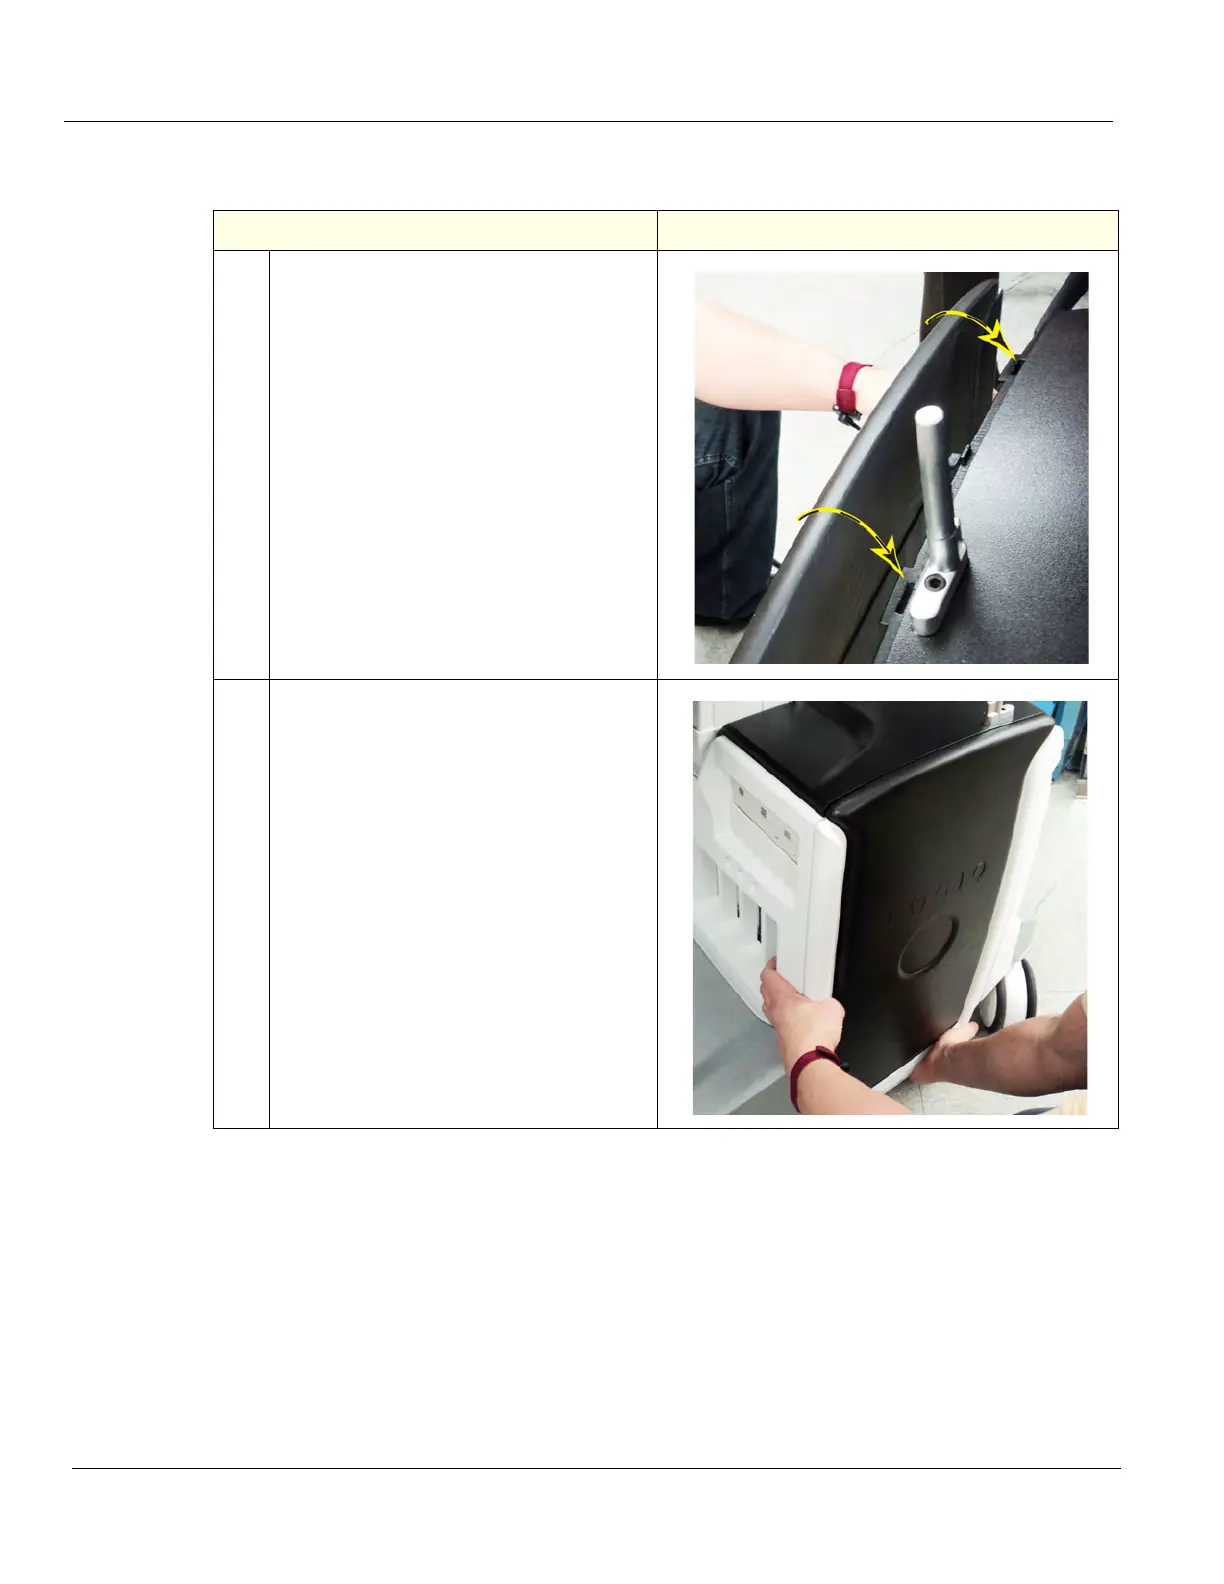
Side Cover(s)/Side Air Intake (Filter) installation
Table 8-24 Side Cover(s)/Side Air Intake (Filter) installation
Steps
Corresponding Graphic
1. Center the Side Cover on the
LOGIQ E10 and align the tabs at the top, in-
side of the Cover, with the slots in the Top
Cover. It should rest evenly.
2. Position one hand at the front center of the
cover and press in, to install the front center
self-clinching stud.
This will guide the lower self-clinching studs
into position.
With both hands, firmly press in, evenly at
the bottom, outer edge to complete installa-
tion.
Re-install the M4 screw(s).
NOTE: If a cover is replaced, transfer the
Air Filter.