DIRECTION 5750007-1EN, REV. 1 LOGIQ E10 BASIC SERVICE MANUAL
8 - 64 Section 8-6 - Replacing Covers and Bumpers
8-6-13 Main Monitor Arm Assembly Covers replacement
Table 8-70 Manpower / Time and Tools
Manpower /
Time
Tools / PPE
One person /
15 minutes
Refer to: 8-2-5 "Tools needed for servicing the LOGIQ E10" on page 8-6 /
8-2-6 "PPE Required During Service" on page 8-6.
Table 8-71 Preparations and Preparation Link
Preparations - you must perform the following steps
1. Power down the system.
2. Move the User Interface (Top Console) to its lower position.
3. Disconnect the mains power cable from the wall outlet and External I/O Cabling.
Preparation Link (if you need more information):
4-2-4 "Power SHUT DOWN" on page 4-9.
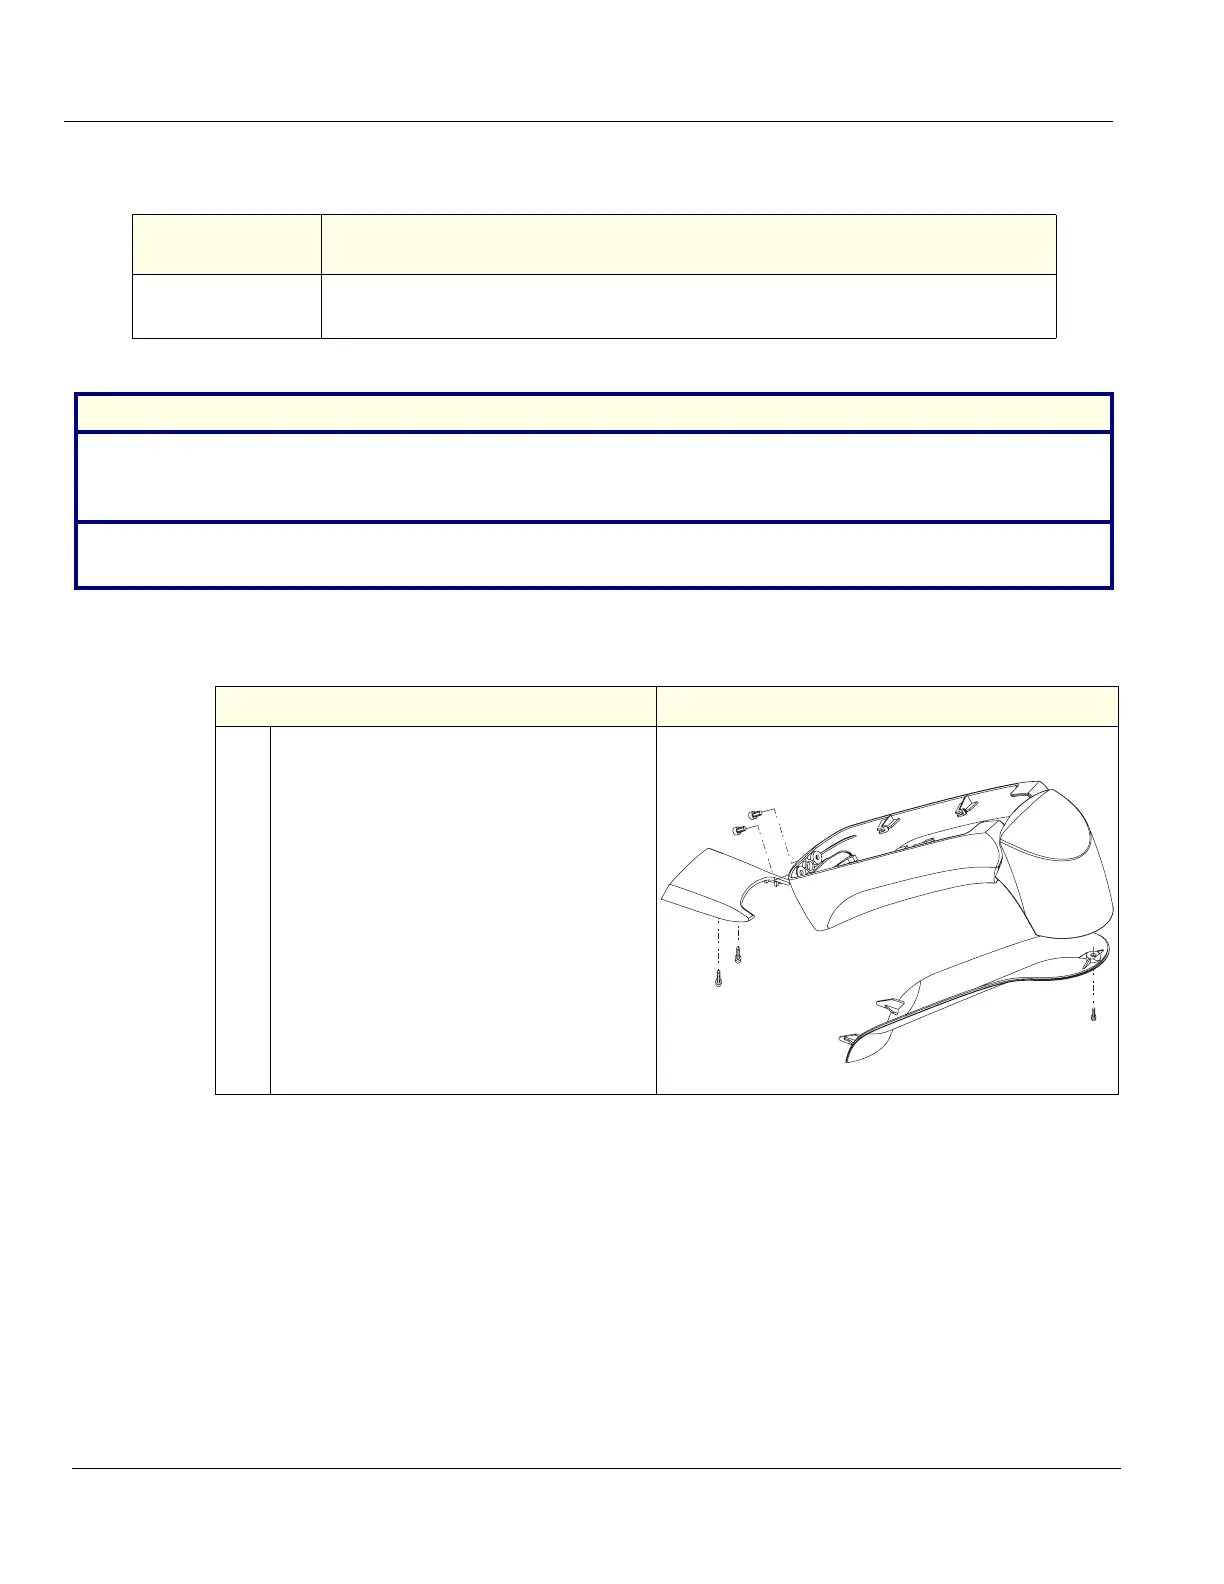
Table 8-72 Main Monitor Arm Assembly Covers removal and installation
Steps Corresponding Graphic
1.
Pan Arm Down Cover (1), remove two
Phillips screws and lift the cover off.
Lift Arm Cover - Right (2) and Lift Arm
Cover - Left (3), remove the 3 mm screws
and slide the Cover toward the Monitor.
Joint Cover (4), slightly push the bottom of
the Cover forward to “bow“ the cover and
pry at the leading, forward edge of the
Cover to remove.
Extension Arm Cover (5), remove the
3 mm screw and lower cover.
Install covers in the reverse motion. To
install the Joint Cover, place top of Cover
into position and snap into place.
1
3
2
4
5