DIRECTION 5750007-1EN, REV. 1 LOGIQ E10 BASIC SERVICE MANUAL
Chapter 8 Replacement Procedures 8 - 125
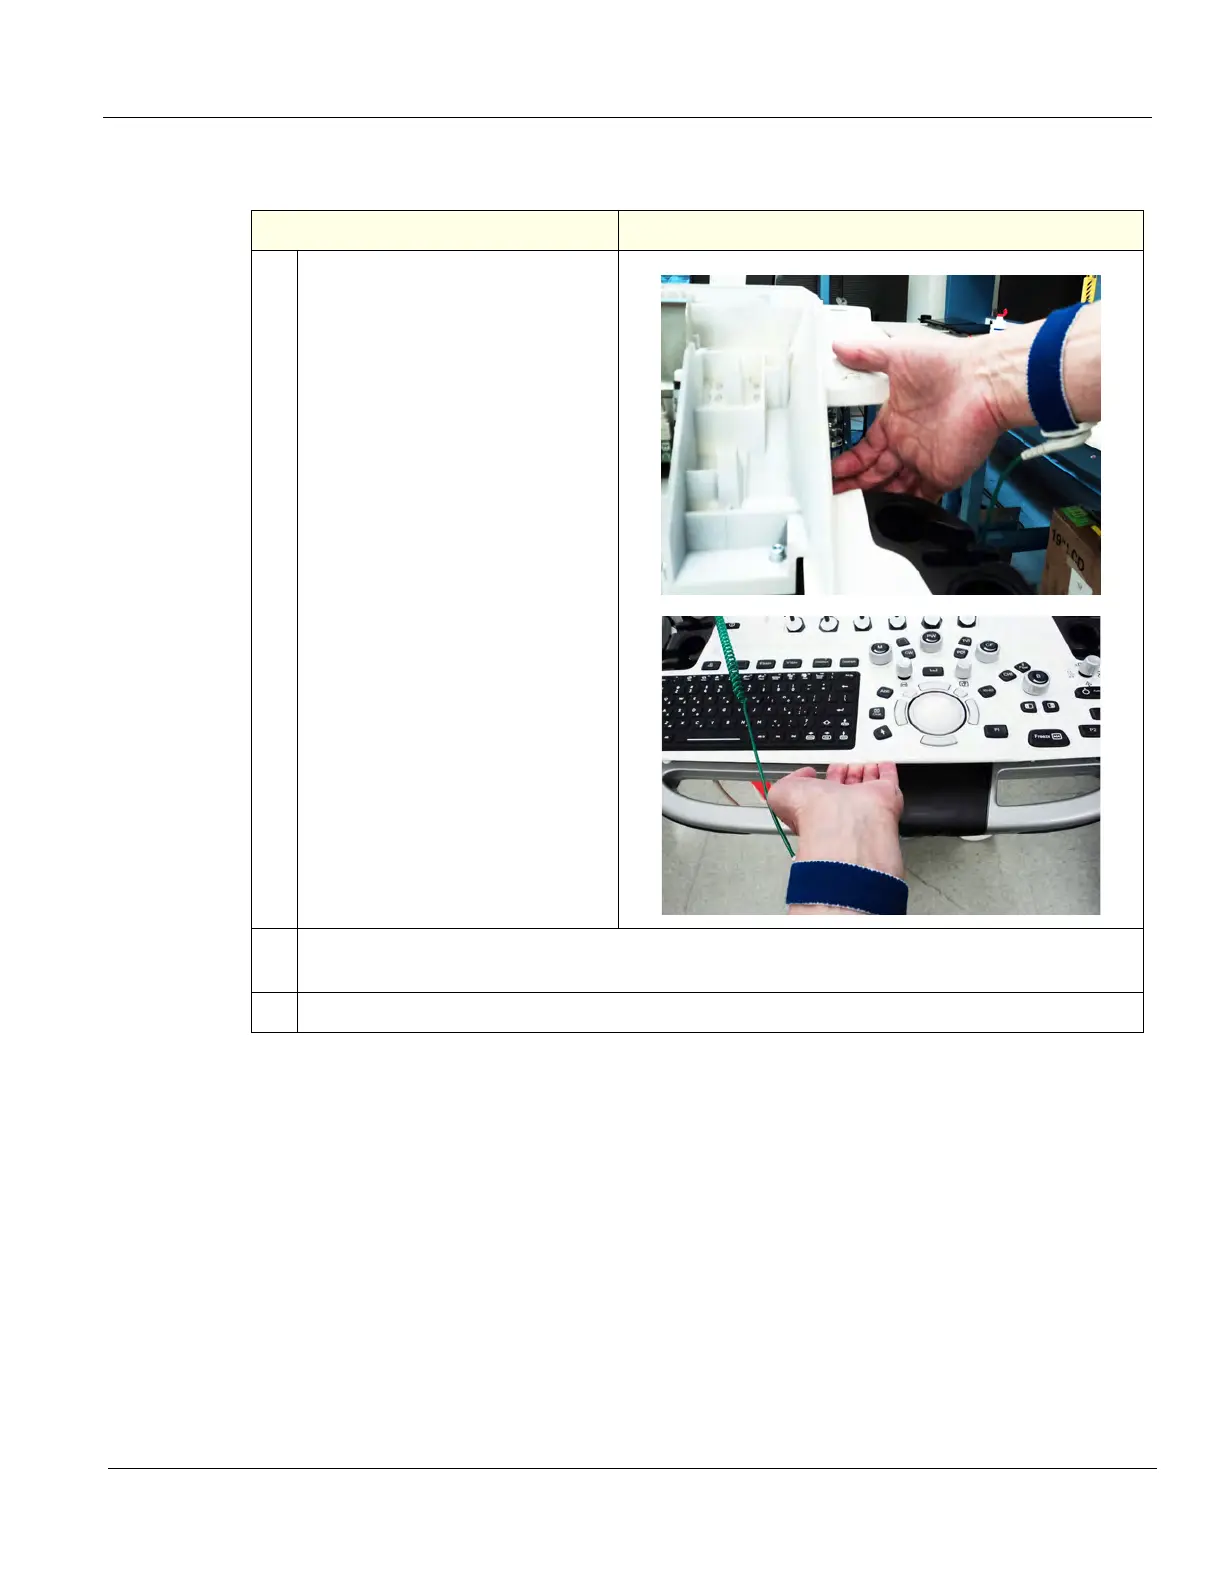
Lower OP installation
Table 8-143 Lower OP installation
Steps Corresponding Graphic
1. Make sure the cables are
accessible before placing the OP
into position.
Slide the OP between Upper UI
Frame and the Lower OP Frame.
Lift the front edge and gently flex
the Lower OP up and slide the OP
into place. It should seat easily and
in place.
2. Re-install the screws to secure the Lower OP to the Lower OP Frame five longer (rear) and the
three shorter (front).
3. Re-install the Upper OP and all Covers removed.