DIRECTION 5750007-1EN, REV. 1 LOGIQ E10 BASIC SERVICE MANUAL
Chapter 8 Replacement Procedures 8 - 131
3.
NOTICE
Be very careful when re-connecting the Video HDMI cable.
Avoid bending the delicate conductors, or cable damage may occur.
NOTICE
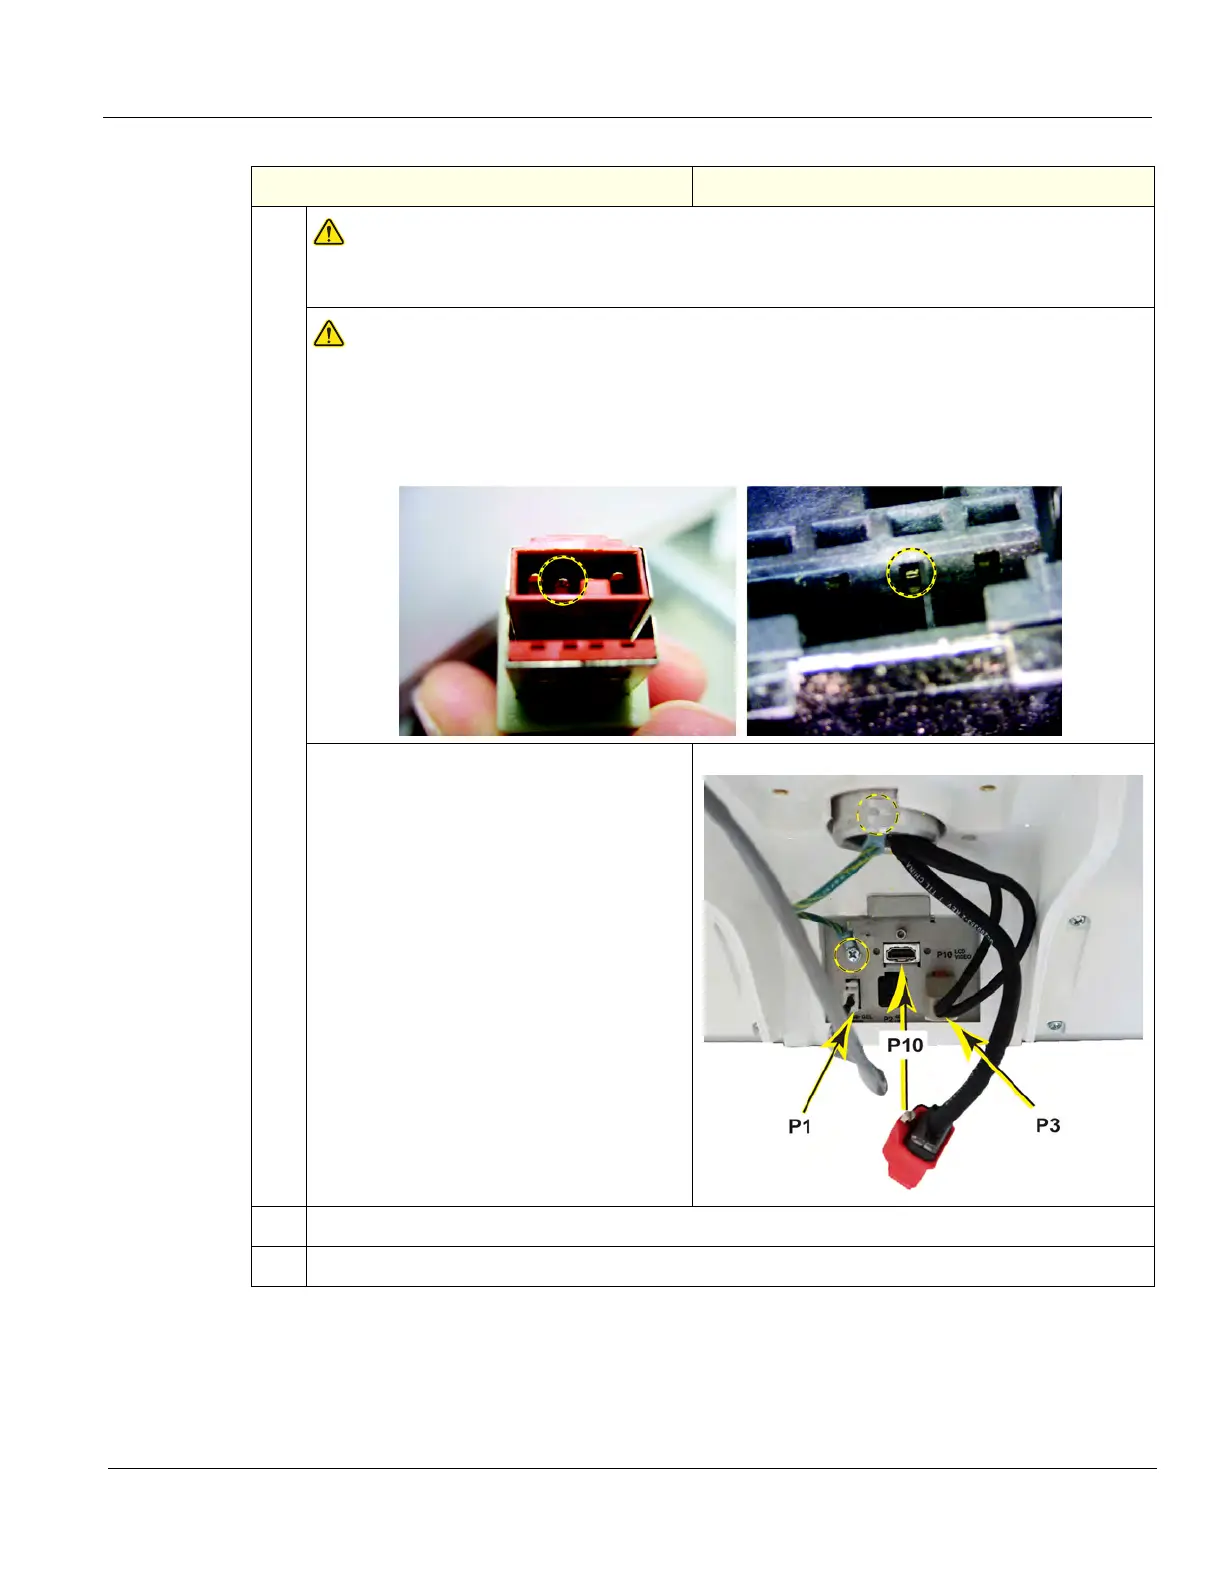
DO NOT connect the Monitor power cable to the power P2 or P3 connector on the
Bulkhead when the LOGIQ E10 is powered up. Damage to the Monitor Power Cable and/
or the Bulkhead Board can occur. See images below of damage that can occur.
48VDC pin in the P3 connector (center pin), shows damage.
The outside two pins are Ground. Cable left, Bulkhead Connector right.
Connect the remaining cables:
• Video (HDMI) P10,
• Power P3,
• Gel Warmer P1, if present
• Re-install Monitor Adapter ground cable
to the Bulkhead Board (circled).
4. Re-install the Upper OP/Touch Panel Assembly.
5. Re-install all Covers removed.
Table 8-148 Bulkhead Board installation
Steps Corresponding Graphic

 Loading...