DIRECTION 5750007-1EN, REV. 1 LOGIQ E10 BASIC SERVICE MANUAL
Chapter 8 Replacement Procedures 8 - 145
Lower Bezel removal
Table 8-167 Lower Bezel removal
Steps Corresponding Graphic
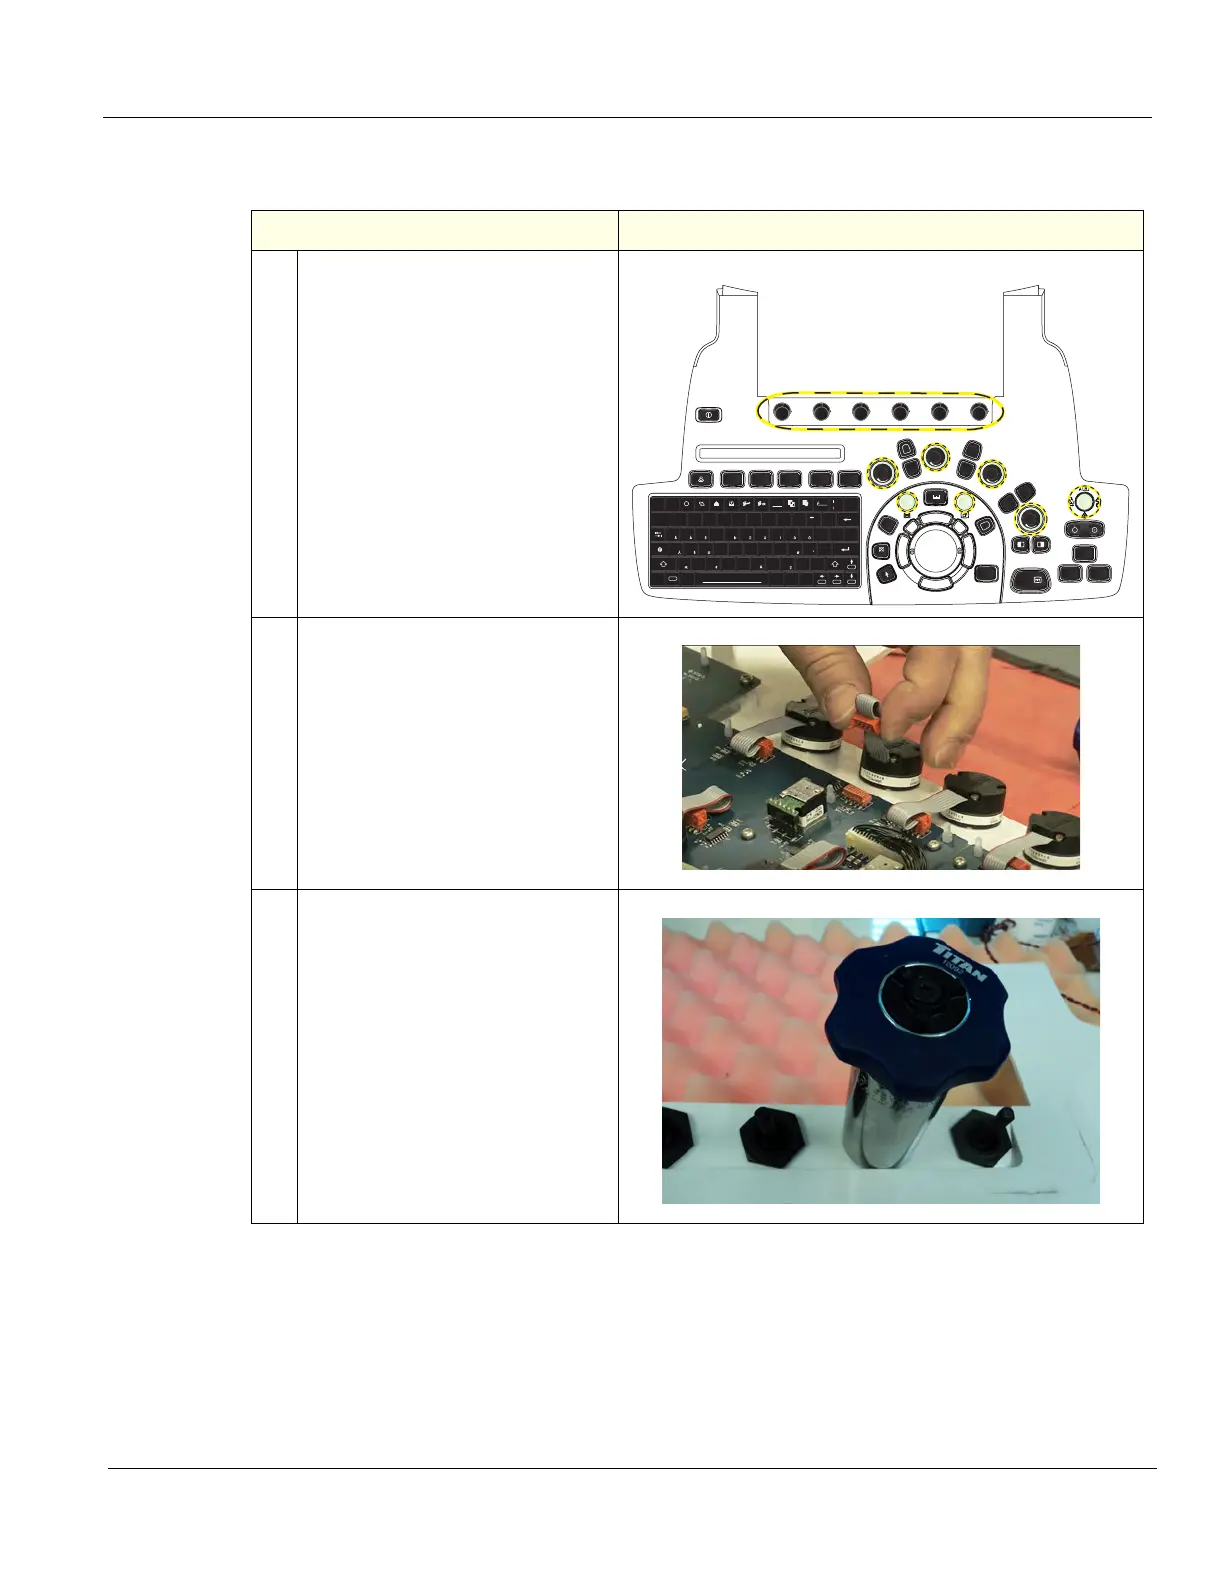
1. Remove the OP knobs.
If possible, place them in their
relative position on a table, or other
place where you can keep them
until you start the re-installation.
Before you install the Bezel, you
should move the OP controls over
to the new Bezel, one by one.
2. Disconnect the six Encoders for the
six Upper OP/Touch Panel.
Grasp the connector and pull
straight away from the board.
3. Loosen the Encoder nut, using a
24 mm socket or an adjustable
wrench and remove the nut.
Remove the remaining five.
Ctrl Alt Alt Gr Ins Del
Fn
Home
End
Pg Up
Prt Sc
Word
Delete
Pg Dn
@
F1
Esc
F2 F3 F4 F5 F6 F7
Set Home
F8 F9 F10
#$%^&*()
1
2
_
!
1
Q
AS DF GHJ K L
:
"
WE R T Y UI O P
{
}
|
[]
\
;
'
23456789
Home
0
-
~
`
ZXC V B NM
<>
?
,
.
/
+
=
?
Help Arrow Eject Spooler MacroMacro Copy Move
P3
P4
P2P1
Clear
Auto
Freeze
Abc
L R
ContrastV Nav
Elasto3D/4D
LOGIQ
View
Flow
B
CHI
TVI
PDI
CW
Y
PW
X
M
Z
CF
B