DIRECTION 5750007-1EN, REV. 1 LOGIQ E10 BASIC SERVICE MANUAL
8 - 174 Section 8-7 - Replacing Top Console Parts
Gel Warmer removal
Table 8-206 Gel Warmer removal
Steps Corresponding Graphic
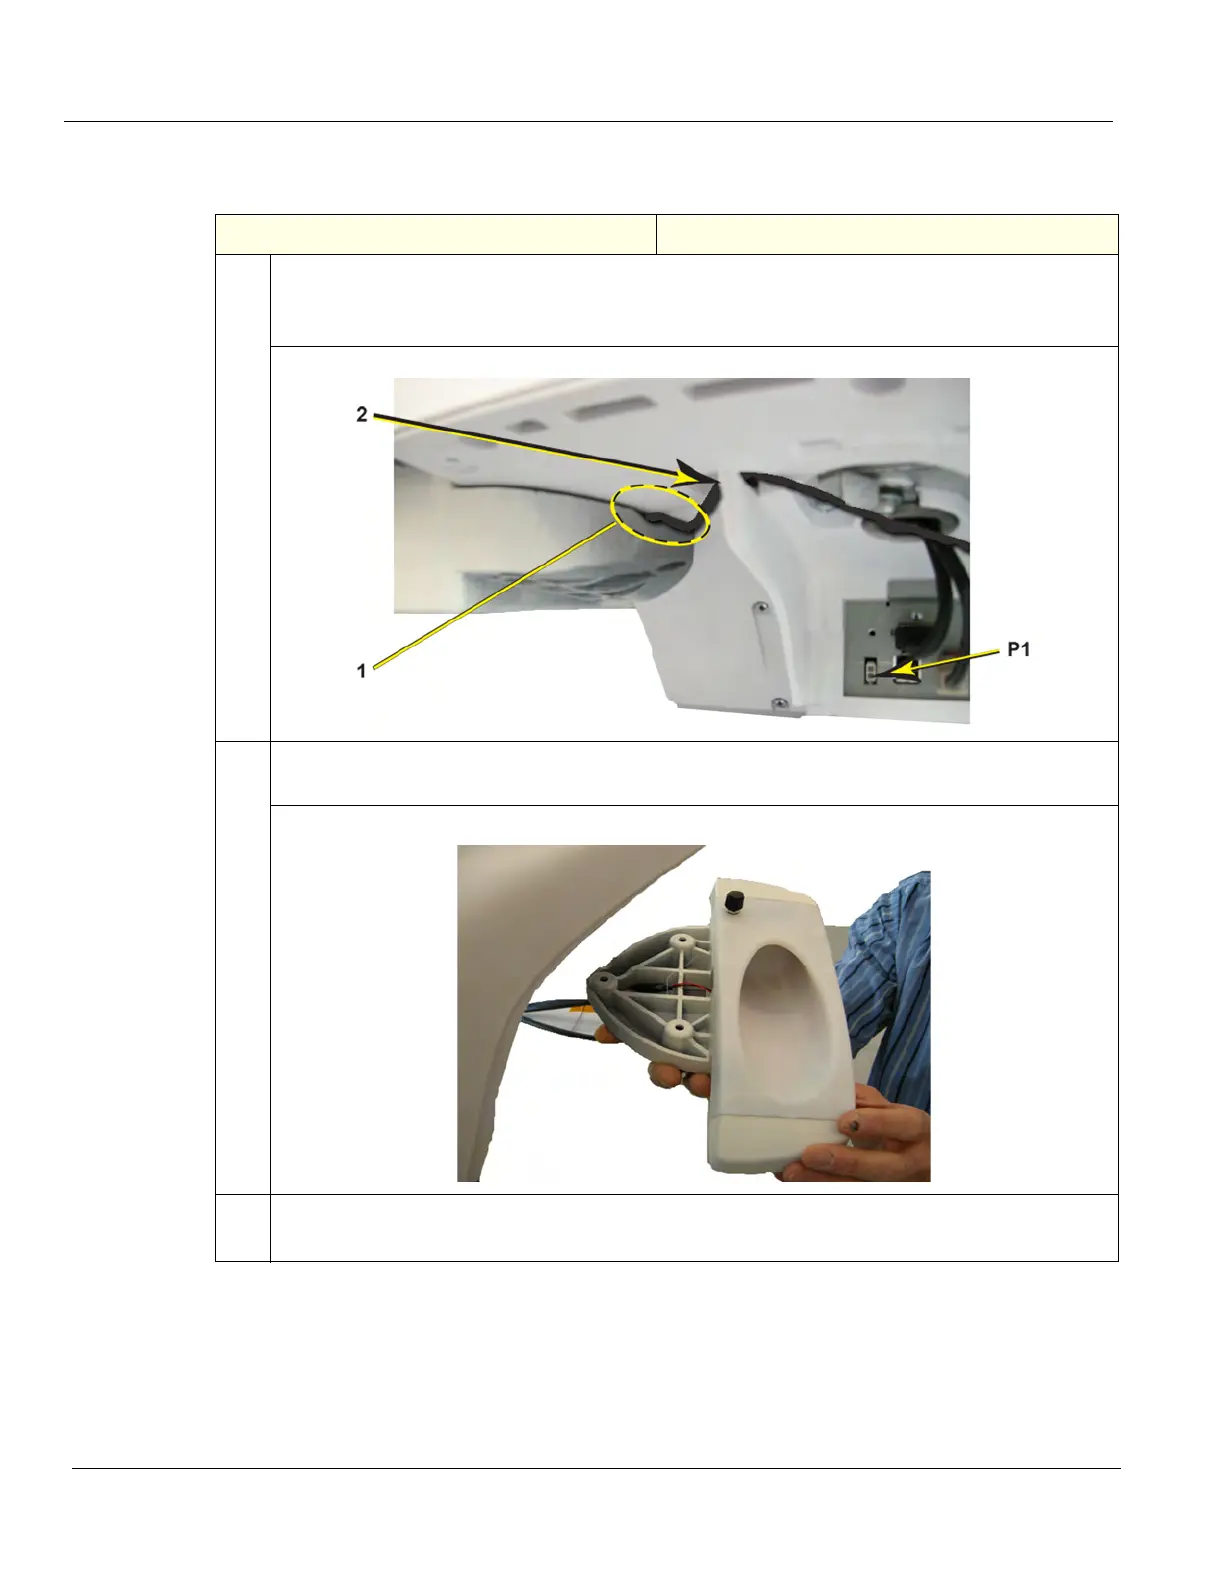
1. Disconnect the Gel Warmer cable from (P1) on the back of the bulkhead.
The Gel Warmer cable is routed through the cable channel (1) and the Lower Frame support (2).
Pull the Gel Warmer cable through the Lower Frame cable support to free the cable.
2. Remove the Options Holder (see: 8-7-22 "Options Holder / Left or Right Support replacement"
on page 8-169).
Options Holder removed, with Gel Warmer in place
3. Remove the two screws at the Gel Warmer base.
Lift the Gel Warmer out of the Options Holder.