DIRECTION 5750007-1EN, REV. 1 LOGIQ E10 BASIC SERVICE MANUAL
Chapter 8 Replacement Procedures 8 - 175
Gel Warmer installation
Table 8-207 Gel Warmer installation
Steps Corresponding Graphic
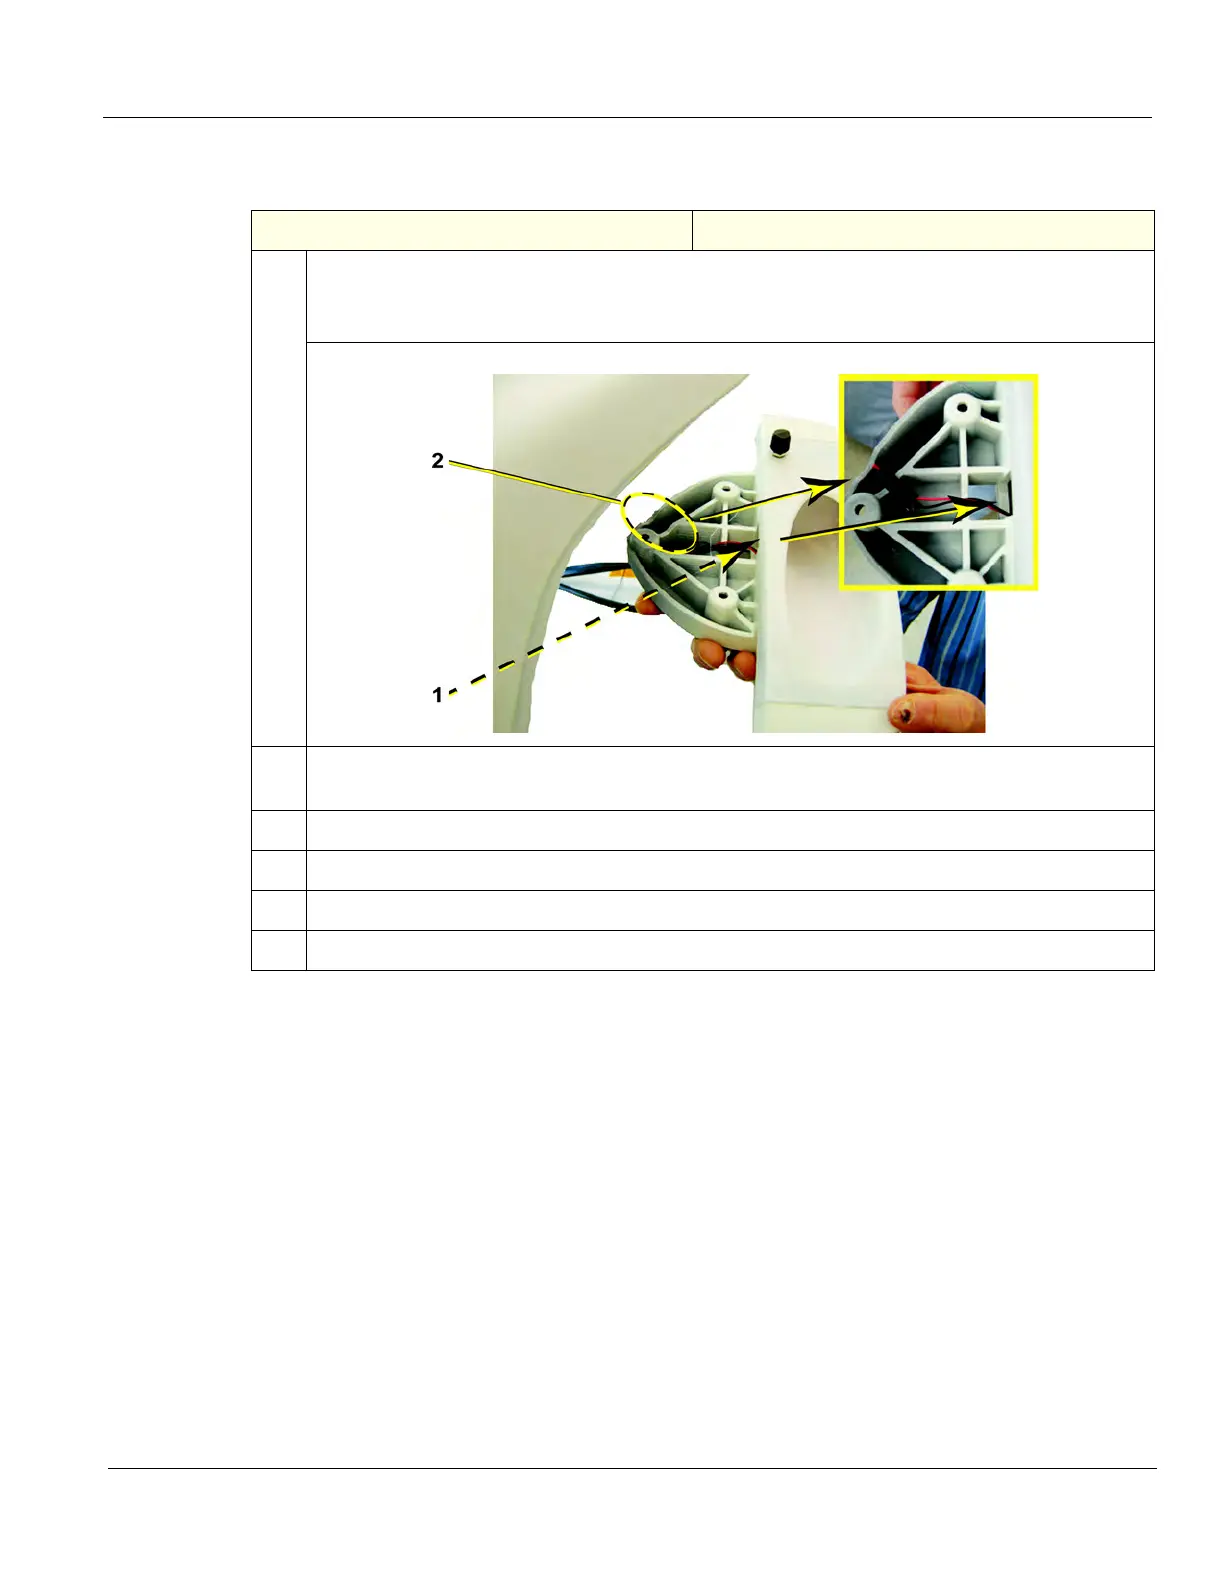
1. Place the Gel Warmer in the Options Holder, routing the cable through the cutout (1) between
the Options Holder and Gel Warmer and through the cable channel (2).
BE CAREFUL not to pinch the wires.
2. Install the two screws at the Gel Warmer base, securing the Gel Warmer to the Options Holder.
Torque: 1.5 Nm (1.1 lbf-ft).
3. Install Options Holder.
4. Route Gel Warmer cable through the Lower Frame cable support.
5. Connect Gel Warmer cable to the bulkhead.
6. Re-install Bulkhead Cover and all cover removed.