DIRECTION 5750007-1EN, REV. 1 LOGIQ E10 BASIC SERVICE MANUAL
8 - 224 Section 8-9 - Main Console parts replacement
Subwoofer installation
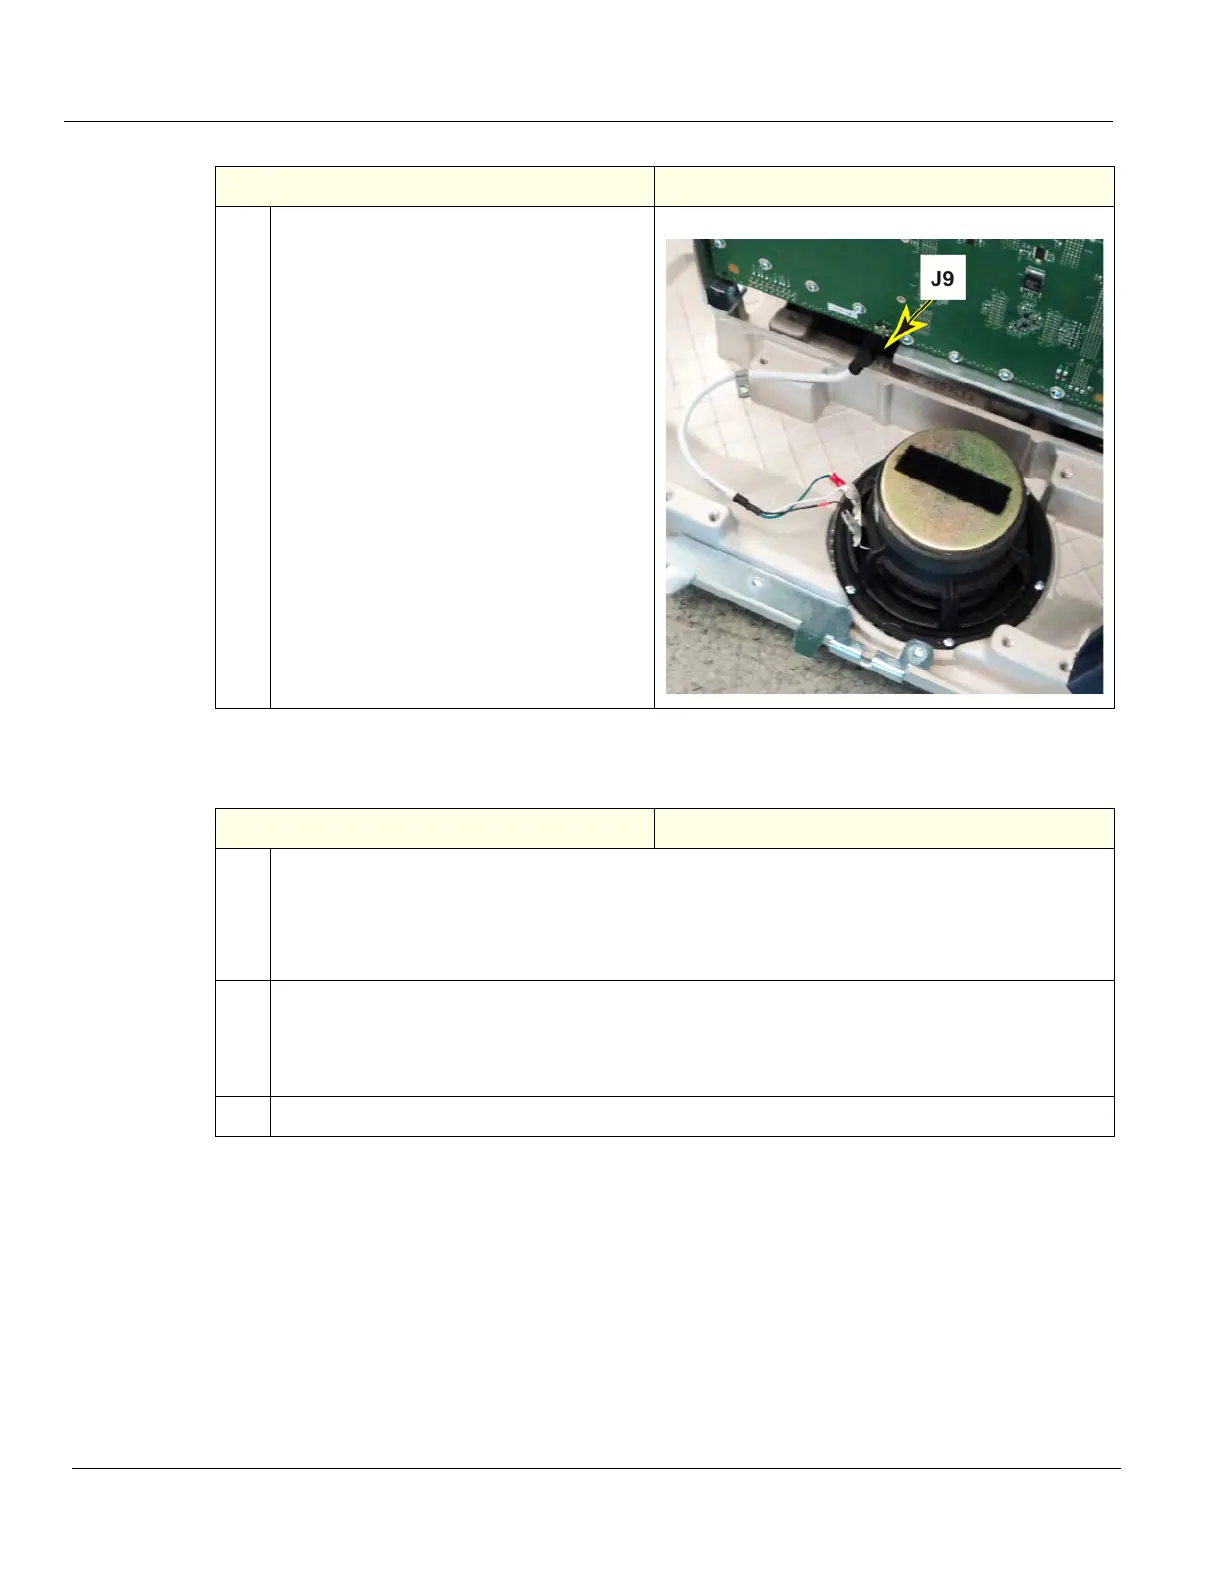
10. NOTE: The Option Bracket is removed to
show J9. It is not necessary to remove the
Option Bracket.
Disconnect the Subwoofer audio cable
from J9 on the Backplane.
Remove the six screws securing the
Subwoofer to the Base Casting, using a #2
Phillips screwdriver.
Note the location of the Subwoofer
orientation and the Subwoofer to Base
Casting ground lead, it they should be
returned in the same location.
Transfer the Audio Cable to the
replacement Subwoofer. Be sure to
connect the Audio Cable, ground to ground
and positive to positive.
If you suspect the Audio Cable is faulty,
replace it.
Table 8-246 Subwoofer installation
Steps Corresponding Graphic
1. Position the Subwoofer and Subwoofer to Base Casting ground lead to the location they were
removed.
Re-install the six screws to secure the Subwoofer to the Base Casting.
Torque 0.6 N-m {0.4 lbf-ft}).
Connect the Audio Cable to J9 on the Backplane.
2. Re-install the Option Box.
Re-install the screw to secure the Subwoofer Audio Cable grounding clamp to the Option Box.
Re-install all Options and Cabling removed. Torque all the flange nuts to 1.5 Nm (1.1 lbf-ft) and
screws to 1.1 Nm (0.8 lbf-ft), unless otherwise specified.
3.
Re-install all Covers removed.
Table 8-245 Subwoofer removal
Steps Corresponding Graphic