DIRECTION 5750007-1EN, REV. 1 LOGIQ E10 BASIC SERVICE MANUAL
8 - 242 Section 8-10 - Casters and Brakes replacement
Pedal Mechanism installation
Table 8-265 Pedal Mechanism installation
Steps Corresponding Graphic
1.
Position the Pedal Mechanism and install the top six fixing screws. Torque: 24 Nm (17.7 lbf-ft).
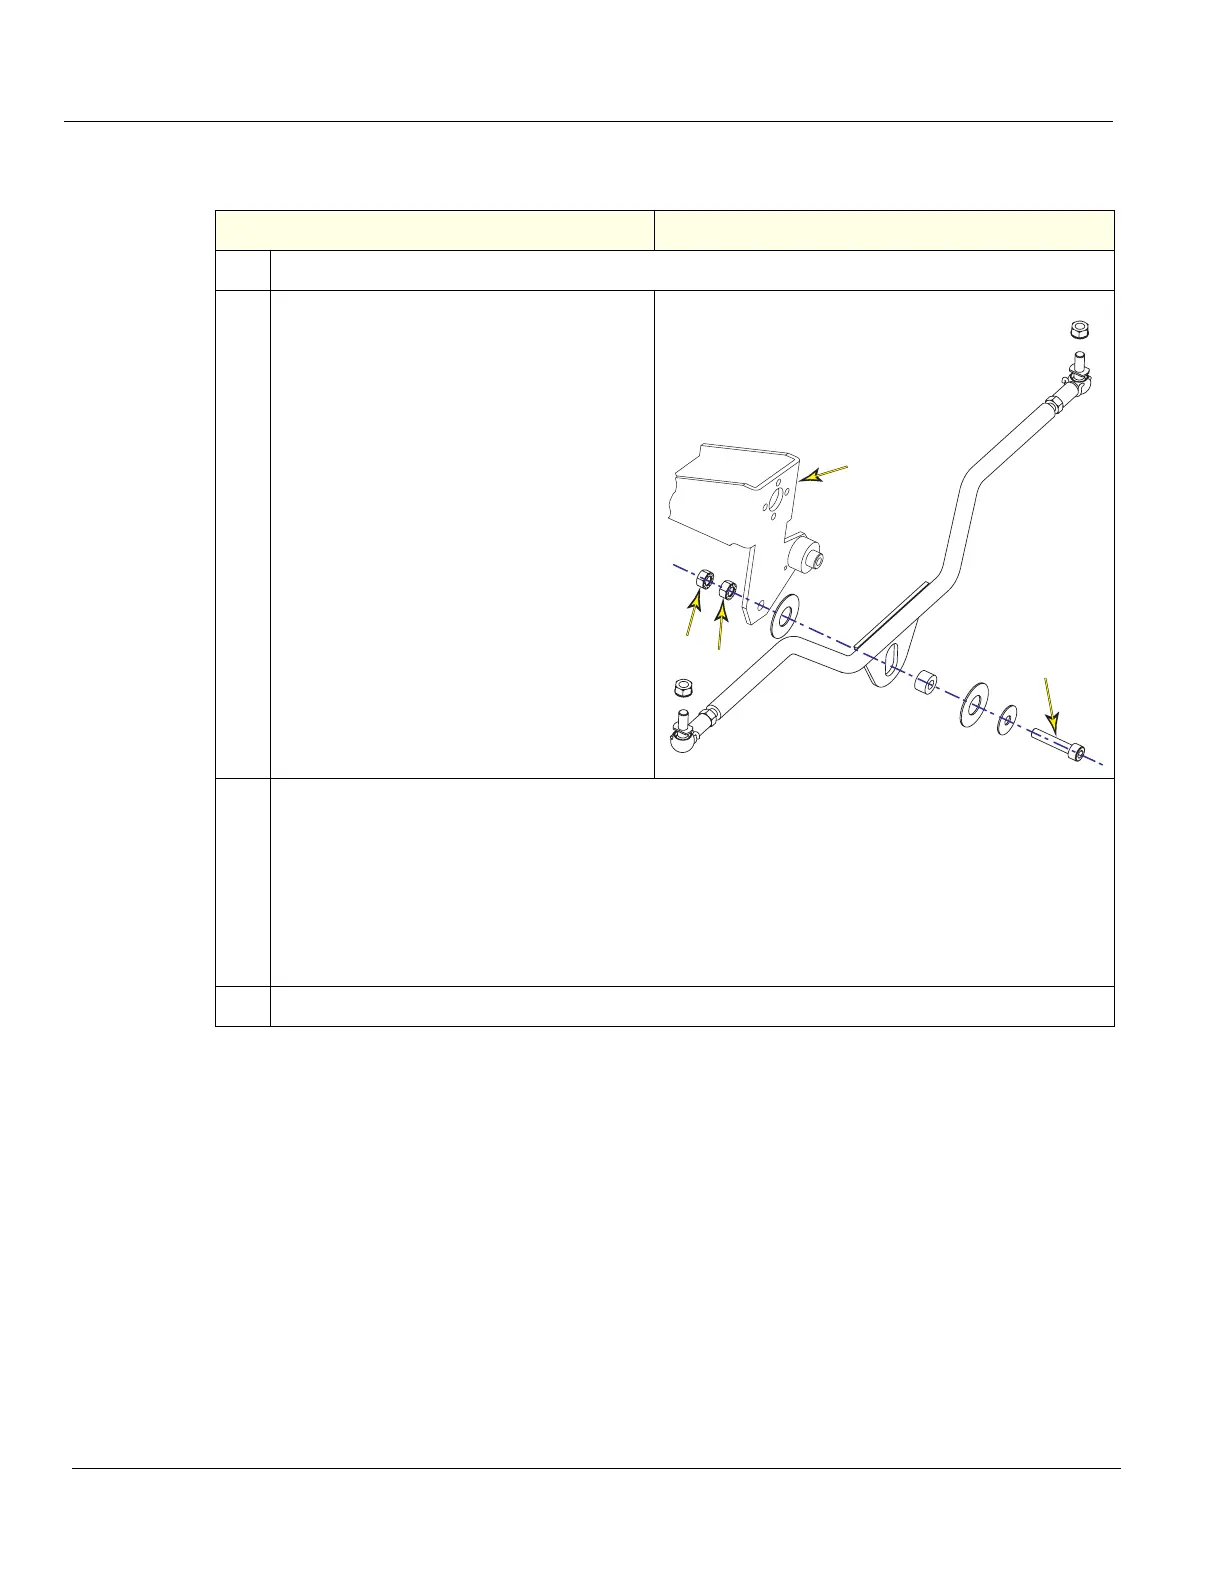
2.
Re-install the pivot hardware as it was
removed.
Secure flange nut (1), facing inward and
screw the pivot screw (3) until they are
hand tight.
MAKE SURE the nylon washers slide over
the spacer and ARE NOT pinched by
Spacer.
Secure flange nut (1) using a 10 mm open
end wrench and tighten the Pivot screw (3)
using a 5 mm hex wrench until they are
secure.
Install the second 10 mm "locking" nut (2);
DO NOT disturb the position of nut (1).
Secure nut (1) with one wrench and torque
“locking” nut (2) 10 Nm (7.4 lbf-ft), locking
the nuts together.
(Pedal Mechanism Assembly A.)
3.
Verify that the pedals work as intended:
a. Push down brake pedal (from “free” position), release it and verify the pedal to return quickly
up to half position.
b. Try to move the Ultrasound System back and forward; and verify that the brake pedal stays
in brake mode.
c. Push down direction lock pedal and verify the pedal to return quickly.
d. Move Ultrasound System and verify Casters stay in direction lock mode.
e. At push down, observe the “Latches” to come over pivot T-Shape, and interfere by engaging.
4.
Re-install all Covers removed.
1
2
3
A