DIRECTION 5750007-1EN, REV. 1 LOGIQ E10 BASIC SERVICE MANUAL
Chapter 8 Replacement Procedures 8 - 287
2.
Note the routing of the Cables and the position of the Clamps, the Cables must be routed in the
same manner.
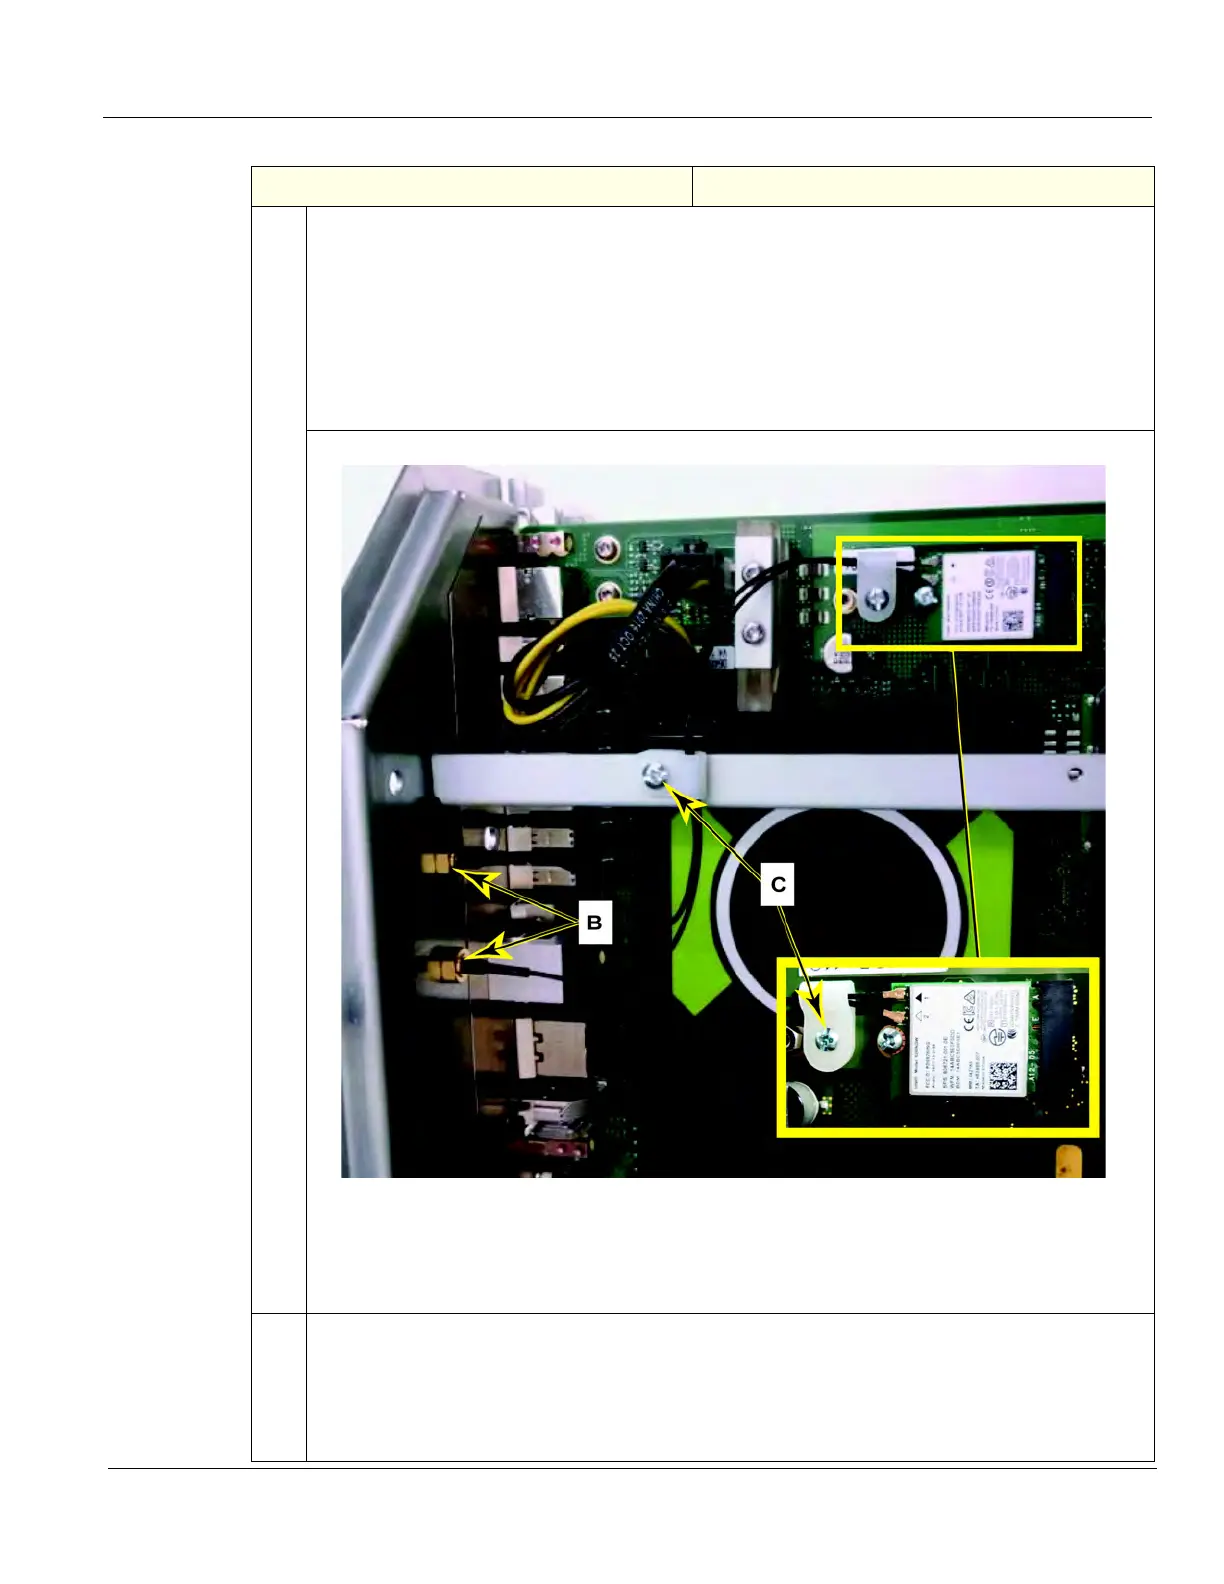
Remove the two coaxial antenna cables from the WLAN Card.
Remove the screw securing the WLAN Card to the ECB, using a #1 Phillips screwdriver. Grasp
the WLAN with your forefinger and thumb and gently slide the WLAN away from the ECB.
Remove the screws (B) securing the Cable Clamps.
Stand the ECB, in the direction it is installed (BIOS battery up), secure the Cable nuts (C), using
an 8 mm wrench and loosen the nuts on the face of the ECB I/O, using an 8 mm wrench.
3.
Place the lockwashers onto the threaded shaft of the Cables and install the new Cables. Torque
the nuts on the face of the ECB to 0.7 ±10% Nm.
Install the new Clamps, as shown. Torque to 0.15 ±10% Nm. Route the Cables as shown.
Secure the replacement WLAN Card to the ECB. Torque to 0.15 ±10% Nm.
Connect the Cables to the WLAN Card.
Table 8-312 WLAN replacement
Steps Corresponding Graphic