DIRECTION 5750007-1EN, REV. 1 LOGIQ E10 BASIC SERVICE MANUAL
Chapter 8 Replacement Procedures 8 - 337
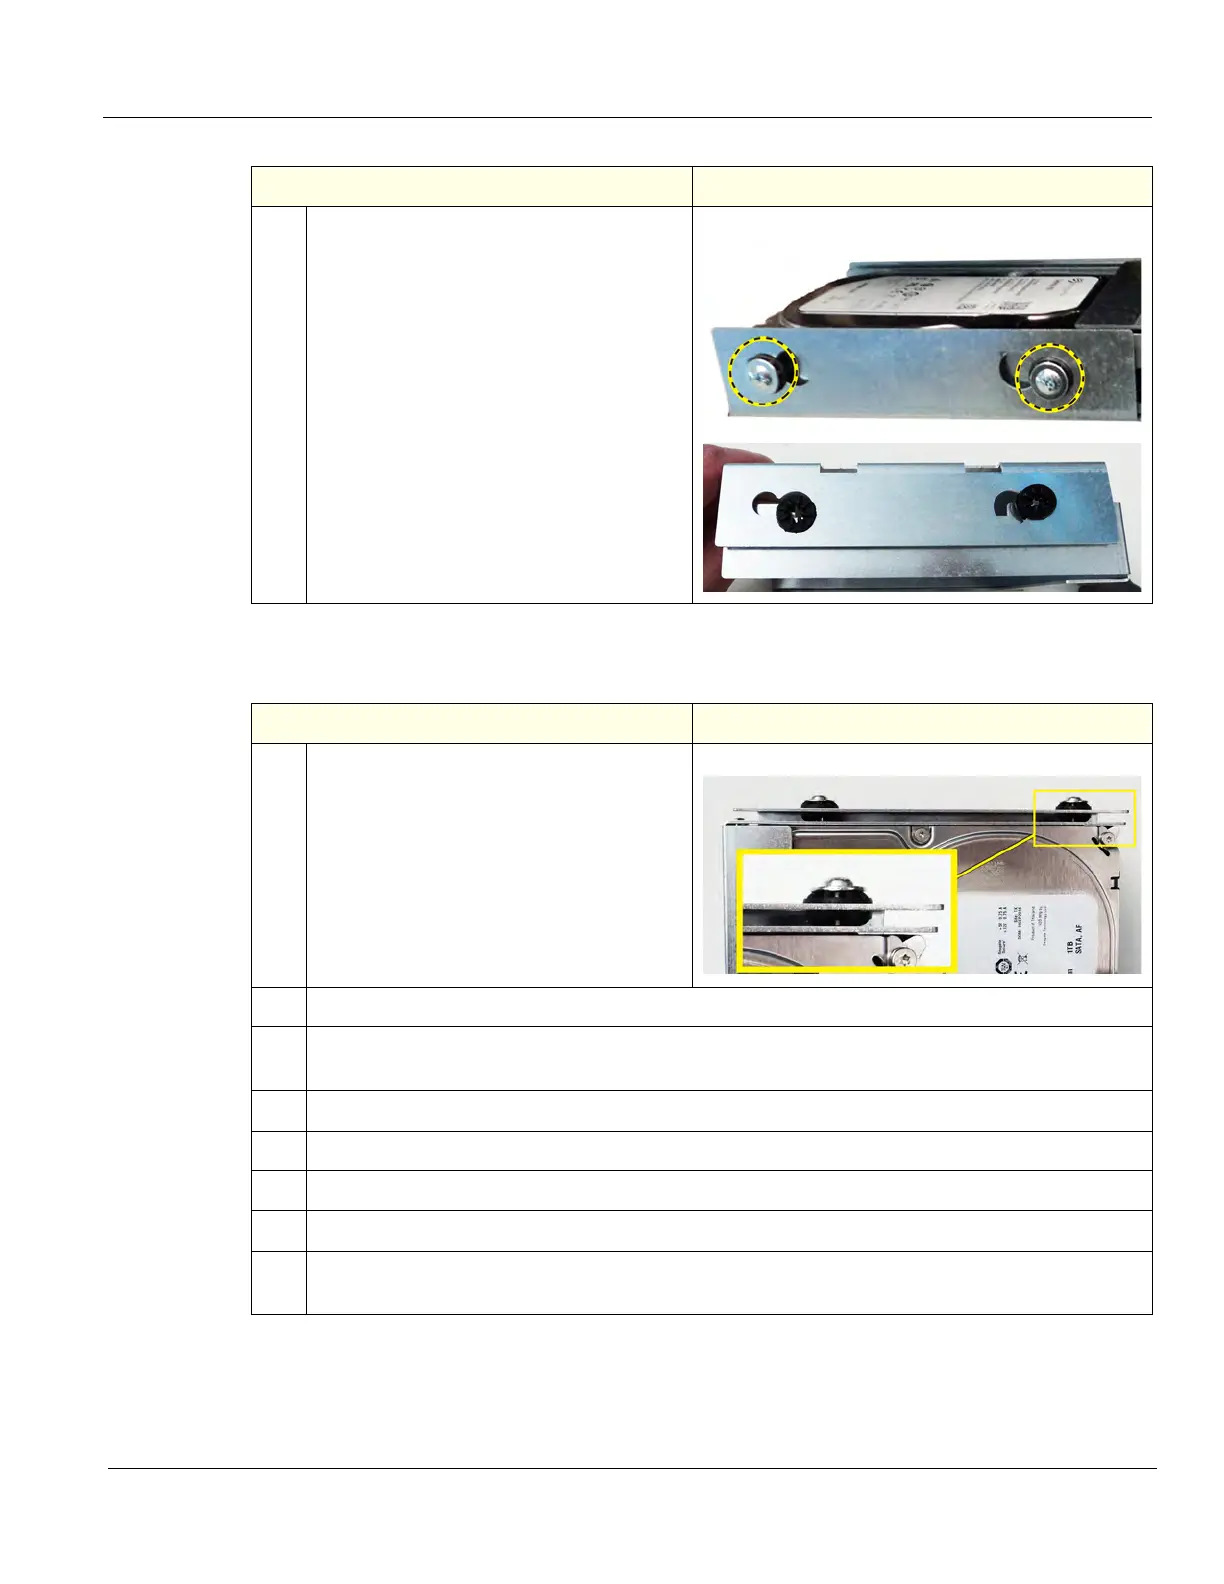
HDD installation
3.
Loosen the four screws securing the HDD
the HDD housings. Two on each side.
The screws do not have to be removed. the
isolator grommets will hold the screws.
Slide the HDD out of the inner housing.
If the screws and grommets are removed,
the grommets can be re-inserted into the
larger holes and centered in the smaller
holes.
Table 8-347 HDD installation
Steps Corresponding Graphic
1.
Slide the replacement HDD into the HDD
inner housing.
The isolator grommets MUST BE installed
to isolate the inner housing from the outer
housing.
Tighten the four screws securely, they will
bottom out when they are installed.
2.
Re-connect the HDD cable from J1 to the HDD and tighten the connector screws.
3.
Re-install the nut that secures the HDD housings to the DVD bracket. Torque to 1.5 Nm
(1.1 lbf-ft).
4.
Re-install all Covers removed.
5.
Power up the LOGIQ E10.
6.
Re-install the Base Load and Application Software.
7.
Enter the TCPIP settings and Option strings for the LOGIQ E10.
8.
Restore the Patient Archive images, Report Archive, User-Defined Configuration (Customer
Presets), and Service settings.
Table 8-346 HDD removal
Steps Corresponding Graphic