DIRECTION 5750007-1EN, REV. 1 LOGIQ E10 BASIC SERVICE MANUAL
8 - 370 Section 8-12 - MPS (Main Power Supply) replacement
MPS removal
Table 8-377 MPS removal
Steps Corresponding Graphic
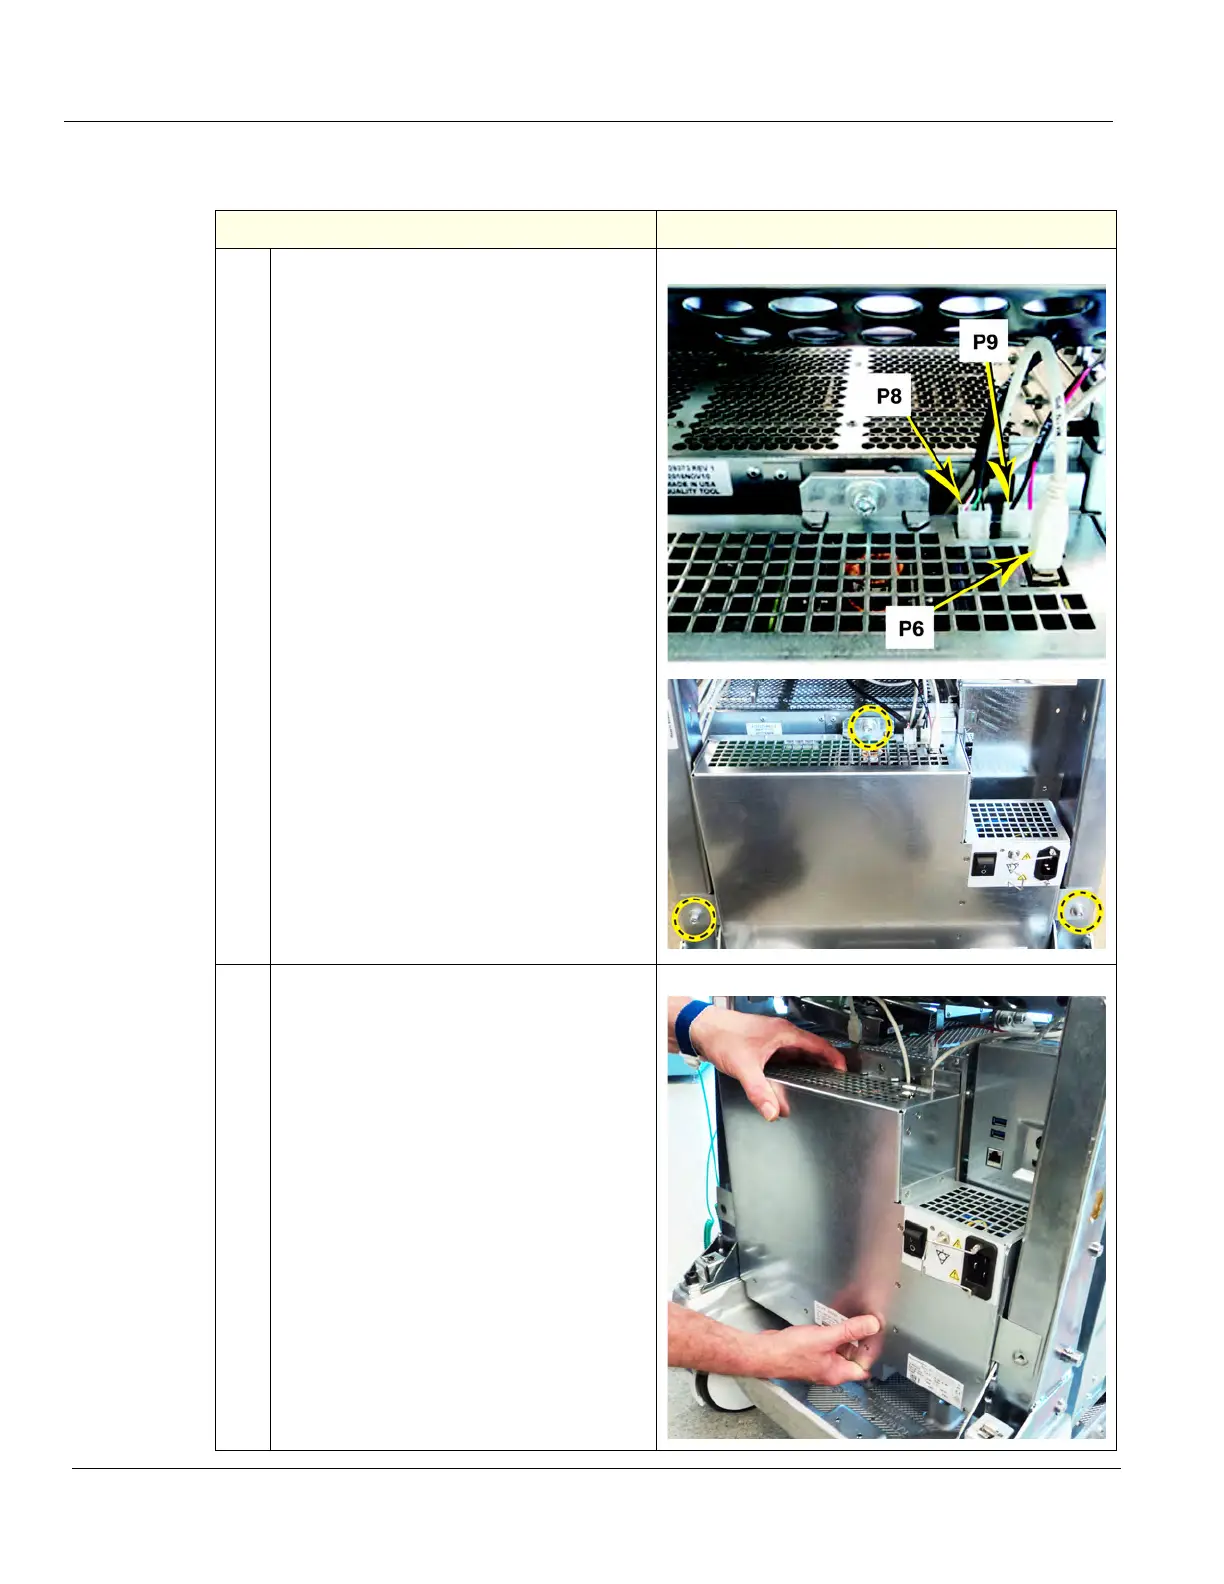
1.
NOTE: When the Ultrasound System is in
standby, the MPS (PS) will be warm. This is
normal for the PS.
Disconnect the PS Cables:
P6 - USB to ECB J8.
P8 - 24VDC to Printer, if present.
P9 - 48VDC to XYZ Controller.
Remove the three screws that secure the
PS, using a 5 mm hex wrench.
Main PS and mounting
2.
Ease the PS away from the fang bracket,
located at the top mounting screw, while
supporting the PS at the bottom center.
Pull/slide the entire PS backwards until the
connectors to the Backplane are unseated.
Pull away from the bottom and upward to
remove the PS.