DIRECTION 5750007-1EN, REV. 1 LOGIQ E10 BASIC SERVICE MANUAL
8 - 388 Section 8-14 - Cables replacement
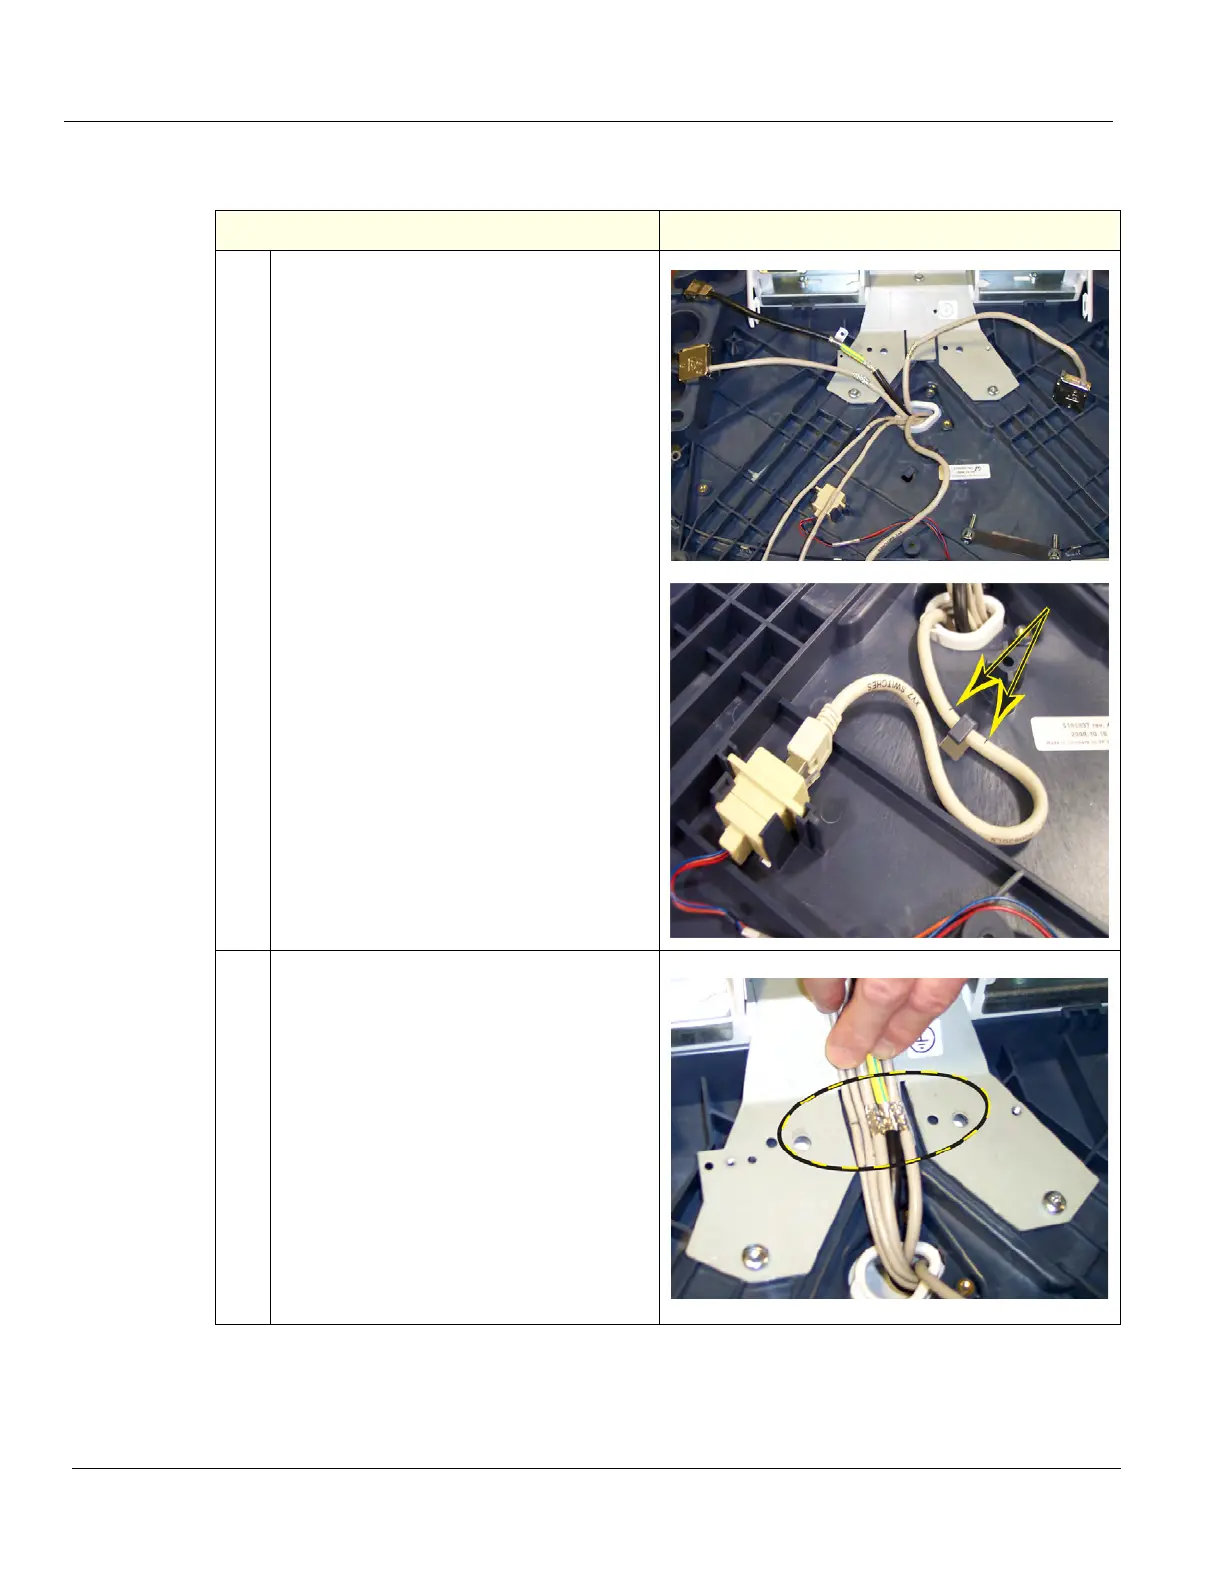
Main Cable (Harness) installation (cont’d)
Table 8-393 Main Cable (Harness) Routing
Steps Corresponding Graphic
1.
Lay out the cables as shown. DO NOT
cross any cables or allow any excess length
in the Lower OP Frame, except the XYZ
USB Cable (shown below). Make sure the
cables are not crossed coming into the
Lower OP Frame.
Route the USB Cable for the XYZ Switch as
shown. Use the markings on the cable to
position in the tab.
2.
There should only be enough cable for the
cable ground shielding to be under the
Grounding Strap Clamp when it is secured.
Also, the USB cables have markings and
should be in the same area.
Notice that the cables are not crossed or
snug when routed into the Lower OP
Frame.
NOTE: Apply Clamp loosely, then connect
cables. Adjust lengths as necessary and
tighten the Clamp.