DIRECTION 5750007-1EN, REV. 1 LOGIQ E10 BASIC SERVICE MANUAL
Chapter 8 Replacement Procedures 8 - 389
3.
Lay out and arrange the cables from right to
left following the Cable Configuration. Make
sure the cables are not crossed when
routed from the Lower OP Frame into the
Z-Mechanism.
NOTE: The cables coming out of the Main
Cable Harness into the Z-Mechanism
MUST NOT be crossed or run under each
other. Crossing the cables will reduce the
amount of slack necessary for the cables to
flex when the Z-Mechanism and
X-Mechanism moves.
Run all cables in parallel according to the
cable configuration.
Cable configuration, starting from the
right side:
• Video Cable
• XY Cables - two
• Park Lock Cable
• Controller Cable
• USB Cables - two
• Bulkhead/OP Cable
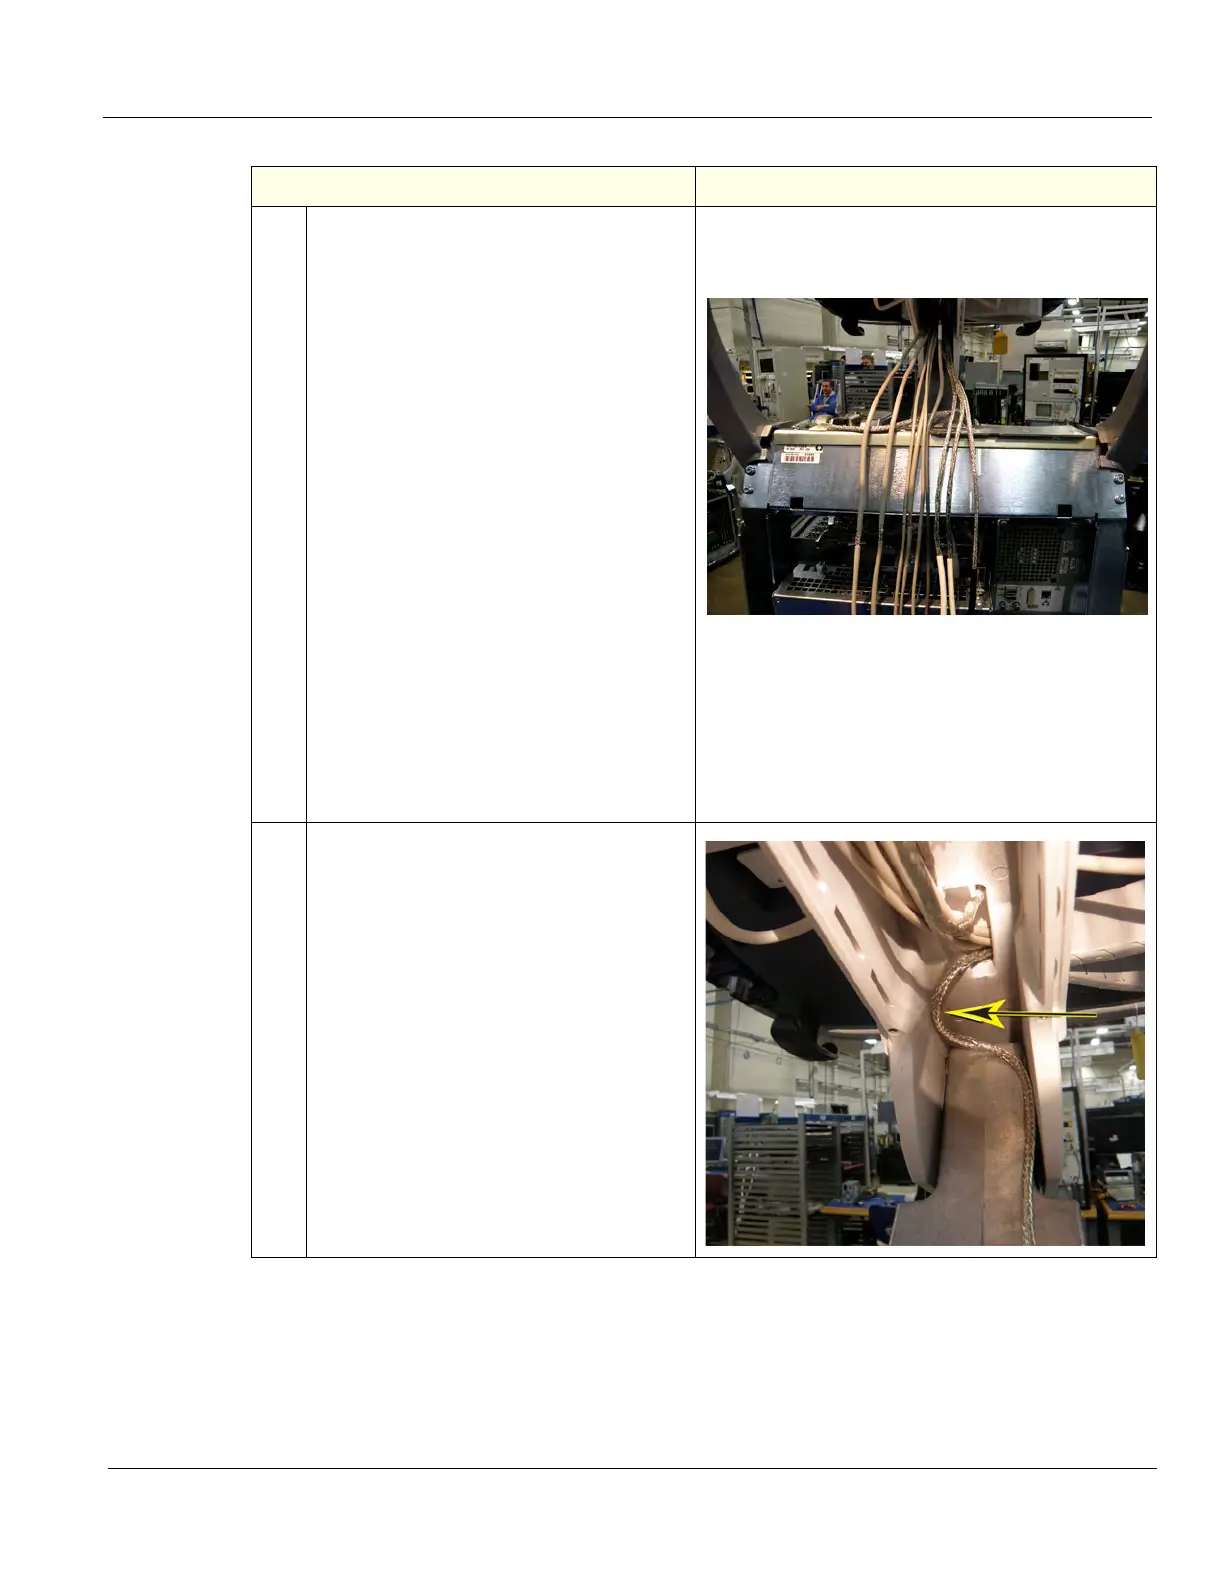
4.
Route the Video Cable along the Z-
Mechanism first. Create an “S“ with the
Cable. This will allow the Video Cable to
flex as the Z-Mechanism moves.
NOTE: The Video Cable is on the bottom of
the Main Harness. This is the correct
configuration.
Table 8-393 Main Cable (Harness) Routing
Steps Corresponding Graphic