DIRECTION 5750007-1EN, REV. 1 LOGIQ E10 BASIC SERVICE MANUAL
8 - 392 Section 8-14 - Cables replacement
Connect Main Cable (Harness) Cables
1.) Connect the D-SUB to J21 on the BEP I/O.
2.) Connect the DVI to J22 on the BEP I/O.
3.) Connect two cables to the XYZ Control box.
4.) Route and connect the two XY cables.
5.) Connect the HDMI connector to the Bulkhead.
6.) Install the Cable Clamps (Torque: 3 Nm {2.2 lbf-ft}).
7.) Connect the cable to the Z-switch.
8.) Power up LOGIQ E10.
9.) Verify that the XYZ functions operate as they should.
10.)Power down LOGIQ E10.
11.)Install all covers.
12.)Perform Functional Checks. See: - Verification and "Functional Checks" on page 8-393.
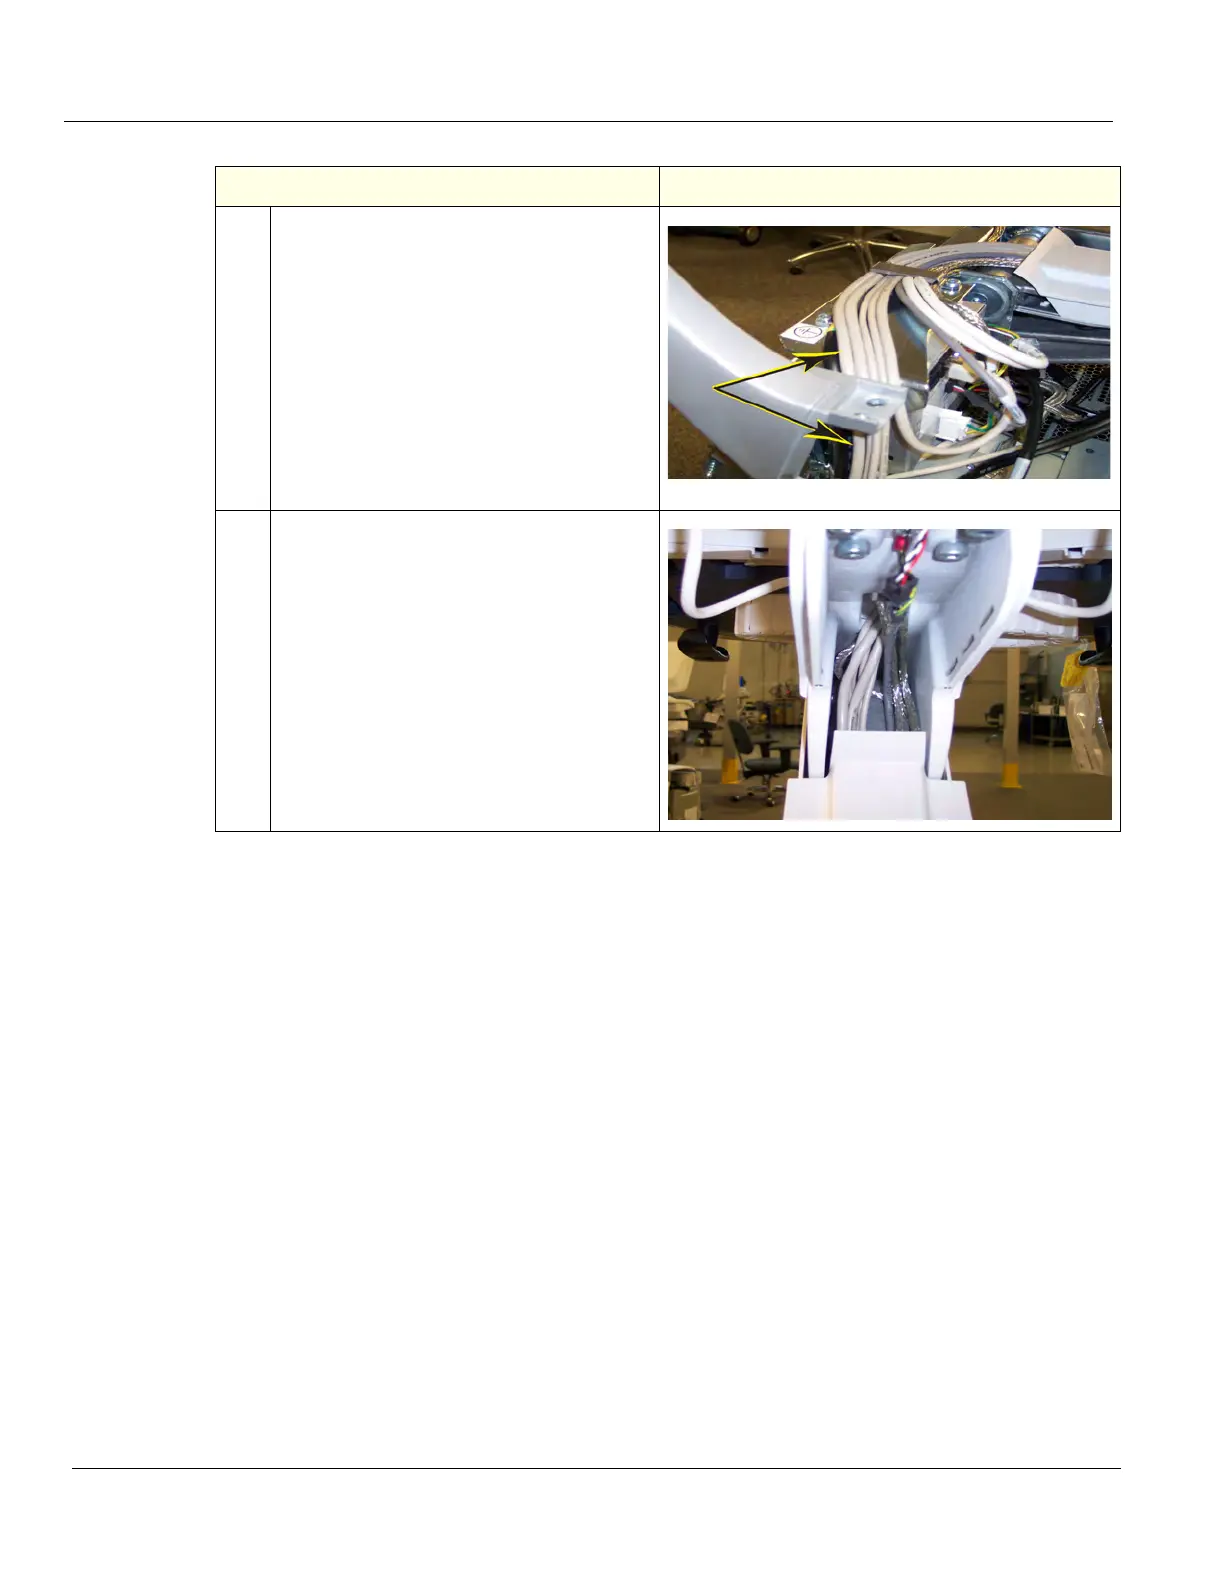
9.
Follow the Cable Configuration, except for
the Video Cable which will be routed first,
then the remaining cables (as shown).
Make sure the cables are flush and behind
the handle. If not, the Upper Cover will
pinch the cables and will be difficult to
install.
NOTE: The Video Cable is routed
underneath the other cables. All cables
MUST lie flat.
10.
After the Grounding Clamp and P-clamp
are tightened, gently press the cables into
the Z-Mechanism so the slack is absorbed,
this will allow the cables to flex as the
Z-Mechanism moves.
Perform a manual test of the Z-Mechanism
and XY-Mechanism to ensure the cables
flex into the Z-Mechanism and not out. The
cables should not chafe against the Main
Cable Cover and Column Cover Assembly.
Table 8-393 Main Cable (Harness) Routing
Steps Corresponding Graphic