EasyManuals Logo

GE LOGIQ E10 Service Manual

GE LOGIQ E10
778 pages
To Next Page IconTo Next Page
To Previous Page IconTo Previous Page
Page #675 background imageLoading...
Page #675 background image
DIRECTION 5750007-1EN, REV. 1 LOGIQ E10 BASIC SERVICE MANUAL
Chapter 8 Replacement Procedures 8 - 429
Printer (Digital Graphic) installation
Table 8-424 Printer (Digital Graphic) installation
Steps Corresponding Graphic
1.
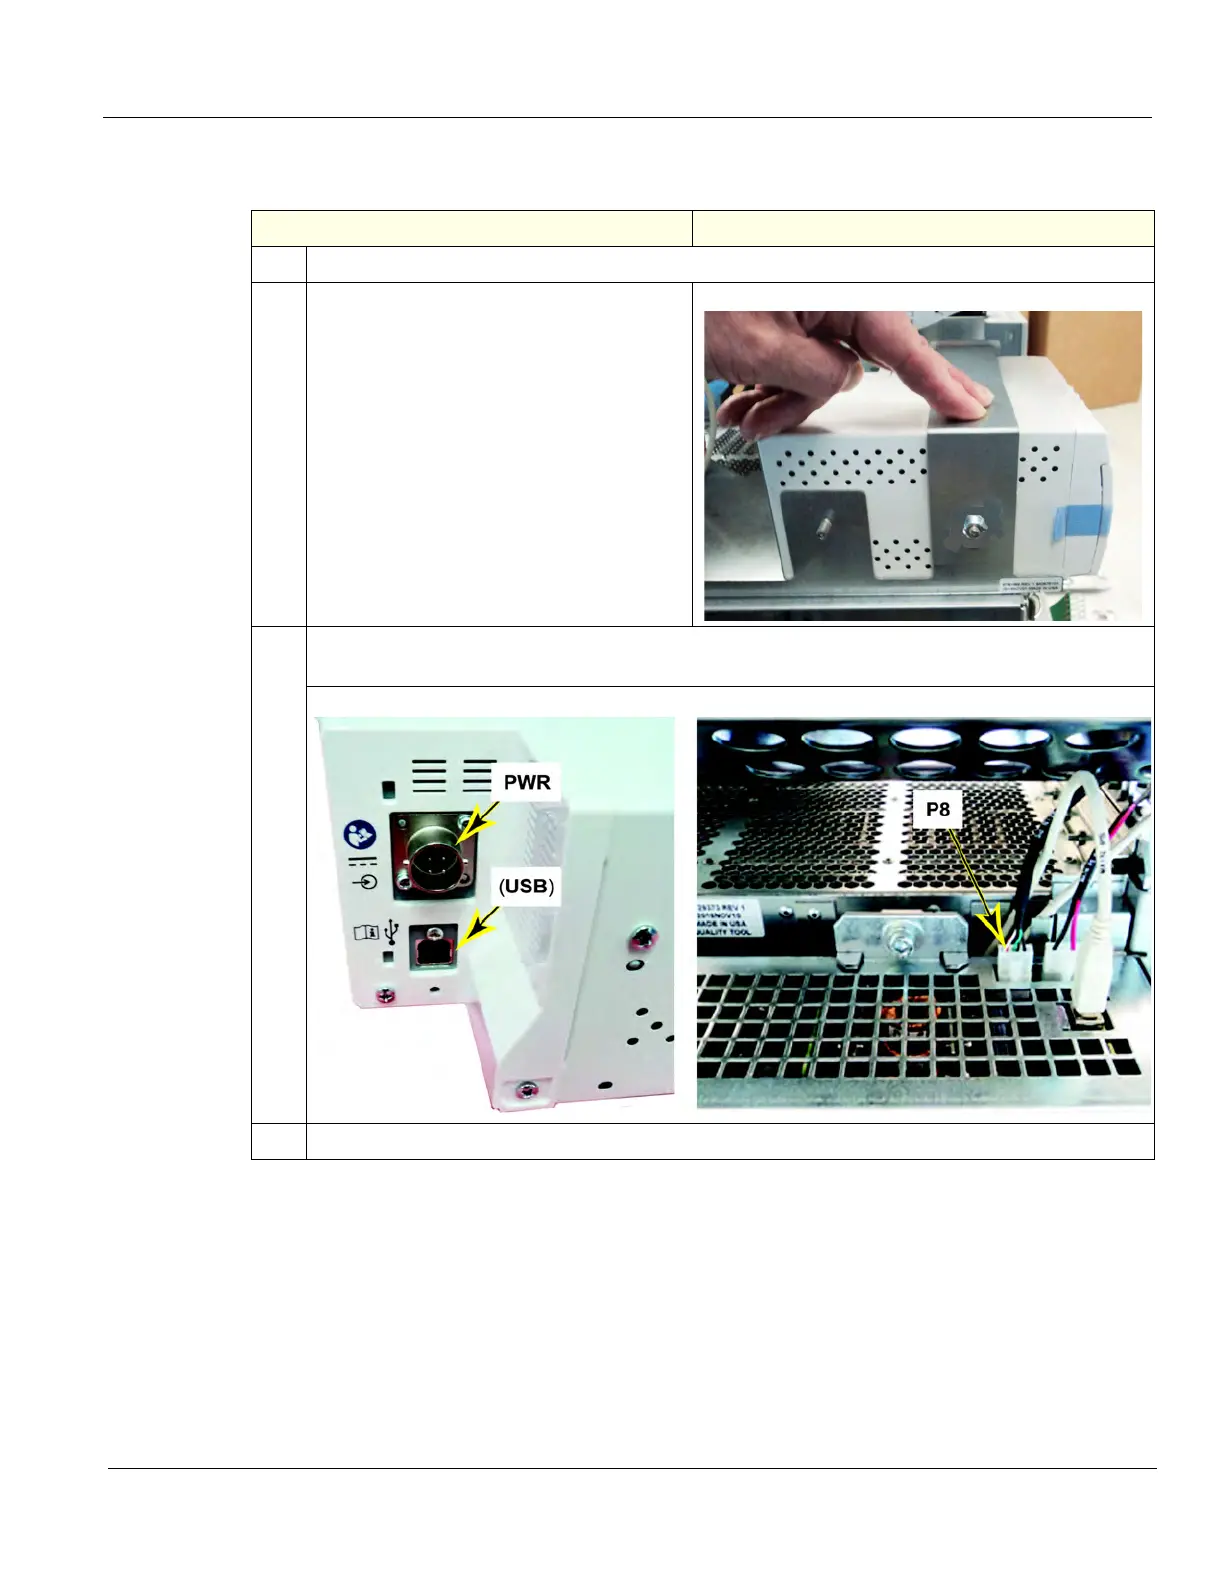
Slide the Printer into the Tray as noted in removal.
2.
Connect the cables to the back of the
printer. Use the new cables provided with
the Printer.
Re-install flange nut and apply slight
pressure, down on the fixing bracket while
tightening the nut.
Remove shipping tape.
3.
Re-connect the USB Printer Cable from J12, of the ECB and the Power Cable from the MPS
(P8, 24VDC) to (PWR) on the Printer.
4.
Re-install all Covers removed.

Table of Contents

Other manuals for GE LOGIQ E10

Questions and Answers:

Question and Answer IconNeed help?

Do you have a question about the GE LOGIQ E10 and is the answer not in the manual?

GE LOGIQ E10 Specifications

General IconGeneral
TouchscreenYes
3D/4D ImagingYes
ApplicationsVascular, Cardiac, Musculoskeletal, OB/GYN
Image StorageUSB, Network
ConnectivityDICOM, Ethernet, Wireless

Related product manuals