Launch
Use this section for preight check.
1. Charge UAV battery and make sure, that battery’s LED status bar showed full
charge level (see Battery and Charger section for details).
2. Create and save new project in Geoscan Planner software to upload it directly
before ight (see Geoscan Planner Software section for details).
3. Assemble UAV launcher (see Launcher section for details).
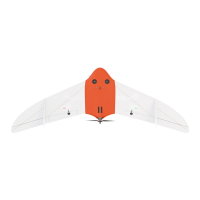
4. Assemble UAV (see UAV Assembly section for details). Place the parachute (see
Parashute section for details).
Check that the parashute compartment cover can opens. To do that just rotate servo horn.
The parashute rigging lines must be free.
5. Close and lock parashute compartment cover by servo horn.
6. Open UAV top cover. Check cameras’ connection to UAV.Turn and set up cameras
(see Camera Settings section for details). Place cameras in cradles and lock them
by velcros.
7. Press battery control button once. When the LED status bar turn yellow, install
it to the vehicle. If necessary, activate temperature holding mode beforehand.
8. Check autopilot indication on the board near the battery connector.
9. Close UAV top cover.
10. Turn the laptop on and connect radio modem.
88