Choosing Tool Settings 33
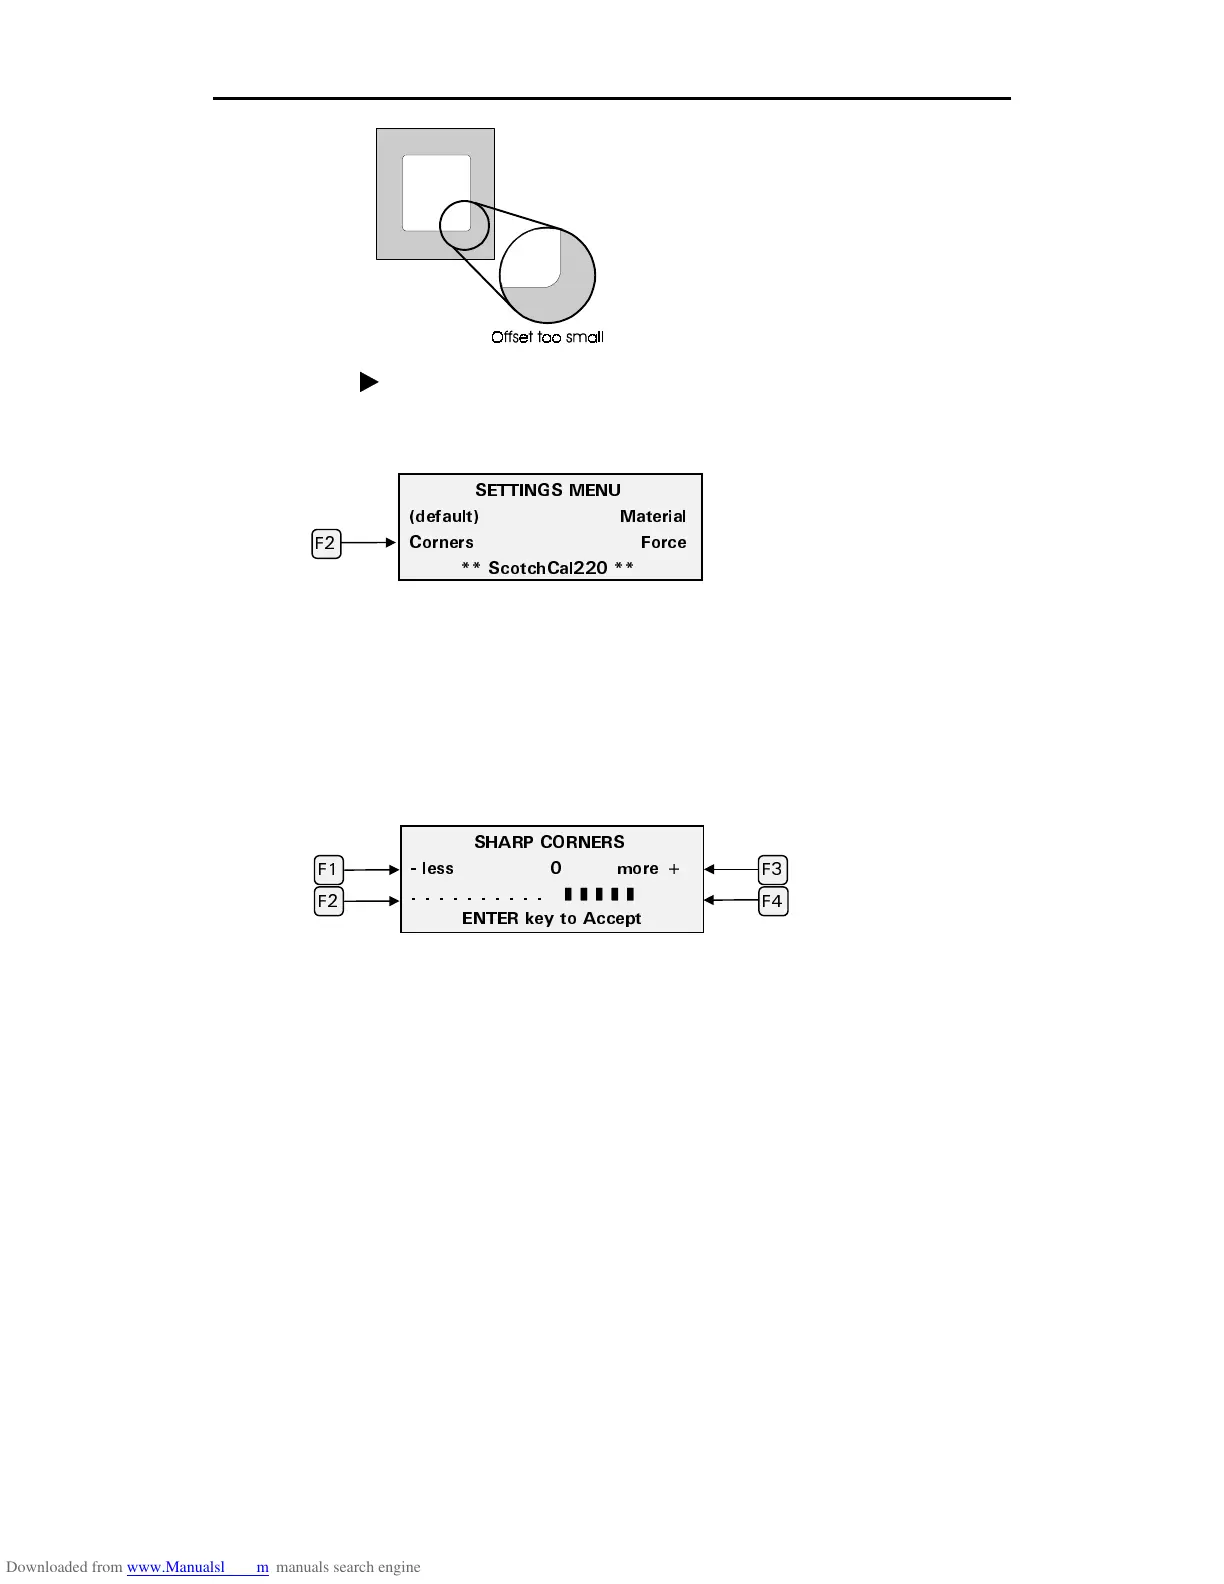
The corners adjustment in the example at the
left is too small. In this case, what should be
a square corner is not well formed because
the plotter did not cut far enough before
turning the corner.
To adjust the corners
1.
On the Settings menu, press F2, Corners.
Note: Pressing F1, (default) on the Settings menu resets all of the tool
settings for the selected material to the factory presets.
Note: This corners adjustment applies only to the currently selected
material.
2.
Press the F1 or F2 keys to decrease the corner sharpness, or press the F3 or
F4 keys to increase the corner sharpness. For each keypress, the bar graph
extends to the left or right one increment to indicate the amount of change.
3.
Press the ENTER key to accept the new setting and return to the Settings
menu.
Note: Keep in mind that adjustments made to corners in the Settings menu are
added to the new corners (knife offset) setting you have just made. If you don’t
want that to happen, you must go back to Corners in the Settings menu and
return the bar graph to its zero point.
5*#42 %140'45
NGUU OQTG
❚ ❚ ❚ ❚❚
'06'4 MG[ VQ #EEGRV
((
( (
5'66+0)5 /'07
FGHCWNV /CVGTKCN
%QTPGTU (QTEG
5EQVEJ%CN
(