Advanced enVision Functions 43
(
(
12'4#6+10#. 5'672
5GVVKPIU 5[UVGO
6GUV /KUE
'06'4 HQT /CKP /GPW
%744'06 5'66+0)5
5RGGF (QTEG
#EEGN %QTPGTU
'06'4 HQT /CKP /GPW
Worn blades require a higher tool force setting. You may wish to
increase the tool force after many cuts. However, before increasing tool
force, check to see if the blade is in good condition. Increasing the
force may also necessitate changes for the corners and speed settings to
maintain a good cut quality.
Tool forces used frequently can be stored internally in the plotter. Refer
to page 28 for saving and recalling tool settings.
Heavier material, such as reflective vinyl, requires increased tool force
settings.
Drawing, pouncing, cutting, and blade angle all affect the tool force
setting.
1.
Use the Settings menu to verify that the material whose settings you want to
modify is the one that is currently selected. (Refer to “Adjusting the force”
on page 30 for details.)
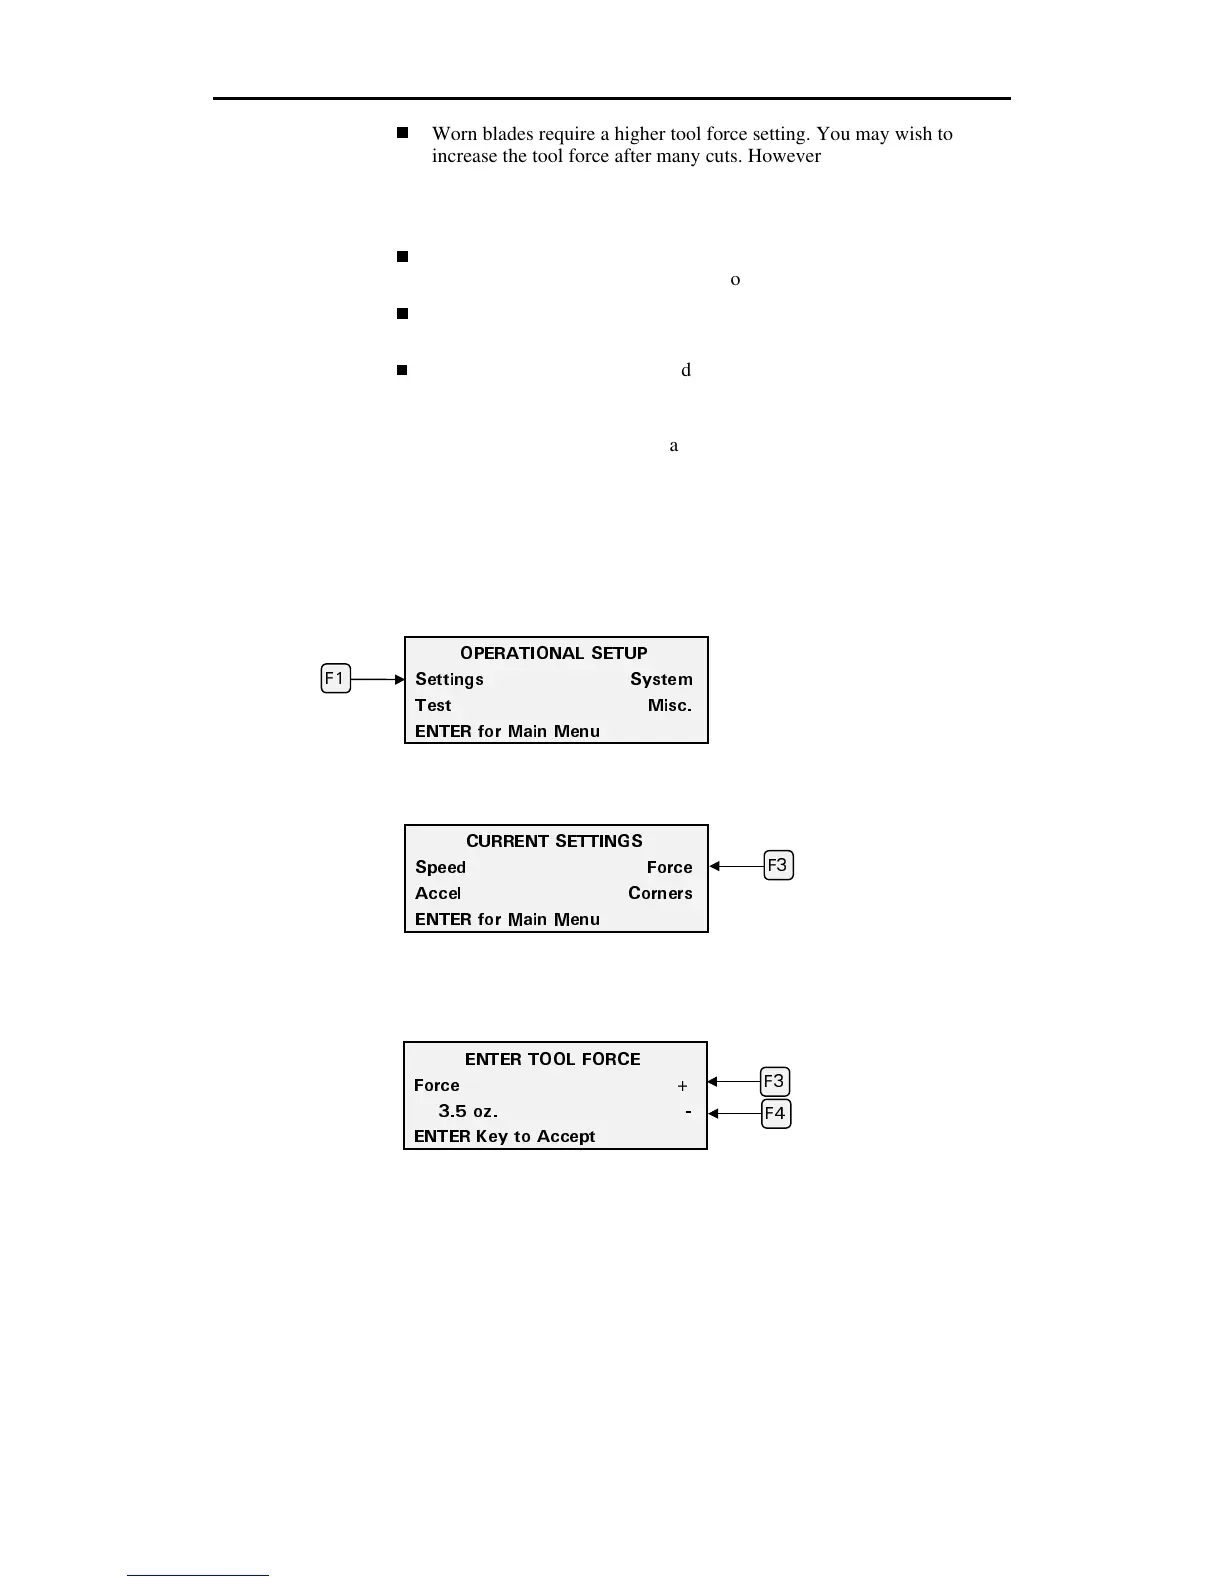
2.
Press F3 while holding down the ENTER key for the Operational Setup
menu.
3.
Press F1, SETTINGS.
4.
Press F3, FORCE.
5.
Press F3 to increase the force or F4 to decrease it. The maximum setting is
16 oz. (448 gm) in 0.5 oz. (14 gm) increments.
6.
Press ENTER to accept the value and return to the Current Settings menu.
(
'06'4 611. (14%'
(QTEG
Q\
'06'4 -G
VQ #EEG
V
(