EOS
|
HD OPERATION
35
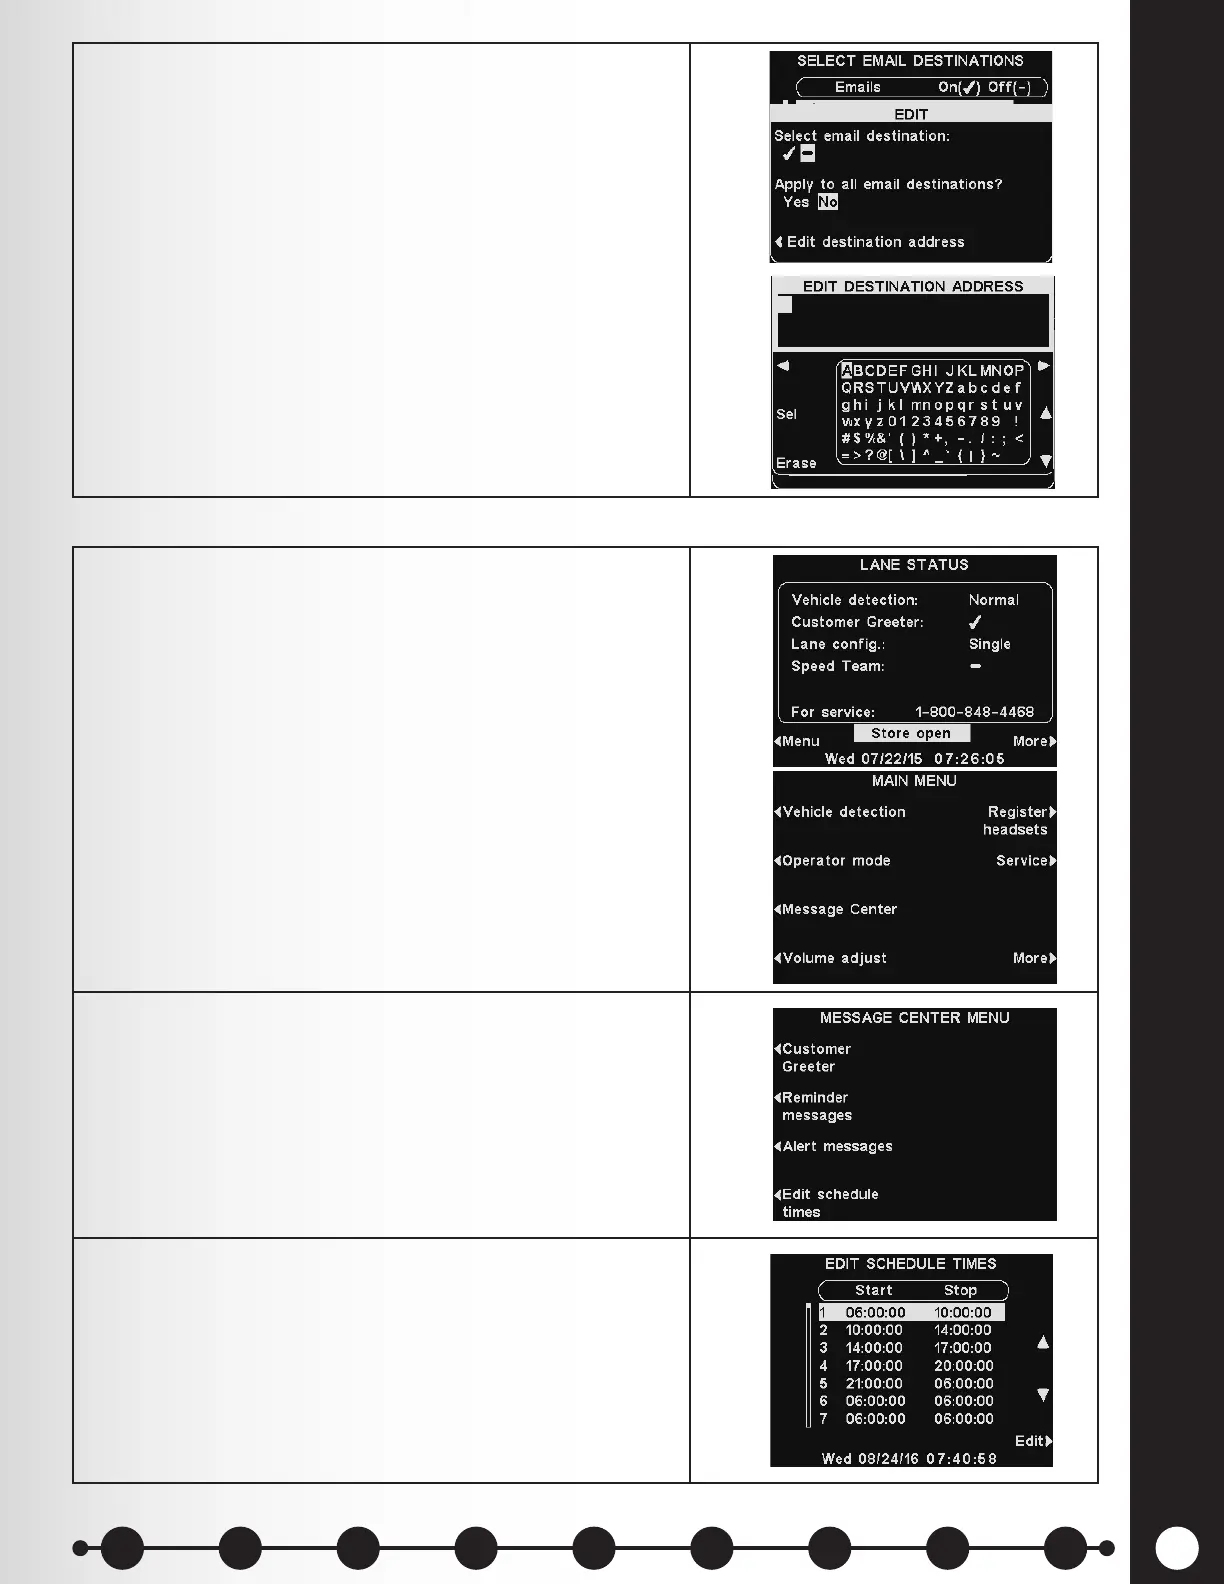
6. To edit the selected email address, press the Edit
destination address button.
On the EDIT DESTINATION ADDRESS display, use
the Erase button to clear characters in the current
email address to change them.
Use the ◄, ►, ▲ and ▼ buttons to move the highlight
to a character you would like to use in the address.
Use the Sel (select) button to enter the highlighted
character in the address.
When you are nished, press the Back button to save
the new email address.
1. To set up all the time periods during each day that
all Message Center messages can be scheduled, press
the Menu button on the base station LANE STATUS
display.
On the MAIN MENU press the Message Center
button.
2. Press the Edit schedule times button on the
MESSAGE CENTER MENU. There are 12 possible time
periods.
Note: Changing these time periods will affect all
Message Center message schedules. Time periods
for Scheduled Outbound Volume Settings will not be
affected.
3. To select a time period to be edited, use the ▲(up) and
▼(down) buttons to scroll through the 12 available
time periods.
When the desired time period is highlighted, press the
Edit button.
4. Message Schedule Times
1 2 3 4 5 6 7 8 9
Introduction
EOS|HD
Equipment
EOS|HD
Operation
Audio Processing
Functions
Equipment Care
and Cleaning
Troubleshooting
Equipment
Specications
EOS|HD Message
Center Guide
Important
Notices