126
10.4.3. Line leak tests (optional)
If you are using the Line Leak Test, refer Hardware Service Select ‘Perform an Entire Line
Leak Test.’ Every point that is currently scanned (Programmable relays) is included in the
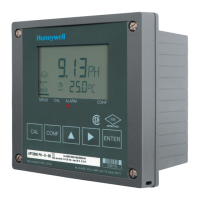
test. The Line Leak LED on the Sample Valve Control Panel (Figure 7) lights while the test
is running. The test starts with point 1 and progresses in sequence, skipping any points
not in the Order of Scan until the last point is tested.
You can observe the pressure as the valves switch from point to point. The line pressure
should start low and build up for each line as it is pressurized.
Points either pass or fail the test. To pass, a pressure must build up in the sample line
sufficient to exceed the set point of the sample pressure transducer. If one or more lines
fail the leak test, go to the ACM 150 monitor to identify the problem as follows:
• Leak at Fittings: Verify that the fittings on both ends of the sample tube are tight (i.e.,
cannot be loosened by hand). Start with the connection port on top of the ACM 150
monitor. Then, inspect the fitting that connects to the check valve at the tube's opposite
end (inlet). If both fittings are tight, the check valve may fail to hold pressure (go to
next step) or, less likely, the sample tubing leaks.
• Check Valve Leak: The line can only pass if its check valve shuts off when pressurized
during this test. Particles accumulating in a check valve may prevent it from sealing.
Resolve this by disassembling and cleaning the check valve. At the same time, inspect
the in-line filter and replace it if necessary. Check the tubing if you cannot correct the
leak.
• Tubing Leak: Verify this by removing the fitting from the check valve inlet and capping
it off. Then, run the leak test and observe. If the tube fails to hold pressure, look for a
cut or a hole. Replace damaged tubing and make changes to prevent a repeat of the
same problem.
• Setup Problem: check the setup (Line leak test setup procedure) and correct any
problems.

 Loading...